Year: 2021

Designing my stickers

Initial Ideas

Whenever I start a new project I like to look at ways that other people have gone about similar projects so i started off by looking on sites like pinterest to see how other people had designed stickers. However when I looked there wasn’t any stickers that were advertising anything similar to what i wanted so i had to experiment quite a bit by myself. I brainstormed a few ideas and the ones that I ended up going with follow,

Idea One
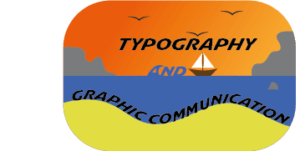
This was my initial idea for the sticker design. I’m not too sure what gave me the idea to make a sticker of a sunset at the beach for a typography and graphic design podcast but i dont think that it works as well as a sticker as either of the other designs do. I think there is too much going on in this design to be at such a small scale too. these are both things that i keep in mind for my future designs and I think that those ones the mistakes that I made in this designs are less apparent.

Idea Two
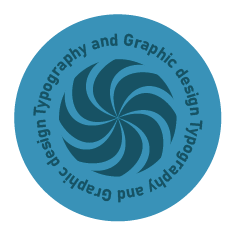
For this design I decided to go with a very generic image for the middle with circular text going around the outside. I think that this design looks a lot more like a sticker than the original design does and it is a lot better scaled for its use. I also used a lot less colours in this design, limiting myself to just two colours. I also decided to use a very boring sans serif font to make sure that it was legible because I knew that I was going to be putting it along a circular path.

Idea Three
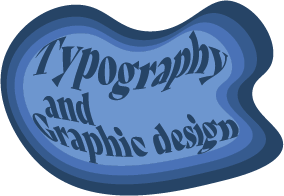
For this design I decided to use a more abstract shape for the outline that I think would work well as a sticker as it is all composed of smooth curves. I was initially going to put the text filling out the whole sticker but I then decided on having a few more layers around the outside that I used a gradient to colour. For this design I decided to use a few more colours than i did for the last design but they all look quite similar because they are all different brightness of the same colour.


Software tutorials

I am going to explain the process to making the wavy text effect i used for my last sticker design idea. To begin i make a curvy shape using the pen tool that vaguely resembles the words that i want to fit into it. In this case i had a smaller word between two much longer words so i was going to end up with white space anyway. Once you have created your shape you then need to write out your text. I find the effect to look better when you use text that is too big for the space that you are trying to fill, like in this image.
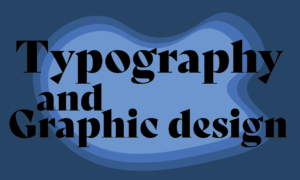
This means that when you use the effect the space will be filled in much better. You then need to make sure that the shape is above the text so that the effect works. Finally to make your text fit into the shape that you want it to you need to select all of your text layers and the shape that you are trying to put the text in and then select Object > Envelope Distort > Make With Top Object. Then your text should fit itself into whatever shape you had selected. You can then edit the shape using the Direct Selection tool if there are any changes that you want to make to the shape.

Designing a brand onboarding system with Bottomline Technologies

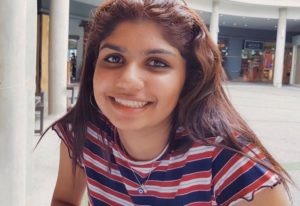
Amrita Shrilal has been involved in an exciting new collaboration with Bottomline Technologies this past year. Amrita is one of our MA Communication Design Graphic Design Pathway students graduating this week. She’s also a BA Graphic Communication (Hons) alumnus.

Bottomline focuses on transforming complex business payments and processes into simple, smart, and secure systems. They work with financial companies and institutions globally, and are widely recognised as a payment and collections enterprise. They have banking relations with global banks, UK banks and, building societies, growth banks and payment service providers.

A young woman smiling. She has long dark hair and is wearing a striped top.
Amrita Shrilal (MACD class of 2021)

Amrita has a particular passion for user interface design. To develop experience in user interface design for the financial sector, she undertook a design brief for Bottomline’s Head of UX Design (EMEA), Kellie White and, Senior UX Designer and Reading alum, Matthew Standage for her MA professional practice assignment. Dr Jeanne-Louise Moys, MACD Graphic Design and Information Design Pathway lead, supervised her project.

The brief gave Amrita the opportunity to explore approaches to designing a system that allows customers of different-sized businesses to customise the interface design, of a particular product, to match their brand needs. The challenging aspect of the brief was creating a seamless and easy process of designing elements of pages for customers with different levels of expertise on brand and webpage design. It required her to consider ways of presenting complex information and processes in a more straightforward method for end-users. Her design decisions were supported by her research into UX design, market competitors and the development of personas which helped her understand the user and business needs.

Amrita said: “I enjoyed this project as it was different from all the other UX projects I had done in the bachelor programme. It focused on Business-to-Business (B2B) rather than Business-to-Customers (B2C) which is more complex as you need to consider not just the user’s goals but different types of business capabilities and interests. I had to think about how a particular organisation could utilise or benefit from the features of the system to make their process of designing the web interface a seamless experience.”

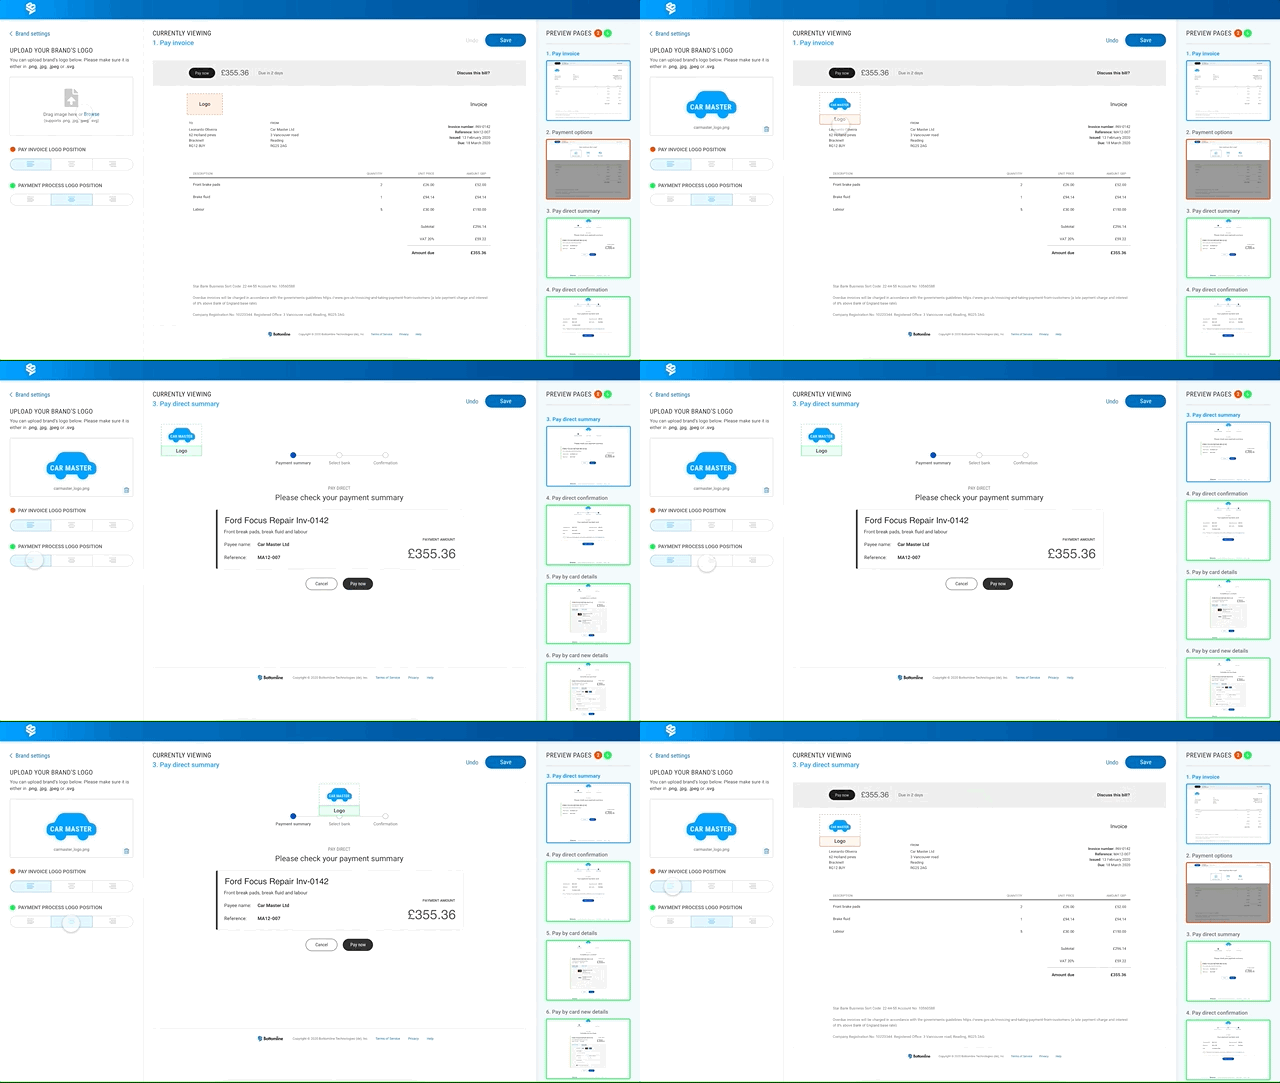
The outcome of this project was a prototype of an interface system that allows businesses to brand themselves within Bottomline’s products. It considers different user design needs and attempts to make the process of designing interfaces straightforward to those who are not familiar with design conventions or terminology. Some of the features within the system included editing the colour scheme, text styles and button styles.

Animation showing functionality within the project
Process of uploading the brand logo and ability to view the placement of these elements in different pages.

Reflecting on the project, Amrita said: “the project was a stimulating experience as I had to think about different user perceptions of design elements. I had to constantly ask myself whether it would be easily understood by someone without any design experience. Despite that, I enjoyed the opportunity to collaborate with Bottomline on an ongoing project and it helped develop my understanding of UX/UI design”.

Kellie White said: “Amrita did a fantastic job of taking a complex problem and making it simple, a difficult task to accomplish. She worked well to align to good UX process throughout, from research through to ideation and user testing. I was thrilled with the outcome, she achieved a well thought out design solution and growth in her UX skillset through the experience. Well done Amrita! We look forward to future collaboration with the Department.”

Matthew Standage added: “It was a pleasure to collaborate with Amrita and the Department on a professional practice brief. We were not only impressed with the overall quality of the outcome, but also the thorough research and design thinking that went into the process. One of the common challenges in B2B user-experience is striking the balance between complexity and flexibility. The work Amrita produced solves this problem well, using both visual and interaction design techniques to progressively disclose more advanced options to the user and provide guidance when necessary. We look forward to seeing how we can integrate her work and thinking into future product releases.”

This project is the first collaboration between Bottomline and the Department of Typography & Communication. We look forward to exploring new briefs with them for our postgraduate students to work on in the future.

We also look forward to welcoming Matthew back in January for the two-day “Branding and user experience” workshop that he leads for our MA Graphic Design and Information Design pathway students in the spring term.

TY1SK – Submission A Blog post

TY1SK – Submission A Blog post

This is my photoshop work where I completed the task as per the brief in making 3 Podcast Covers.

Design Ideas and Design Process

Idea 3

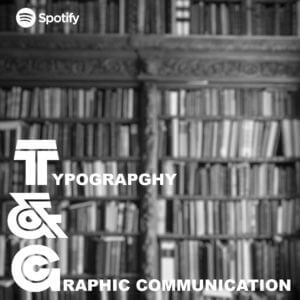
This was my first design where I wanted to highlight the use of books because of their importance to typography and graphic communication, and what better way to represent this is using an image of bookshelves. From viewing covers a black and white background with text over the top is an extremely common trend. However, this looked rather busy so I decided to blur the background to put more emphasis on the text but still can tell what the image is.
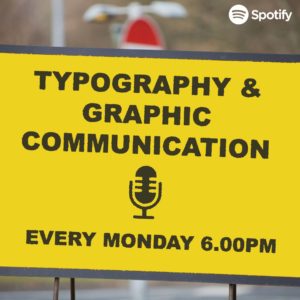


Idea 2

This is my second design where I wanted to link the topic of the podcast to something that people always look at and relate to. So just like the book idea above, I created this idea using road signs. However, with this design I feel like the sign I created does not look weathered enough.
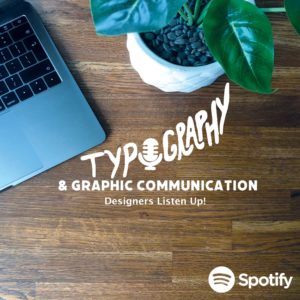


Idea 3 – Final Idea

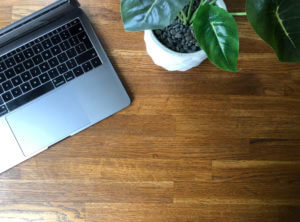
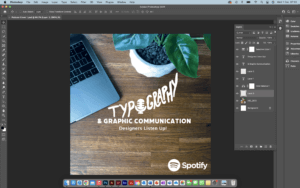
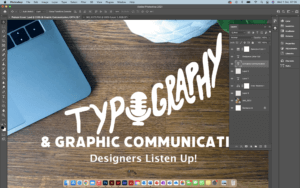
This is my last and final idea and by far my favourite one. Just like the covers above I wanted to make a cover that could relate to a lot of people but because this podcast is of a specific topic, I wanted to really filter down on Designers themselves. So, I decided to take a picture of my desk space because this is where a lot of designers will be sitting to complete their work, even including a MacBook as this is pretty much industry standard. I think by doing this makes listeners more comfortable because it is something they are used to seeing.


  1. Working in layers to create suitable Hierarchy
  2. Cropping & Dragging image across using lasso tool
  3. Choosing a font to match the same thickness illustration
  4. Cropping and colour correcting image


Software Tutorials

Because I have some experience in using photoshop, when completing the task, I used existing knowledge of the software and where my knowledge lacked, I would look into alternative means in filling those gaps. I did this mainly by looking at tutorials provided on Blackboard but also venturing through YouTube videos.

The one tutorial I heavily used in one of my podcast covers was because I wanted a desired effect of a weathered or distressed road sign. This was because the text and the boxes used to create the overall cover looked very unnatural to me, so I looked at means to make this more realistic. A lot of the road signs I have seen look weathered, rusty and warn down. This tutorial helped me develop my skills further as it is something used a lot in projects, and it also opened me up to seeing and playing around with filters to change images.

https://www.youtube.com/watch?v=3rGFkOvpPrE

I’d like to improve on cropping and using the likes of the lasso tool to make sections look sharper and crisper. This is because I kept finding additional tags when cropping out images which made the image look blurry and messy. It took multiple attempts for me to be happy with some of my cropping.


Design Resources and Articles

When it came to looking at additional resources around the podcast covers, I mainly looked at various different websites and podcast services/ apps to find what common conventions each cover had. As an avid podcast listener and knowing how to navigate these I found this extremely beneficial as I created a list on what covers had in common. This is the list I created and used throughout my covers:

  • Minimal/ simple
  • Use of white (either for background or text)
  • More illustration than photography or combination of the two
  • If photography is used it is very specific
  • Mainly use 3 colours
  • Square

These really helped me and inspired my designs for my covers.


Skill For Design Blog Post

Design Ideas and Process

When previously using Photoshop/Indesign/Illustrator I tended to stick to what I knew producing simple and sometimes boring outcomes. I found these tasks challenging as I knew I wanted to push myself to learn new tools in the software however it was sometimes hard to not give up when something was going wrong.

Postcard 1
Screenshot 2

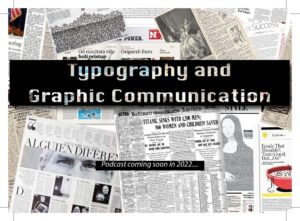
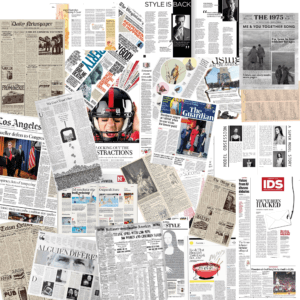
My first design I wanted to try using the clipping mask to create this see through text effect. I layered this onto of lots of images of newspapers as I thought this would show the themes of printing and typography talked about on the podcast (see screenshot 2). It took bit of playing around with to get the perfect balance between the background and the text so that it would still be eligible to read and meant I had to transform and crop the original photoshopped background to make this work.


Postcard 2

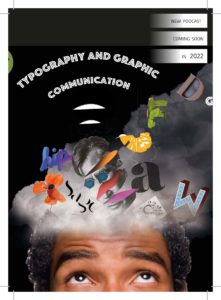
Before starting my second design I knew I wanted to try cutting out from different photos on photoshop.

Screenshot 1

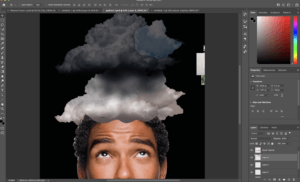
By composing this idea with different typography and graphic design elements coming out of a head (as if this is what he is thinking about) would allow me to practice this skill multiple times. I found the smoke in this podcast cover the most challenging. I originally
started by trying to draw the smoke with different colours and blurring this together however after watching some tutorials, I found the most realistic way was to use images of clouds placed into the file (shown in screenshot 1).


postcard 3

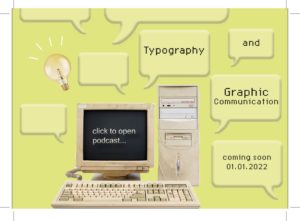
My final design started on the inspiration of using an old computer. Originally I wanted things to be coming out of the computer almost as new tabs opening before I chose to incorporate the speech bubbles. I believe this was my least affective design as they are only basic components and mainly used skills that I had developed on my last two covers


Software Tutorials

A helpful tutorial I watched on YouTube explained how to create smoke on photoshop. I found this particular video useful as it talked through three different ways to do this, all of which I tried before deciding which one worked best for me. I chose to import an image of a cloud and use the lasso tool to clip this. I didn’t think about this way before as I wouldn’t have thought to change the levels of the image to create white smoke on a black back compared to a cloud on a blue sky. The tutorial can be found here https://www.youtube.com/watch?v=FIBXXglbYtQ&t=361s

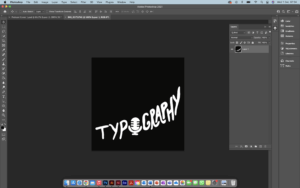
I knew before starting the sticker tasks that illustrator was the one software that I felt the least confident in so before I began I watched different videos on the basics of illustrator, this also helped me understand the terminology such as anchor points for when I watched more specific tutorials. When I first started drawing the microphone on the postcard cover 1, I was struggling with getting the curve of the line smooth so I watched this tutorial (https://www.youtube.com/watch?v=ViKQgIDblr8) which allowed me to realise I was using the wrong anchor points for what I wanted to achieve and I could easily fix this by using the covert tool.

Design Resources and Articles

Before all of my tasks, I would start by looking on Pinterest at other podcast covers or stickers etc to give me a general starting point. This is where I first saw the concept of objects flying out of someones head like in my second podcast cover.

The website https://dribbble.com/stories/2019/08/06/30-creative-examples-of-podcast-cover-art-and-branding was also interesting to me as I could see how the use of colour affected the design. Most of the covers on here were very colourful and eye-catching which inspired me to use more varied colours when design my own such as the use of purple and yellow in my third sticker.

For my first podcast cover, the idea included a lot of emphasis on the typography of the design. I used skills I had already developed from other modules on the course as to how to efficiently alter a type face to produce the best outcome. However designing this cover showed me that there were gaps in my knowledge such as the kerning of the writing which is why I found this article useful to read. https://99designs.co.uk/blog/tips/11-kerning-tips/


TWA Travel Poster

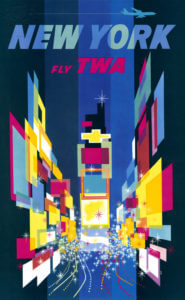
New York, Fly TWA Poster

I found that going through some of the collections and having discussions on the work exhibited was a real eye-opener on how work was produced and how we have moved on in terms of design, materials and processes. However, there was an item of work that stood out to me especially once finding out the date in which it was produced.

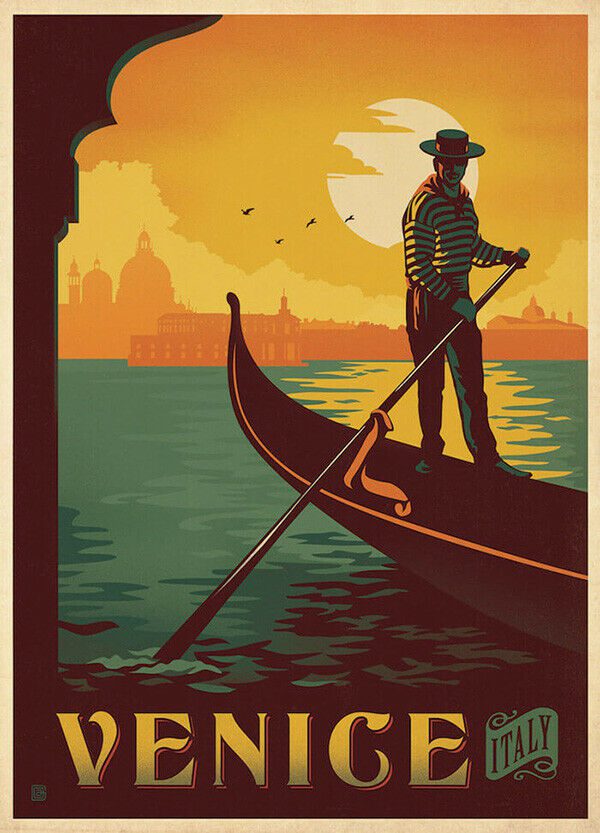
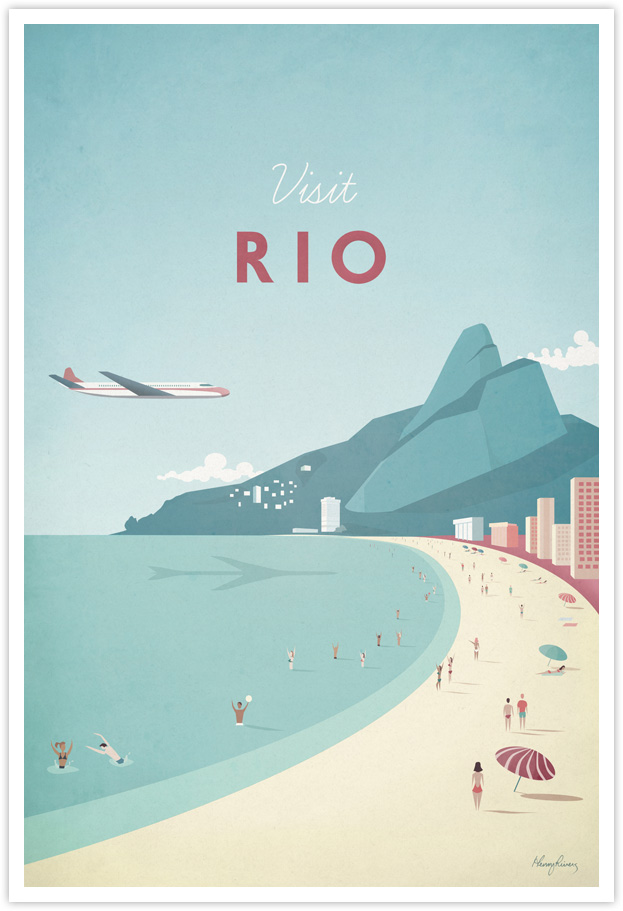
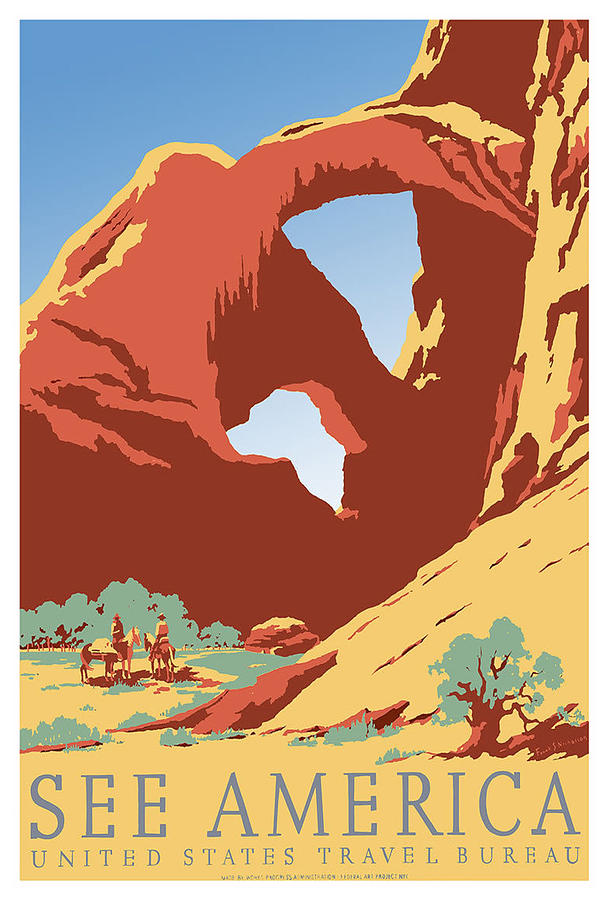
I was drawn to David Clines ‘New York’ travel poster which he produced in 1956. The concept behind this advertisement was so intriguing to me due to it being so ahead of his time. I did further research into travel posters and advertisements around this era and when comparing Cline’s work to other poster, his work was extremely contrasting. This is because other posters consisted of 3 or 4 colours, place names and a directly linked image to the country or city. Where Cline’s work differs is through the use of layers, colours and shapes to depict a country or city, in this case being New York.

Here are some examples of posters produced during the 1950s:

Venice Vintage Travel Poster | Yorks FramingRio Vintage Travel Poster | TRAVEL POSTER Co.Vintage Travel Posters: Advertising a Dream – The Vintage Woman

I would describe this specific piece of Cline’s work as a “controlled mess”.  Intentional because Times Square in New York is an extremely hectic place, Cline has used multiple different colours in layered shapes to represent the vibrant advertisement boards and shop windows as well as dotted lines to depict bust traffic on top of this.

Typeforms

I found this practical task very insightful as I gained a greater understanding in the different aspects and features revolving around typefaces. What I found most useful was understanding why features where designed in a certain way to make it less challenging for audiences to read.

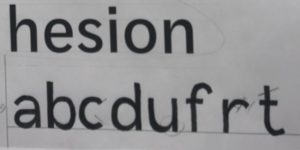
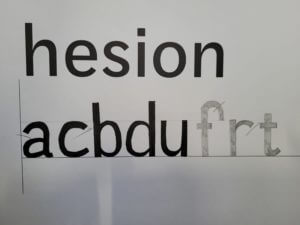
The session was split into two activities, firstly we had half of a font in which we had to draw what we thought the other half would look like and the last activity was drawing missing letters using the features from examples above. I had to really take into consideration curves, Line thicknesses and the lengths for both ascenders and descenders.


Retro logo

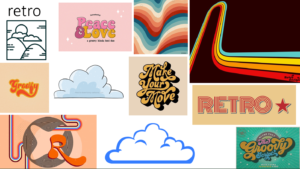
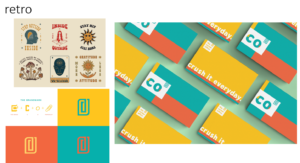
I had a lot of fun with this project.  you can see from my mood board my inspiration, but my focus was a retro theme. by looking at many retro designs I saw a great emphasis on line work, bubble, and pop fonts, and either pastel or primary colors. these are the things I chose to incorporate into my design. this project was very fun and I learnt a lot on illustrator.

New York Hotels

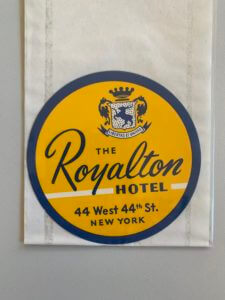
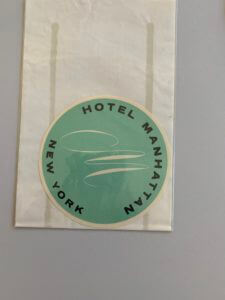
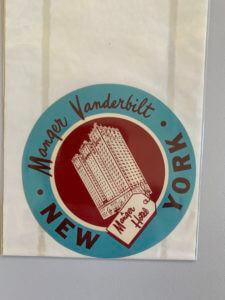
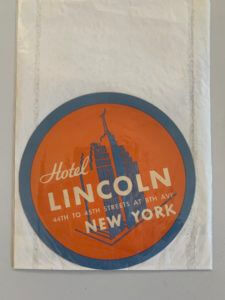
When looking at the collections highlighted along by Emma was clear to see that there were some interesting and intriguing items, the ones standing out to me being the New York Hotel logos. Vast arrays of colour, combined with their simplistic image is a common part of all of their designs which builds a logo that is crisp, clear and interesting whilst being simple and informative, a balance within these designs that I found particularly intriguing.

Whilst all the designs shown convey the standard circular shape, an image and the name, they are still all unique in their own ways when looking at the typography, layout and colours.

The Royalton Hotel uses a san serif font for all its typography other than the name of the hotel itself, emphasising the hotels importance of highlighting the hotels name and making it stand out so customers or passers by become familiar with the name. Hotel Manhattan on the other hand is much more simplistic, a stylish ‘M’ as the image along with a san serif font on a coloured background, the anomaly in the 4 examples as there is no inner circle, no secondary colour and no secondary typography.

The other two designs are a little more adventurous with two colours working harmoniously together, a building silhouette as the image and the combination of a san serif font and a secondary more brush script like font. These designs are all successful in their own right but when looking at a hotel sign the second example despite being quite minimal is not necessarily my preferred design but I find the others too crowded with information, the second design has the image in the centre surrounded by text which is much easier to read compared with the other examples.

Typeface drawing

Following the Thursday interactive session from Gerry Leonidas, I have come to recognise and acknowledge the details in typography as well as overall design.

The session had us draw letters of a particular typeface that was only in small parts that were pre-drawn; and from that reference we had to draw the rest of what remained of the text. I believed this exercise was to test our knowledge of not just typefaces, but to see if we could guess the following style through little information.

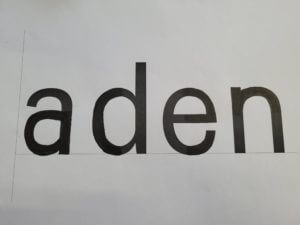
The picture on the right of the page illustrates an example of my drawn work that shows how I continued with the pre-drawn typeface. Compared to the original, it was fairly accurate, however the “a” and “e” required more curvature, after being given 4 words, the task moved onto doing more without a starting reference on what we had to draw. Very similar to the first example I had drawn, they were mostly accurate other than the curvature of the lines on certain letters. In future projects, I will need to improve my skills of refining and recognising fine details, especially when it is related to text or fonts. These drawing skills will help reintroduce me into sketching for future assignments as well as improving my confidence in refinement.

To conclude, the session helped me understand the foundations of what future analysis of designs/typefaces will require. Additionally, as I have not drawn for a while, it was always helpful to regain my confidence into drawing more again.