Author: RianBatra

Exploring vector objects with Yaa Gyasi

Design process

The first step of this whole task was to find an appropriate background or pattern that I thought would look appealing to add the rest of the designs in. This would be with this pattern that I found on google, the colours match Yaa Gyasi’s pallet for her book.

The second step of this task was then getting an impactful image to make the design more relative to the brief. This is why I use a Silhouette of Yaa Gyasi herself. I then used the pen tool to outline her head and neck shape.

The third step for this design was then to remove the background of the image that I selected, which was a white background. I did this to ensure that when I did move on to changing the colour of the outline and the colour of the image itself, it wouldn’t be as appealing.


The fourth step of this task was then to include some colour to this silhouette, in my case I wanted to include the same colour palette as the book cover. This is why I have included the exact same blue and the same reds as the cover. I did this by using the eyedropper tool, which was very useful they are very different reds and navy blues. After this, I then used the silhouette as a basis for the main component as the design for this vector task. I also flipped the colours on two of them as you can below, with the red filled and outlined silhouettes above the blue silhouettes.


The next and final step was actually adding in the title of the vector design for Facebook.  Which was spefically the title of the book by Yaa Gyasi which was also included in the design. I also included a black outline for the title and for her name which I made white to pop.


Software tutorials and Sources of inspiration

Software tutorials

This was the section of this week’s tasks that I did enjoy a lot, due to the fact that there was such a range of material that was out there to find and learn. I do know that there were a couple of software tutroials that I did like which were useful enough to get me started with what I wanted to achieve when I was in the process of thinking of ideas and simple design plans for this vector advert. The first tutorial that I wanted to mention is ( https://www.youtube.com/watch?v=hNjxcvvP1Mo ).

This YouTube video did help me with learning how to use the pen tool with letters,  it showed the letter A and the letter S. I then learned how to do it right and curved lines to trace around images or letters in this case.  The tutorials that were given to us in the brief were quite useful as well in terms of getting an idea of what types of work I could create using these tools in Illustrator. This link did give me some idea of the basics as well of using this tool.
( https://helpx.adobe.com/uk/illustrator/how-to/drawing-tools-basics.html ).

The next source for tutorials for me when I was in the process of thinking about where to look for steps in creating certain designs. I went on YouTube again, due to the reliability of the videos. They didn’t give any false information and made everything very clear. If something wasn’t apparent when I was doing something they did explain it. which is what made the experience of trying out these new tools and processes even more enjoyable and peaceful. The video that I used that was amazing for me was
( https://www.youtube.com/watch?v=jxcCLan0Yko ).

Sources of inspiration

The main task for this practice was to produce an illustration for a social media banner for a podcast by Yaa Gyasi. The book is called ‘Homegoing’, I did really see this book cover and other art similar to it as very true to itself and more so in tune with the heritage of African people. There were very different shapes, angles and colours behind every layer which did help me with deciding what type of background pattern I was going to end up using, In the end, I did end up using something very similar in terms of colour pattern to the book cover.

I do think that the best source of inspiration was from looking at videos and also looking on Pinterest as well. I used Pinterest to ensure that I could get the most out of people who have already made certain Yaa Gyasi designs already.  With Pinterest I did find a few pictures and posts that people decided to put up, that did seem to look like what I had in mind with designing my own advert design. This helped me with knowing what to design quite inspirational. ( https://www.pinterest.co.uk/search/pins/?q=homegoing%20yaa%20gyasi%20designs&rs=typed&term_meta[]=homegoing%7Ctyped&term_meta[]=yaa%7Ctyped&term_meta[]=gyasi%7Ctyped&term_meta[]=designs%7Ctyped )

The next piece of inspiration that I did find very helpful was a video that I came across when I was looking through YouTube. This video looked at what African heritage looks like and gave a few designs within illustrator. This video showed me what type of colours , patterns , styles and whuch colours compliment one another. Instead of me looking for a set of designs that looked like the ‘Homegoing’ book I wanted to expand my knowledge on certain patterns and also specific meanings. In my case I was looking for a set of familiar designs that I could have gone off of, at the end of my decision-making process of what background, for example, I was going to use. Was quite simple as I learned that watching these videos and looking at posts on Pinterest that these designs are all patterns and the patterns follow a set way of starting and ending.(  https://www.youtube.com/watch?v=GIUHtb14ZhY )

This is why I did go ahead and pick this image. This image or pattern was then duplicated in y final design because, in essence, it could. It was perfect for what I needed to create, in terms of making a simplistic and vibrant pattern. This image was the focal point of the foundation for building up my design from the ground up, starting off with a simple silhouette.

This image was the focal point of the foundation for building up my design from the ground up, starting off with a simple silhouette.

Exploring different tools in Photoshop

Design ideas and processes

When been having told that we would choose which task we could choose to talk about, my first instinct was to choose the photoshop task.

Fig 1 Blue background

For my first design idea, fig1, I started off by creating the background for this. I did this by selecting the background layer, then choosing a colour to change the colour. Once I chose this light blue colour and used the gradient tool. The gradient tool allowed me to get a very slight change of light, where it looks like a different perspective.


Once I did that I then decided to include some text, this was the next step in creating my design, as I didn’t want to get too confused when adding in my images for this design. There are two colours that I have also used for each word, and I did this to ensure that it didn’t have a stale and dull look to it. The first word was typographic and I wanted to make sure that this was all caps, to make sure it’s as clear as possible to read.


The next thing that I did, was that I decided to try to then use another colour for the second word for this title of the podcast cover. The second colour that I used for this was white. For this step, I also made sure that this white text which said ‘PODCAST’ was behind the typographic font, also a lot larger than the other word. This achieved a very simple but effective look to the whole design.


Fig 3 -Second word, white fon
Fig 4 -Completed Design 1

The next step and thing that I did to this design, was that I included four images, and three of these images were the same, however, I wanted to ensure that the three images in Fig 4, were all the same size however I did change the orientation of these three images. The fourth image that was included was an image of a microphone and a headset.


Fig 5 – Completed Design 2

Within my second design idea (Fig 5) I was hoping to try new things within photoshop. One of them was trying to attempt and implement shapes and different shades of a certain colour to this particular design. I wanted to ensure that the gradient of the design, was a match for the colours of the title of the cover, and for the shapes that I included within this design as well.


Fig 6- Completed Design 3

For my final design, Fig 6, I started off with this idea of various colours open, and also from google, I did have quite a few options of colour designs I was looking at. Eventually, I decided to go for another very intriguing colour or colours. I went with green,  yellow and white.


Software Tutorials

I have been using YouTube to get inspiration and to also gather the basic foundation of how to actually use Adobe Photoshop, because of the fact that I am still learning and would class myself as a beginner at using this software.
Since the videos and tutorials on YouTube were made to be very specific and also sometimes very general and vague. This meant that for me whilst trying to gather information and knowledge on how to do all of these tasks on Photoshop, was quite a user-friendly experience. This was also great for me, for keeping a track of what I know and also don’t know, as I watched a playlist of videos to help me understand how to use this software. Whilst doing this I think that I would have been less likely to look at the videos again and again, and not forgot anything.

Another thing I used was actually going on Photoshop and then comparing my work to other professional work. For example, there are a lot of designers that have uploaded their work online for all of us to see. This gave me a good idea of how a podcast cover was supposed to look like. For example, the Joe Rogan podcast was one of the images I was looking at from the internet. These tools actually did help me develop my skills due to the fact that they allowed me to look at which areas I needed to go back on and learn how to complete them. For example, when I was struggling with certain functions of each tool on Photoshop, I went back to the YouTube videos I had open and referred to it to ensure it was the right way to do it. The main skill I want to develop further is drawing in Photoshop.


Resources for research and inspiration

I have been again using a lot of sources from YouTube, which are both very detailed for tutorials and obviously an inspiration. People that upload videos on YouTube have a lot of passion for Graphic Design, and they want to upload their work and how they created their work. This is why I think that this is one of the best sources of information, and definitely an inspiration to use due to the fact that it has millions of pieces of work people have made. The videos that I watched did actually help me develop my ideas because of the fact that when I was struggling with finding ways to add character to a plain design, they said to make sure you do have a structure and some symmetry within your design.

The video I used for the most inspiration was https://www.youtube.com/watch?v=4i2F7zLjS7c&list=PL6LaxAQbT3qkjNy3VbM0yd6KnLKxpg1X1&index=9

This video had quite a few tips and tricks of thinking outside of the box and using your mind in a lot of ways to look at designs and the software as one. Due to this, I created all three of my designs with this mindset. From this inspiration, I have definitely learnt a lot. The topics that I would like to explore further would be to ensure that I am very strong and confident with using images as text, and text as images. In a way to look at them both at different perspectives, because there are definitely ways of doing this. With all of these videos and people online helping me have different perspectives will always improve my work in ways, even I will not realise.


London – Olympic Underground

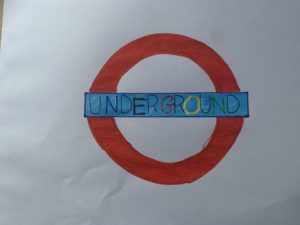
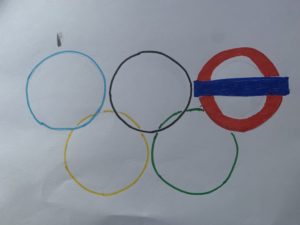
The task that I was set was ‘ London’, I actually decided to show this word and this location by showing the simplistic universal logo of the Olympics along with the culmination of the underground logo. Within the first few images or designs that I made were inspired and created with the logo of the Underground with the colours of the Olympic rings implemented into the lettering with this. The final image that I made was a mixture of the Olympic rings and the underground lines coming out of the rings themselves. I feel as these two images and logos are very recognisable, and quite relatable to London as the city of London hosted the Olympics in 2012. Previously the city hosted the games in 1908, 1948, and now 8years ago 2012.

The end of Club Penguin R.I.P

Club Penguin is an online game that was loved and played by millions across the world, however, it sadly got shut down on March 29th, 2017. The tragedy left millions heartbroken as this game was what they loved playing. Many people sort out to create or find a new version of this beloved game. However, sadly the true club penguin could never be topped and replaced.

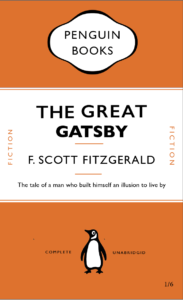
The actual main cover of my book design is purple with white text. This design has an image of a penguin from the game Club penguin on the bottom. The font that I used was quite different from the original book cover of the Great Gatsby, however, i thought that it would add some personality to the design, along with a bit of playfulness to it.
I also attempted to include even more images than the Great Gatsby did as well, to ensure the reader would be more engaged with the design. I did however stick to the main theme and layout of the penguin layout , however in the end included images and text that related to ‘Club Penguin’

The staircase to success

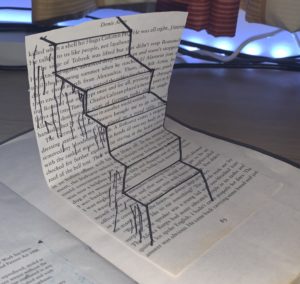
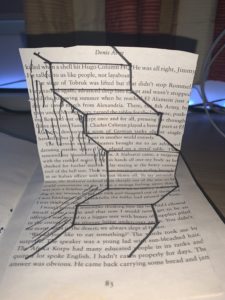
The main concept of this was that the front page and cover would have a clear and meaningful design, showing the route or the stairway to success. Which is what the brief or Staircase story states. That a man arrived at a sanatorium, as he has an unnamed disease. The stairs always have layers and levels, to which you go up or down them. The reader would travel to the next page where they would find a stairway, however from a different perspective. Which the story describes the man moving away further away from the real world and closer to death.


Lettering and development of monograms

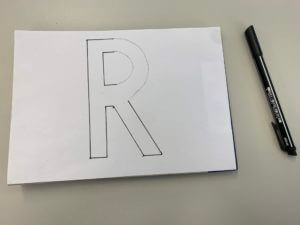
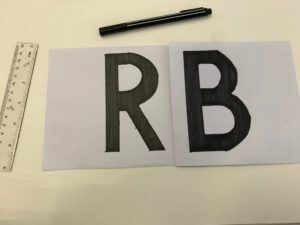
The brief for this project required us to make and develop a representation of our initials, whilst using either the fonts Futura or Garamond. However, we did have the option to use both of these fonts simultaneously. For the start of this mini-project, I decided to draw a spread of sketches and brainstormed ideas to develop further. The whole purpose of this project was to create a monogram for the initials of our names. I personally chose the Futura font, as it is quite geometric compared to Garamond. This means that it would have been even more precise when I create the monograms with it.
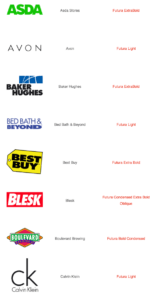
 

The main attraction with Futura for me, and why I chose it as a font is that it is one of the most geometric and linear. This means that it doesn’t have as many serifs as other fonts and as Garamond, therefore making it easier to create the monogram and was a lot more practical to produce my final design which was what the brief asked of us. I also took a lot of inspiration from certain brands that utilise and implement Futura into their Company names and logos. A few including; Gillette, Calvin Klein, Asda, etc. From looking at these fonts used by these companies, I gathered that they use very different weights and use either: ‘Medium’, ‘Bold’, and ‘Heavy’ for example. By doing this they ensure their logos and names are not stale and have variations and slight changes in the personality of the font.

Development of initial ideas
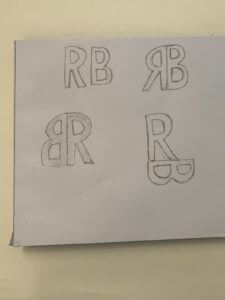
 

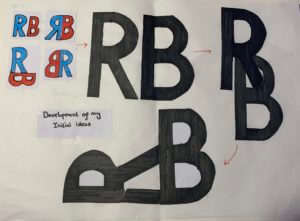
For the final design for this project, I tried to look at the future with a new perspective. By this I mean I used each of the individual letters to combine them both, for the initial designs I decided to look at the initials in an abstract way by putting the ‘R’ into the ‘B’. This then created a lot of options for me to flip and use different structures of the initials. I finally went for two colours, black and red which I did actually use for the first four initial ideas as well.
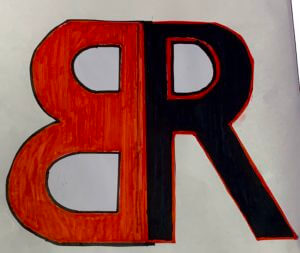
FINAL DESIGN
The environment is everything that isn’t me.

Introduction

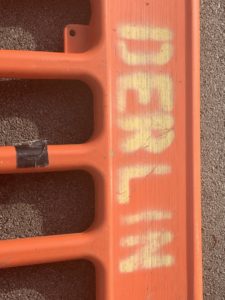
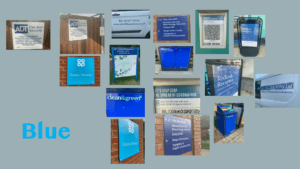
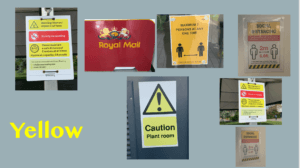
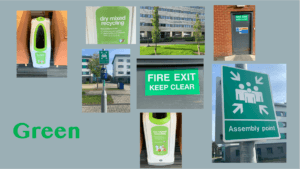
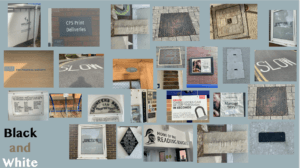
The lettering in the environment project that I completed really gave me a clear understanding of how much detail there is to where we live and breathe every day. The brief was quite simple, as it said to explore and go around the campus to photograph as many sources of the environment as possible. There was quite a distinctive pattern to what I was taking pictures of, due to the fact I took quite a few pictures of letting on buildings, walls, and floors. Reading’s campus has a strong sense of vibrancy and colors to it. However, the pictures that I took, were quite the opposite of that.

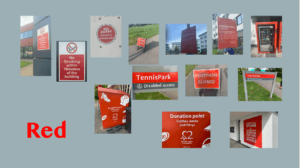
Once I had all my photos, the next step was to categorize them. I displayed my photos into  different categories, that were quite simple but effective at distinguishing each photo to what type of photo is was and where it was taken.   The platform or software I used to display these categories and pictures that I took was on PowerPoint The categories that I mentioned are shown below, they include Colour and Materials.

Colour

The next part of the task wasn’t really difficult, as we just had to organise each picture into different categories. Once I did this, I then noticed after presenting these pictures on Powerpoint that whilst categorising them into colours and materials. The pictures weren’t very relevant to one another and didn’t really do the pictures justice. Which is why I do believe that in the future if I did this task again, I would just update and edit the pictures to black and white. this will hopefully let me maintain my attention and time on the letters of the pictures rather than the actual colours themselves.

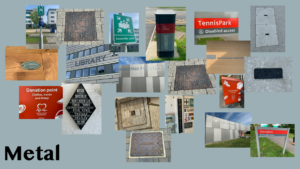
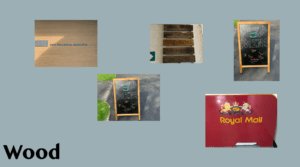
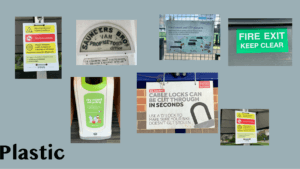
The next category of the PowerPoint and pictures I took are below:

Materials