Author: CharleyFenton-Moore

Creative Images in Photoshop

Our task was to use photoshop to make some creative images that would develop our skills with the software.

Design Ideas

When looking at existing creative images they often reminded me of dramatic scenes from books or movies, I thought I would draw on this for my inspiration. For this piece I wanted to create something that would remind me of my book collection, I looked at other creative images with a story and found those with a fantasy atmosphere were the most interesting. The idea of castles, magic and battles was a highly enticing one.

I wanted to create an image of a woman running through a castle and then having some kind of suggestion of magic in the image. I had to find some photos that fitted with this idea. I found some images in and around castles and settled on a shot of a dramatic staircase with some detailed architecture, it has some intense warm lighting that I could emphasise even further by altering the colours of the piece. My next task was to find a subject, I wanted a powerful image that had some form of symbolic suggestion to it. I also wanted the colours to match nicely with the image, I had tried previously and found that when a subject has massively contrasting clothing to the room they in no matter how many alterations you make it still won’t look right. Even if the image was authentic it still would lack a certain pleasing visual nature I therefore went for someone with a red dress and a lantern whose light I could change to be more warming and fit with the rest of the scene. I wasn’t trying to simply cut out a person and put them in another setting I wanted to create an entire piece and for this there had to be a story.

For the narrative of this image I wanted to go with magic and power of some kind, my initial idea was to have a large sword and to make it appear as though flames or magic was erupting from it, however when I found my image the sword wasn’t the centre piece of the subject so instead I grew this power from the lantern she is holding.


Tutorials and how I used them
In order to create the image that I wanted I had to find some tutorials that would help me produce flames or magic artificially in my work. When doing this research I found a designer named Max Asabin, he is a Russian artist that is known for his own unique way of creating flames of magic in his work. He does this by using a gradient map and then drawing over this gradient map by hand to create the texture of whatever you want, in this case for my image I was able to create the texture of flames and because they were drawn by hand they had an organic nature to them. I had some issues with these tutorials because a lot of his work is fully in Russian and a lot of his videos don’t have translations, I did however find some other Russian artist that also speak English that have conveniently translated his personal tutorials or created their own using methods similar to his or what they learnt from him.

My first step in creating this image was to find my subject and cut her out from her original scene and then place her into the stairwell, this was quite simple as I’ve practised this before on other images I did however then have to alter the lighting in her image so that it appeared that she was actually stood on that staircase rather than somewhere else. I learnt this in another tutorial that showed me how to change the lighting and the colours in order to make something look like it could belong anywhere that it was put. I did this by overlaying black and white layers and increasing the saturation to bring out the true colours.

After I had made it look as though she was in the scene I drew some shadows around her to increase this realistic affect and then it was time to create the flames. I created a gradient map and then a layer mask; the gradient map that I used had all of the colours of flames. I’d use it in other images where I’d used un-natural colours that made it appear more as magic rather than fire. Using the layer mask I drew on top of this gradient map so that only the colours of the gradient matter available could determine what colour the flame would be in linking to the amount of pressure that I used with my pen. This helped to create a nice natural look for the fire and I could have it spread from the sword in the lantern anyway that I desired. The finishing touches for this piece were alterations to the saturation and lighting of the peace as a whole to give it a kind of warm and orange glow and add some clothes and dust effects to create some more depth and texture to make it look as though you are in that scene rather than viewing a picture of it.

Here are the links to the tutorials that I used in order to create this image.

Inspirational resources

My inspiration for this piece came from the things around me in the form of fantasy books films and posters, it’s quite a common thing for fans of books or films to create their own artwork around it and it’s quite common for me to see Photoshop manipulations that involve magic or some kind of mystical world. I’ve looked at a few images that included this and I really liked how they looked and I wanted to be able to replicate it myself.


This first image accurately displays what I was talking about, this fan made magical image using photoshop to make it look as though someone is appearing in a fictional world. I really love this and as someone who is a fan of fiction I felt that this topic was close to my heart. This particular image is brilliant and really stands out because there is such a detail to the drawing of the Petronas, it’s difficult for you to see that that would be something made by a fan rather than a professional I wanted to replicate this kind of magical lightning atmosphere within my work and the piece that I created.


This next images are quite clear separation between what is real and what isn’t. The man creating the magic symbols is an ordinary one and dressed in everyday clothes. However the effects around him help to enhance the narrative of the scene here, I really like the high intensity of the colours the oranges and yellows help draw your eye strongly to the piece and really help to add that sense of fantasy and magic.


For this third image I really liked how clearly all of the objects are put into this scene there obviously all taken from different angles on different objects maybe with green screens behind them but I really like how realistic the falling looks. I want to be able to adopt skills like this in my work and to be able to take someone from a fantasy setting into a real building or room whilst maintaining that sense of realism so it looks as though someone is actually performing those acts of magic.

Creating Dymanic Images in Photoshop

The task we were given was to create a podcast cover in photoshop so here is how I created mine.


Design Process


Designing a podcast cover, the first thing to do when designing a product is to examine existing products of a similar nature and look at what works and what doesn’t. I had a look at other podcast covers and found that those with emphasis on imagery were the most effective, this is because the covers themselves are seen at a very small size when displayed for mobile and text isn’t generally visible unless at a large scale. A common thing is the use of a simple image containing the person holding the podcast, this however only works when the person is famous or at least well known in their particular field of work. I really like this technique and wanted to employ it in my own work. Seen as this was a task for a fictional podcast I used some portraits taken by British Vogue to represent the people hosting the podcast.

For the first idea I used the magic erase toll to remove the background of my portrait. Then creating a path using the pen tool I was able to separate different parts of the subject and appear as though you could see inside her skull, my original idea was to have some roses growing out but when I did this I found that it didn’t relate enough to the brief and the idea of typography wasn’t clear enough. Therefore I went with something simple and uses the word type repeatedly in the shape. For the second design I used a similar concept as my first design but wanted to explore textures, I therefore used layers and overlays to get these effects. The third design took a more minimalistic approach, I used the pen tool here and then erase the background from the image of the pen, I really liked how clean this design looked however seen as this task was to explore photoshop skills I felt that my first design used the most interesting techniques.


Software Tutorials

The task stated that we had to create these covers using photoshop. I have used it before but not for a long time so I decided to look into some visual artists and seek inspiration from their work. One of my favourite poster designers is Magdiel Lopez, he has done collaborations in the past with adobe and I followed his tutorials in order to create the effects seen in my covers. I watched a series of videos of him creating some posters and looked at not only how he creates his effects but also why he uses them and how to create more appealing visual pieces. The cut seen on my portrait in design 1 is something he uses a lot to add depth to an image, it also helps to convey meaning. He also loves to use a gradient and using his tutorials I was able to add these to individual shapes in an effective manner.

I was going to include flowers in the cut of her face as mentioned earlier but I struggled to make it look realistic, in the future I feel that improving my understanding of shadows will help me to create this effect and produce seamless professional looking work. These tutorials helped to develop my skills with the pen tool and layering options also adding gradients and the use of colour palettes. The skills that I want to progress are my ability to tie to two images together to create unnatural effects without it looking pasted together, I can achieve this by adding shading to an image and getting more practice with light sources. Another thing I would like to improve is my backgrounds, at the moment they are relatively simply however I would like to create more complex images allowing my work to have a greater impact.

This was my attempt at having flowers grow from the cross section

This is the link to the tutorials I used-


Resources for Research

I myself don’t listen to podcasts so for this task I had to do some research into existing podcast covers and their design trends. As I mentioned earlier I found that a large proportion of them had portraits as the central focus generally containing the host of the podcast and I created my pieces to fit this trend. However in terms of the actual designs took inspiration from a lot of other sources.

I really liked covers which uses simple portraits or had a person as the focal point of the design. I think its very personal and has a human side to it, also its nice to put a face to a voice. Having an influential person hosting your podcast would generally be the main selling point and it should therefore be appropriately advertised.
I absolutely love these covers and think they have an incredible sense of impact. The bold colour choices really draws your eye and the use of gradients adds a certain level of professionalism to the work, it gives the piece another layer of depth. What really like here is the 3D effect these images have I think its more dynamic than a normal image and helps to keep attention, this is what inspired me to look at texture within my work by giving it more features you can create a more interesting piece. One issue with this is that you do run the risk of having an over complicated design and it looking like an eyesore, this is something I had to balance when creating my covers.
Magdiel Lopez is where I drew the inspiration for my first design, he creates incredibly dynamic work that uses bold colours to capture attention, he also has a love of gradients. I used the cut head technique and some gradients in my work in order to show his influence on my images. In the future I want to look at add images or objects in the cross section instead of just text.

Japan in a Coffee Cup

So for the ideal gifts project i was working with a story about a trip to japan, my partner described Japan as an entirely different world. This got me thinking. How could I actually create another world? The idea i settled on was have a bubble that represented another dimension which contained some symbolic elements of Japan.

I was then given the random word of coffee. I had seen a trend in kawaii Japanese artwork using drinks bottles as containers for their artwork and thought this would be a brilliant way to convey my idea. So here we have Japan as coffee.

Penguin Covers

Initially we recreated a cover of the Great Gatsby in classic penguin style, I then used this template to create covers for some other books. I did however chnage some aspects of the template to better fit with the book contents. The Norwegian Wood cover is a deep red in fitting with the orignal cover, Call Me By Your Name uses a royal blue for the same reason. In this cover however I changed the penguin logo to a peach, the peach is a symbolic part of the book with a lot of relevance; I also used a font similar to the one used on the latest edition covers of the novel. My favourite design is the Fahrenheit 451 design, this book is an incredible look at censorship and the importance of literature in our society, i therefore have used text from the first page of novel but censored some of the words. I have chosen to keep the original penguin orange because it had good connotational links to Fahrenheit 451.

Labyrinth

The brief was to design a book for a client writing a novel based on a labyrinth. I have therfore created a series of concept pages which could be filled with content from the book.

When I read the brief for the labyrinth book idea there were certain key words that stood out to me, I have chosen to focus on them within this design project. The first was “unexpected spatial characteristics,” to me this implies a change in the way the main body of text is presented, the unexpected may also suggest that this presentation is not consistent throughout the novel.

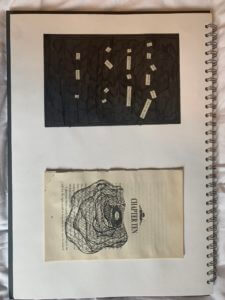
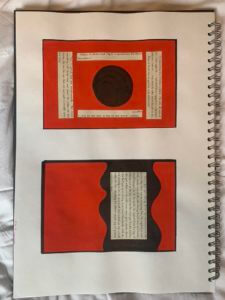
Next was the use of the word “shifting” from this I decided that the text would be at different levels and areas of the page.

The most interesting point was the “impossibly infinite” maze that the characters are stuck in. This gave me the idea to have each page or double page spread to have its own unique theme, not only does this work with the previous comments it links to the story and the lack of direction within the labyrinth.

A common thing in labyrinths is their lack of distinct features. This is used as a tactic, so you find it more difficult to gain your bearings, because of this I have chosen a simple color scheme with minimalist designs on the page rather than complex additions.

Politician

I was given the stimuli of Politician, from this my immediate thoughts went to the politcal unrest happening in America right now. Here I have created two contrasting images, the first shows Trump as he would like the world to view him; proud, patriotic and powerful. The second image however displays the truth, here you see the things people are having to fight for due to his lack of leadership. To create these images I used an app on my iPad and combined a proganda image with different protest signs I’ve seen over the past few months.