Category: Formatting effective layouts

Experimenting with Magazine Layouts with InDesign

Design ideas and design process

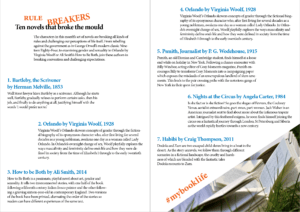
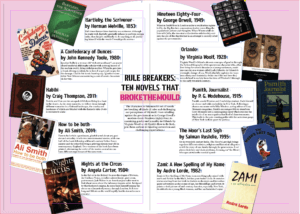
I was set the task of creating effective layouts in InDesign, to which I would create two magazine layouts and then choosing a final design that I was most satisfied with (Design 1) that I felt demonstrated the best and most effective layouts for a magazine.

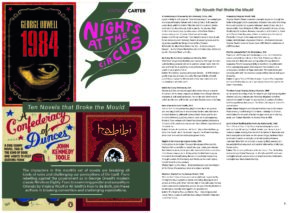
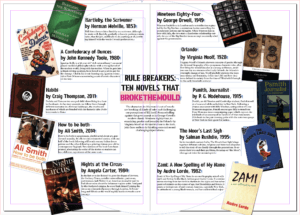
Creating this design, I had to use typefaces that I had no prior experience to using, Suisse Int’l Book and Bembo. When forming ideas and my inspiration, I used an album cover as my main inspiration for my second design, as I had a particular interest in it as I loved the colours and typefaces that it used. I also believed the idea of using aspects from an album cover design (Figure 1) was something that wasn’t in trend nor had been explored much in the design world. The topic of the magazine has no relation to the album cover, I used it simply for inspiration in my design.

Figure 1. The 1975’s ‘Notes on a Conditional Form’ album cover, released in 2020

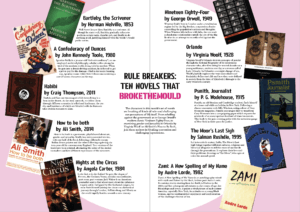
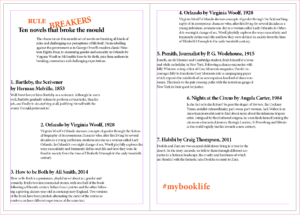
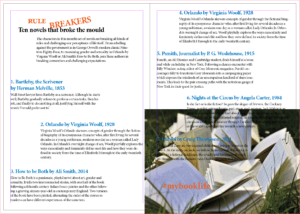
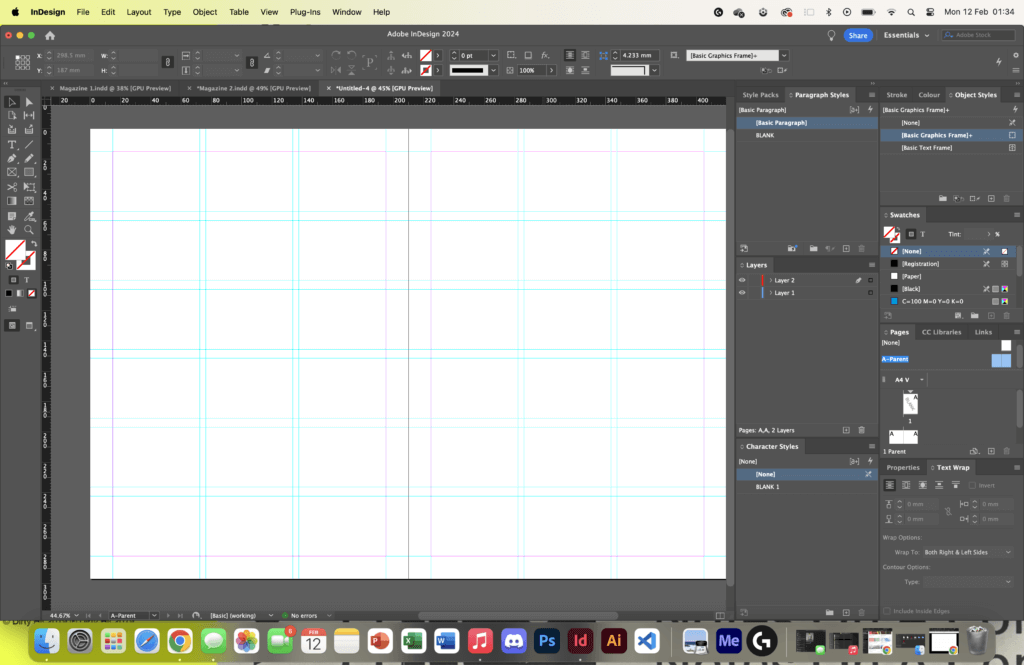
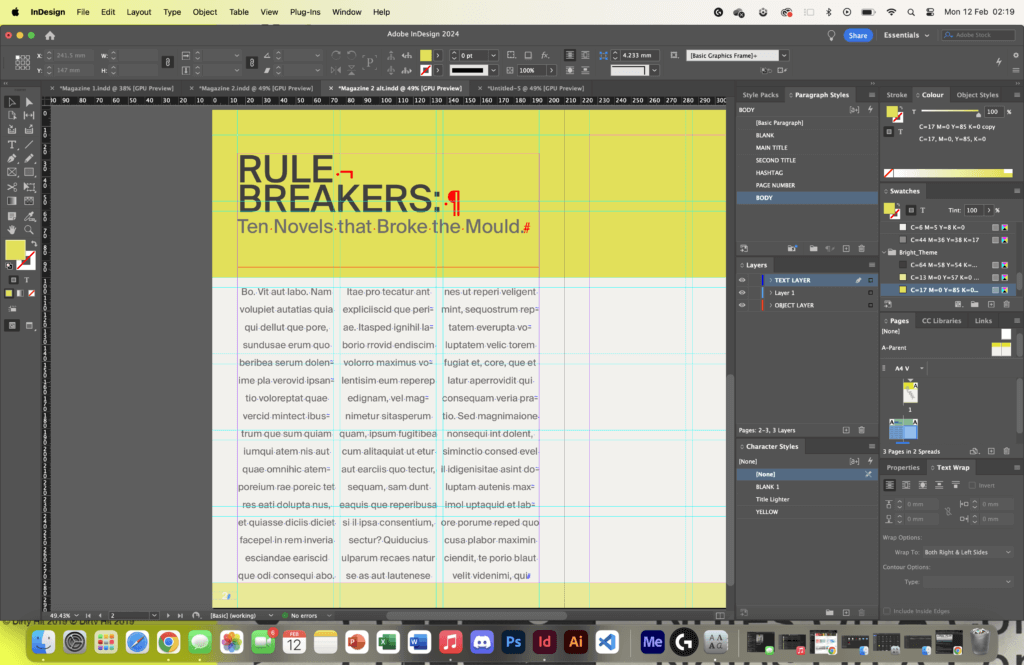
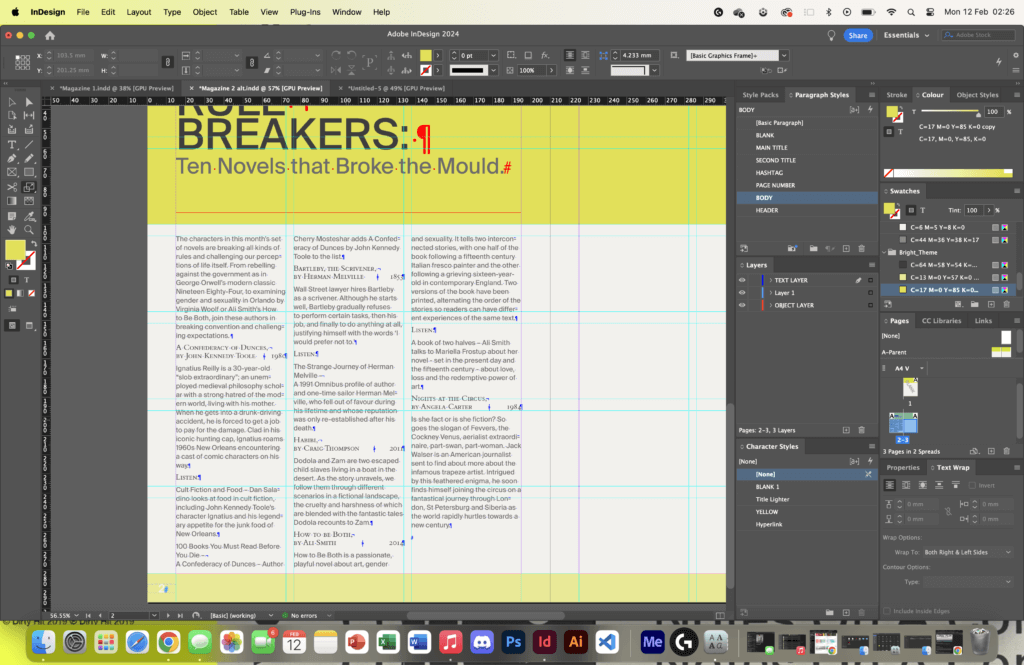
Having collated my inspiration for this design, I began by setting the grid and format for the document (Figure 2), opting to use a three column grid for this layout. In my previous experiment I used a two column grid that I thought felt too much like a book rather than a magazine (Figure 3). The three column grid allowed me to experiment with my text much more and allowed for an easier and smoother reading experience.

A screenshot demonstrating my process in setting up a three column grid in InDesign
Figure 2. Setting up a three column grid in InDesign
Figure 3. My first idea for creating a magazine layout, using a two column grid

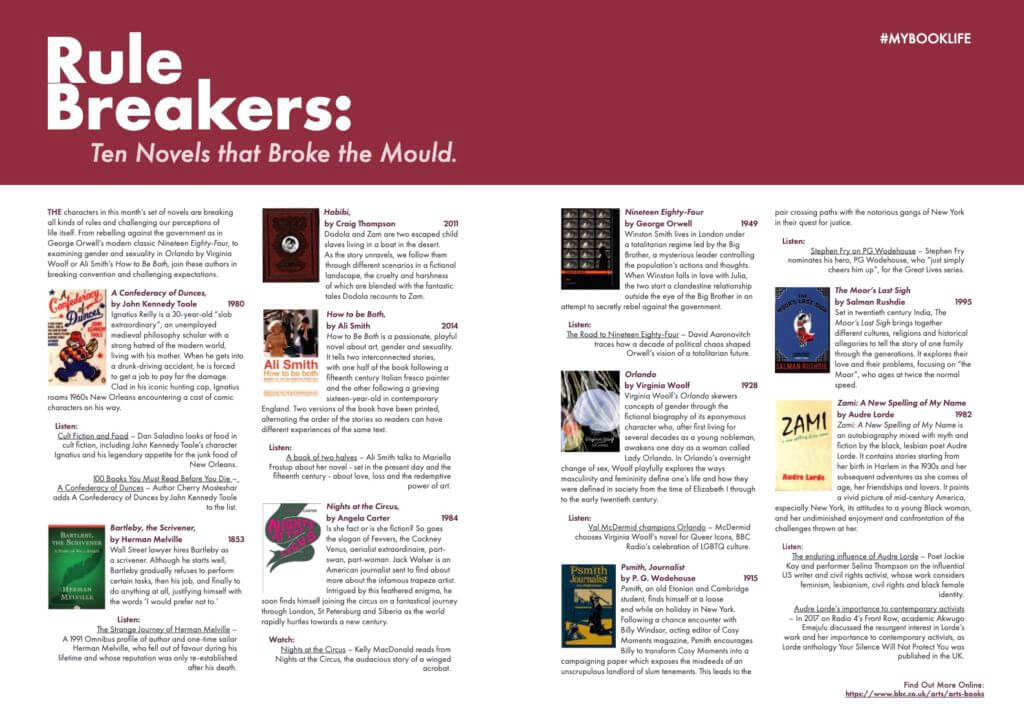
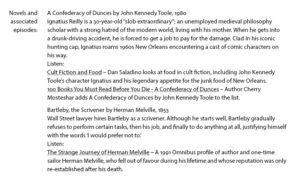
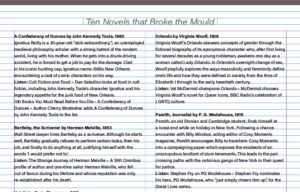
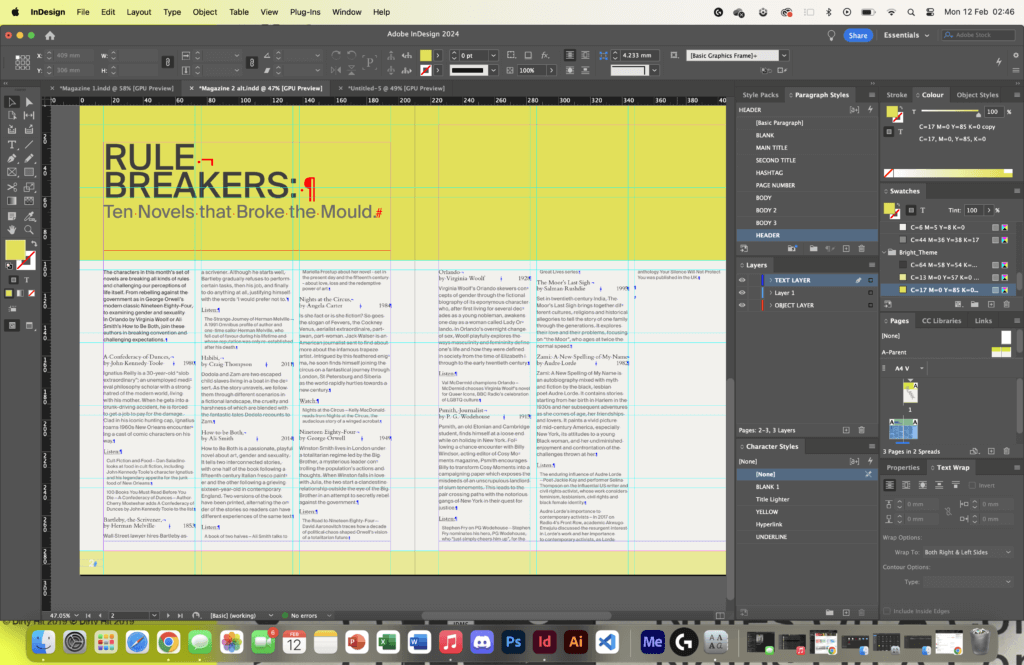
I would use my knowledge of using paragraph styles in InDesign to typeset the text appropriately (Figures 4-6). Making it easy to differentiate between a header and the body text. I would also explore creating appropriate styles for different aspects of the magazine, such as audio links and titles for the books. By the end of my design, I would finish with around nine different paragraph styles that were used for my typesetting.

Figure 4. Use of sample text to demonstrate the 3 column grid, as well as some very basic typesetting
Figure 5. First iteration of typesetting with actual body text and headings included
Figure 6. Near Final iteration of typesetting, an appropriate use of spacing between paragraphs as well line length

Software Tutorials

As well as having inspiration for my design, I had support from many online tutorials to assist me in my work. A tutorial that I found most useful was a video that guided me on how to create a grid in InDesign. I wasn’t too familiar with the following process so I thought following a tutorial was the best route forward.

I would begin by creating a new document, exact to the standards set by the brief, turning to the ‘Layout’ tab at the top of the screen and setting a colour in the ‘Ruler Guides’ section. I would then return to the ‘Layout’ tab, then to ‘Create Guides’ where I would start setting the number of desired columns and rows, as well as the measurement of distance between these guides using a gutter. Before finalising my grid, I made sure to set the grid to align to the page.

I felt this tutorial was very beneficial to me in creating my magazine layout and solidified my knowledge and understanding of knowing how to use InDesign professionally.

Online Tutorial Used:
https://www.youtube.com/watch?v=9A3EtUZsPZE&ab_channel=TypeTwice

Design Resources & Articles

Along with the tutorials and inspirations used when creating my design, I found other resources in my research that I found useful to creating my designs. I looked at magazine design layouts that I could find online that were effective and that I felt demonstrated what was an effective layout. These helped me to develop a better idea of what a magazine layout actually looked like, and how they were handled by a user.

I would also use Pinterest for mood boards to generate ideas. I feel its a great and effective website tool to source inspiration for designs and I have used it in previous projects. I felt it very useful here as it gave me near endless amounts of inspiration, demonstrating different techniques of formatting images for a magazine layout, as well as different styles of grids and columns which I found very useful as I struggled to come up with ideas for designing an interesting format.

Online Resources Used:
https://www.marq.com/blog/14-magazine-layout-design-ideas-for-your-inspiration
https://www.pinterest.co.uk/dnacreativeshoppe/magazine-page-layouts/

Learning Throughout the Module

Having now used InDesign for this task, I feel so much more confident in creating formats using grids and guides when setting up my document. This was something that I had explored in this task and I feel I can use this in my other modules, especially when creating work files for any upcoming projects. I also covered other softwares such as Illustrator and Photoshop which I feel much more comfortable using.

Specifically for Photoshop, I learnt how to use adjustment layers more effectively, and how they can be used to alter the colour and brightness of an image. In Photoshop I learnt also how to remove certain aspects of an image using the select tool, and then the content-aware fill. This was one of the more useful skills that I learnt across the module and feel I can apply it in my works, whether it be personal or works related to the course.

In Illustrator, I got more comfortable with using typefaces and creating an outline to alter the design to my own needs and requirements. Though this was useful, I feel I still need to develop my skills further in Illustrator as there are many skills I am unfamiliar with.

Understanding Layout and Hierarchy


Hierarchy: The classification or assortment of subjects regarding their importance.


Hierarchy in typography is arguably the most important consideration when creating layout. It writes subliminal messages within the page that tell the reader what’s important, what should they look at, what should they read first. This is why it is so important you don’t mess it up.

The task at hand was to format an effective layout for a double page spread. The content would be an article on novel characters which break character norms. The text would be supplied, but it was up to layout the content, edit the hierarchy and format an effective DPS.

Software Tutorials

Prior to the spring term my knowledge in Adobe software such as Photoshop and InDesign was already quite extensive and I have had much experience in these applications. However, I found that it is useful to have a refresher in some of the more niche or hidden features of these. To do so I have searched for a few tutorials, most notably in InDesign, to boost my knowledge in these fields and solidify my skills as a designer, and bring them to fruition.

I also came to use less familiar software, such as Illustrator, which posed as new and interesting challenges to overcome. While challenging at first, after a few tutorials I found myself quickly becoming more confident.

One of the more useful tutorials I used was a creative cloud download which ran down on the importance of tracking and leading in text and how this can be used in InDesign.

Change letter and line spacing in text (adobe.com)

Design Ideas and Design Process

I began by creating the InDesign file I’d be working in. This consisted of a double page A4 spread with facing pages. The margins were set at 16mm as this would create plenty of space in the center of the page for the body text, while keeping a healthy distance from the edge. It was after this I implemented the baseline grid, which would help me to layout my text later.

This feature in InDesign is vital to formatting a good layout as it allows you to evenly space the lines of text on your page. This is becomes especially prominent in the body copy where it can assist in organizing masses of text with just a few mouse clicks.

With this done, my next step was inserting the main body of text. This is where the Importance of layout and hierarchy became too apparent.

I found that there was too much going on, the text was in big chunks that was harder to digest. Some lines didn’t have enough space between them do divide the different subjects, and some had too much space, making something of minor importance seem more so. I believe this made the reading experience awkward and unrewarding.

I amended this by firstly splitting the text into columns which split the text into more digestible parts that wouldn’t fatigue the reader. I also spaced the paragraphs apart by an entire line to show that they are not connected, and bundled the “reading:” and the reading list onto the same line to establish their connection as before it appeared as though they were unrelated.

I then began establishing the typographical hierarchy, using different type styles and sizes to differentiate the relevance of the text. For example, the headings of the sections would use a semi-bold variant of Acumin Variable Concept, where as the body would remain in regular form. I saved these as paragraph styles, which would later help me to format the text far more efficiently and in uniform.

Following this, I created the left page, which consisted of images of some of the books mentioned in the article. It is important to involve graphics in double page spreads as it helps to create visual relation to the article content and also balances out the text, reducing the likeliness of a reader being discouraged by the masses of reading.

My final change was adding the title and introduction paragraph. I wanted to integrate these into the image page so separate them from the body text, but also didn’t want them to get dwarfed by the imagery. The solution to this problem was containing the text in a dark band, and using white text to create contrast to set out from the background. I also used italic type for the title, and increased the tracking, to set this text apart from the rest.

Design Resources and Articles

Before making too much progress on the layout design I found myself experimenting with some features to explore my options, as well as watching some tutorials on some of the features I was less familiar with to prepare me for the task ahead. For example, I needed to recap on how to more efficiently format text using paragraph styles using the tutorial below.

Format text (adobe.com)

I also revised how to set up a baseline grid as this was a feature I had only recently practiced and was not entirely confident in using, nor did I fully understand it’s utility. I feel however that this task has helped me to appreciate it’s uses.

For the image page, I used high quality jpeg covers of the books relevant to the article.

Learning Throughout the Module

Throughout this module I have picked up many new skills, as well as reinforced ones I knew already. One of which is understanding the importance of using a baseline grid in typography. The vitality of this feature has become obvious to me during this task and I have increased my understanding of how to set one up.

I also think my ability to create a pleasing and useful layout has been improved through not only looking at other material for reference, but through trial and error, and experimenting with the layout rather than keeping a tunnel vision on one idea.

However, next time I would try to be more ambitious with my layout. I think I could have created something much more interesting by having images placed on the same page as the body text. This would have posed some new challenges for me to overcome and offer more experience in how to establish the layout and hierarchy of a page.

Magazine layouts

Design ideas & process

I wanted to show two very different design layouts and chose a non-linear and a linear design. For one I wanted to use a lot of images with not a lot of space between the writing and for the other I wanted it to be very striped back in terms of visual design features.

Linear design
Non-linear, circular layout

For the very stripped back design approach I wanted to let the typography do most of the visual effect and only used one photograph. This was possible through the use of the text wrap panel. Wrapping the text around the image it could add extra visual to the spread and tie into the text so it doesn’t seem out of place or forced. To stop the image from taking over I used the direct selection tool to cut the image in half so only the right bottom triangle remained, thus allowing the text to wrap around the photograph in a diagonal line to bring it together.

Typographic design visual
Photograph prior to editing & text wrap

One of my design ideas was to create a circular layout, with the individual book covers surrounding the middle, creating a boarder for the circle. As it is a circular design the most important information goes to the centre, the core of the design. Individual book’s descriptions and information surrounds the title and introduction ,which the reader needs to make sense of what is going on – otherwise they may believe that it’s an ordinary list of books. Another reason for the book information going around the circle is to ensure it is clear that all the books are of equal weight in the hierarchy. There can be no mistaking one as more important than the another. To emphasise the purpose of the article I changed the colouring of the words ‘break the mould’ as that’s what it comes down to, these books aren’t the norm.

Original idea
Tinted background, prior to text wrap

Software tutorials

Building on the skills I learned from my previous experience with the Adobe InDesign software when we did the book exerts last term I used my notes to reiterate the principles we touched upon already. This helped me a lot in terms of setting up the hierarchy – especially with the non-linear design as it is an unusual spread for people to come across. Following the rule that something new catches people’s attention, but too many new and unusual things may end up confusing the reader in the end I drew from my experience of common and uncommon techniques. In order to get the spacing between the linear design right I used the guide lines. Similarly I ended up using the guide lines to centre the title and article introduction for the circular spread.

I did use the Adobe InDesign tutorial for Adding work with graphics to learn how to use the text wrap panel. This allowed me to further develop both my designs. Another good thing I learned from this tutorial is how to use the direct selection tool to alter the frame of an image in InDesign. I used this for the chosen photograph to become an integral part of my design to ensure I wouldn’t overwhelm my design with my chosen image. It allowed me to incorporate the photograph into the existing design, while keeping the balance of the layout. With the text wrap I managed to generate more space for the non-linear layout while also linking the individual covers to the corresponding information.

While it wouldn’t have worked for my designs, I do want to learn some more about how to wrap text around an object. Especially as the object doesn’t need to be removed from the image before being placed into InDesign. There’s so many possibilities I can explore with this. Moreover, in future, I would like to explore some more magazine layout styles, in particularly the call out features they use.

Resources for research & inspiration

One of my hobbies is Bullet Journaling (BuJo), so I create layouts a lot within my life to keep myself organised, jot down my ideas and thoughts and to relax. This meant that when this task was presented to me I already had a lot of different inspiration from creating my BuJo. As I wanted to do something that was non-linear I used a double spread layout I like to use on occasion as I felt it would suit the purpose. While I cannot recall who initially introduced me to this particular layout The Petite Planner uses a spread like this for her weekly spread to give you a better idea. Many others in the BuJo community use a similar layout for some of their spreads – the most popular ones I believe are to ones for tracking habits to improve them.

In terms of my other design idea I didn’t have a singular inspiration, I simply knew I wanted to create a large contrast between my two designs. I’m also rather fond of simply having text be the visual as I feel it is being often overlooked. Since I knew the other design would be quite heavy with images, colours and not have a lot of space I wanted this design to show the opposite (within reason of course). After having looked at some of my peer’s designs so far I developed a better understanding of what exactly I wanted my linear layout to look like.