
Background
The Museum of English Rural Life wanted to expand on their Ladybird Book Gallery with a replica of Douglas Keen’s 1948 A Book of Birds and Eggs. This prototype was originally made to convince the Wills & Hepworth Board of Directors that factual Ladybird books were viable, in which Keen succeeded. Without this, Ladybird Books may have ceased to exist. The prototype is kept by Keen’s daughter and is the sole copy so to avoid damage to the original and for the prototype to remain with its owner, a replica was commissioned by our department for museum use.
Brief
The deliverables of the project were to craft a physical replica as accurate to the prototypes original state as possible, and to create a digital flipbook version for online use. The main objective focuses on the physical replica, for the final piece to reflect the true size and accuracy of the original. With the resulting benefit to the museum of having their own physical copy to use for handling and display.
Process
Contact with the client
Initial contact with the client was established over email, however meeting up to discuss the project was agreed upon when needed. From my first meeting with the client we discussed further about the aims of the project, dates the prototype would be available for viewing, and what the roles were of both the client and designer.
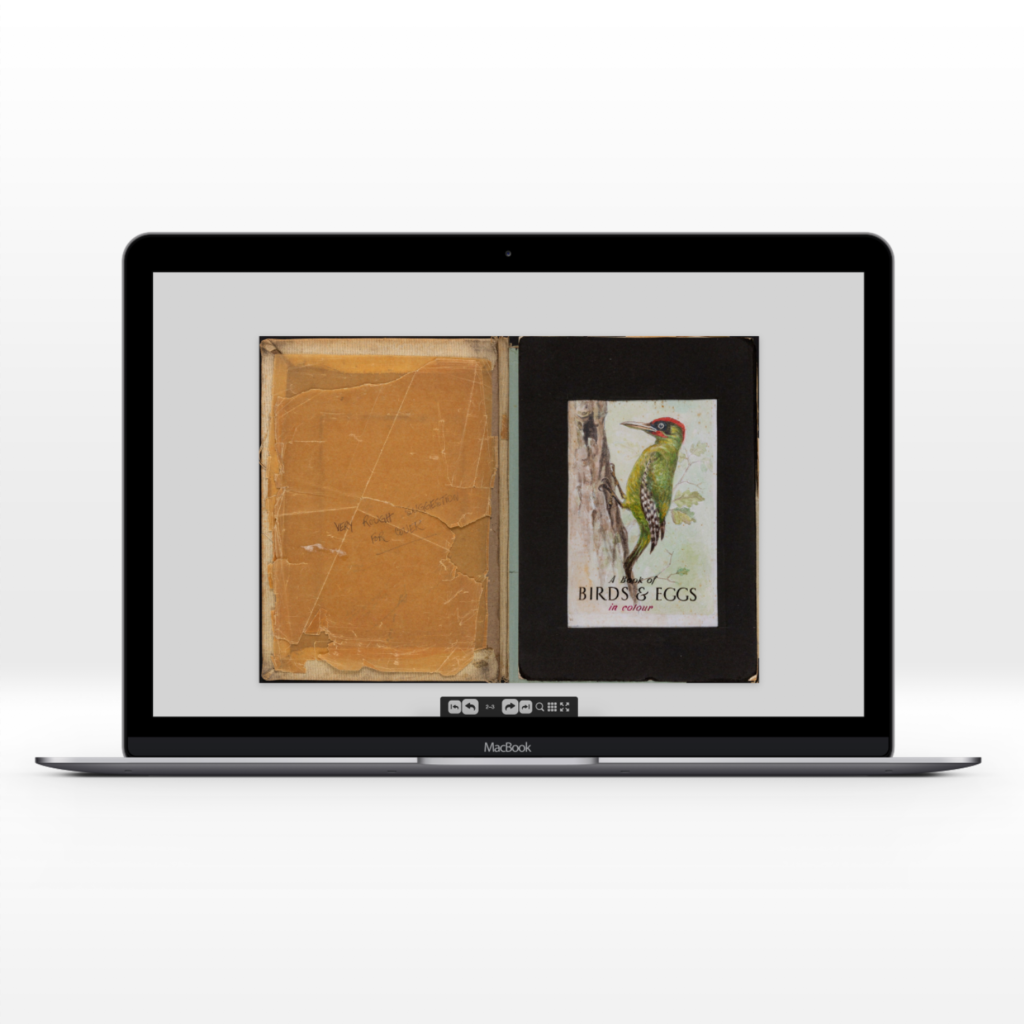
It was stated from the first meeting that I would have limited opportunities to view the prototype as the owner would have to travel to bring it to the museum. So I was prepared to take as many reference photos as needed due to time with the replica being restricted.
From this meeting I also presented the idea of creating a purely photographic version of the replica, however the client clarified they wanted it to be as accurate to the original as possible. If it were printed photographically it would be too thin and would not mirror the true bulk of the prototype. It was decided that the entire replica would be crated and stitched the same way it originally made.

Research
From my research I found additional context on the prototype. I was able to view images of what the original looked like before viewing in person, to get an idea of what I would be working towards. I also found out what materials and processes were used as the bird illustrations were water-coloured on sketchers board and the vignettes were created using ink and scraper-board.
My research also analysed types of potential materials and methodology to include in my own craft. Within sewn book binding methods I found that kettle and coptic stitching were effective techniques for this purpose and to possibly include in practice. The materials I looked into were options for the main components of the replica: The Sketchers board— to substitute with mountboard; the tracing paper— to use either acetate, vellum or sturdy tracing paper; and the textured inside colour pages— to source from artist’s sketch pads.
Initial viewing, processes and sketches
After viewing the prototype in person for the first time and measuring the dimensions, I was able to map out each component and what I had to account for when crafting myself, these were:
Imagery
- Watercolour bird paintings on sketchers board
- Ink and scraper-board illustrations
- Separate bird egg paintings stuck to sketchers board
Materiality
- Black and green/blue artist paper
- Sketchers board
- Thread for binding
- Fabric cover (wrapped around sketchers board)
- Tracing Paper
- Acetate (on front page only)
- Cotton Binding (glued between spreads)
Text
- Typewriter main text
- Hand-rendered notes on tracing paper
- Hand-rendered title (painted) on the front page


The copy was also given to me via google drive after this initial meeting. From receiving the copy I was able to start editing the images so each element could be printed separately. I also had to order the copy and pinpoint what images needed to be retaken and what elements were missing. Additionally, there was not a copy of the watercolour images without the black paper border, so I had to Photoshop each image to contain only the water colour image for print. Some images however needed additional photographs for this.
During this development a rough mock-up of a spread was made using materials that I had independently sourced from craft stores. This was a useful starting point for the project as I was able to understand fully each component of the book and pinpoint crafting areas that I had not previously realised—such as discovering the correct placement of the cotton binding which I had initially misinterpreted from just observing. This mockup was compared to the original on second viewing and feedback from the client on this was positive, however it was highlighted that the colour paper pages did not match the original entirely.


Diagrams were also created to provide an image-based breakdown of the components and measurements of each spread. This was beneficial as it offered a more visual understanding of the task rather than having in text form.

Printing development
An initial hurdle faced was deciding how to handle the water-colour bird images, as they were originally painted directly onto the sketchers board. After conversing with both my supervisor and the client the most effective printing method for these images was to print directly onto mountboard to get the full experience of the original, rather than printing these out on separate pages and sticking onto mountboard. To print directly onto mountboard however, required learning how to print on the department’s A2 printer.

Working with my supervisor multiple test prints were conducted to prepare the artwork for print. The first test was printing on A4 paper to establish the appropriate settings for future reference. We noticed with this first print that the key colour was not printing (even though there were multiple key inks in the printer) after various setting changes and test prints it was determined that that a specific key ink needed to be replaced and so a revisit was needed once this was delivered. With the ink replaced I tested again but on mountboard to see how the printer would respond to the intended material. This test was wholly positive and printed in full colour directly onto the mountboard.

It was also made apparent halfway through the printing development phase that the museum required archival quality materials for this project, this necessitated a sourcing of acid-free paper which limited the choice for materials. The company Colourplan was suggested by my supervisor, which provided various weight, texture and colour options. So this issue was fortunately swiftly averted. Despite this, when looking through the colour options they did not have an exact match to the coloured paper and after pitching to the client they did not want to settle for the wrong colour. To avoid this, colour matching the original paper was implemented and used as the base page colour on a white page of archival quality paper.

Production and digital design
While far into the crafting process, unfortunately due to COVID-19 I had to cease the production of the physical deliverable. After no longer having access to the department’s printing resources, I instead focused on the digital deliverable for the remainder of this project and informed the client accordingly.
The digital flipbook also came with its own set of challenges to overcome. I had to re-edit all the images for the digital format. Once the images were edited I collated them into a PDF file and converted to a digital flipbook. However after collation, I noticed that I didn’t account for the unique nature of the book, since there are multiple page layers for each bird, the flipbook should have had the initial tracing paper layers lifting up to reveal the black bordered image underneath, but this additional layer had not been accounted for so the whole design became disjointed. Additionally the photos did not entirely align so these needed to be re-edited. To combat the layering issue I needed to create two identical spreads for every bird however one with the tracing paper over the bird imagery and one without. This would connect the pages and have the correct flow.

After rectifying these issues the digital flipbook was created fully as an interactive feature for potential display on the MERL website. The conversion was from PDF to HTML5 and came with an embedding code ready for use.

Reflections and conclusions
From this project I have gained a new experience of having my initial plans be completely disrupted by unforeseen circumstances. It allowed me to entirely adapt to a new situation and learn the difficulties of managing time during such an abnormal occurrence of events. Unfortunately I did feel quite thrown off from this project as it was such a physically-focused main deliverable and the work was impossible to complete from home. This meant when working on the digital flipbook I was also balancing a new working environment, as well as other university projects. The project had to drastically change and it was very difficult to find momentum whilst working through the long processes of photo editing and collating.
Despite this, I have still developed new skills such as digital flipbook making, printing in a larger format, photo-editing, photography, and replica crafting. I was able to approach the project from a three dimensional perspective, and had to learn to work backwards from a piece, deconstruct it’s elements, and then decipher how to recreate it. This was a unique project to have worked on and for future reference I am able to approach design tasks from a more craft-based perspective. Focusing on how I can ensure all my projects are as meticulously planned for crafting as this one.