About
Baseline Shift is a student led weekly talk, held every Wednesday, between 11am to 1pm during autumn and spring term. Available to attend by both undergraduates and masters’ students of the Typography and Graphic Communication department as well as members of staff, the sessions host former alumni of the University and well-established designers in the industry. These talks are in place to not only inspire but provide insight into career and networking opportunities to prepare students for the future. With James Lloyd as the client and supervisor, the student team are required to plan, promote, blog and host the sessions, through contacting speakers, creating timetables, and publishing digital and print material.
2022/2023
I was recruited to join the team at the end of my first year on the Graphic Communication course, for the beginning of the next academic term. As a confident speaker looking to develop communication and branding skills, this felt like the perfect job for me. Initially attending meetings in the summer break before hand with then team leaders Adam Powell and Sara Noguiera Perez, we discussed other suitable candidates to form a larger team. These positions were then filled with Mia Bryan and Ben Brown, two other Part Twos on the course. With a complete group of five, the team leaders gave us a debrief on expectations and tasks in place to carry out the job, and then allocated roles based on our existing skills and preferences. I was the designated lead host alongside Sara, introducing and contacting speakers, presenting the sessions whether it be online or in person. Ben and Adam coordinated the blogs, writing and editing after each session with Mia on socials, printing posters and publishing announcements across Facebook, Instagram and Slack. With the decision to slowly move over all roles to the three of us in Part Two and Adam and Sara taking a step back, it was important to have a few weeks each to complete another role to experience everything to run a team of our own the following year.
With the new team, and autumn term fast approaching, we still had a lot to do, including deciding on speakers, contacting them and fitting into a calendar, in order to begin the promotion. We each researched into designers in different fields of design and bought the names forward, using a carefully designed template to email them providing potential dates to talk. There were a few complications with doing so, such as availability, however after a few rearrangements and shifting, we were able to accommodate everyone, with the audience’s interest at heart, separating topics with different ones as well as having a mixture of both online and in-person talks. Based on experience, attending the talks as a student, I valued the in-person talks more as they felt more engaging than sitting behind a screen. We then tried to implement this where possible, which initially proved quite difficult returning from a COVID affected year, where majority of sessions were online. However, we aimed to fix this through even splits of online and in-person, so not too many sessions of the same location were bundled together.
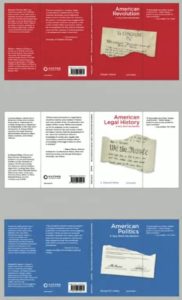
We collectively decided the previous branding could be improved and updated, in terms of colour, type and logo. Due to different locations over the holiday period and busy schedules, it was difficult to arrange times to meet in order to progress. We solved this by individually designing elements. I chose the typography, whilst Mia focussed on colour and Ben logo. We each contributed to these to select the best options. Coming back to campus, the different parts could be pieced together to publish a term calendar as well as weekly graphics.
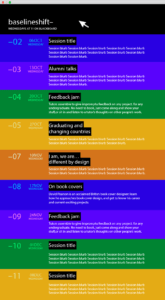
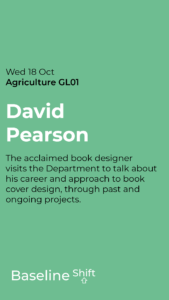
With the initial session being year tutor briefing, the first experience I had hosting was alongside Sara, introducing Malcolm Garrett. Following this, we each took turns hosting the likes of James Hunter, Rob Waller, Nick Sexton, David Pearson as well as previous alumni and staff for the Time Management and Feedback Jam sessions. Not being experienced in talking in front of such a large audience before, this was a learning curve. Understanding new word patterns and how to introduce speakers in an engaging way to prompt questions later on from the audience. With some people missing sessions or wanting to revisit, we saw the value that recording could be, so began doing so, later available to our students and staff.

Doing the social media, using a formatted template, made the process of designing weekly graphics a lot easier. Changing names, dates and titles as well as short description to match the session and the publishing these both around the departments as well as across social media; Slack, Facebook and Instagram. Whilst Mia was predominantly in charge of this, I spent the majority of Spring term controlling the socials as we swapped roles.
Completing blog posts meant having to note take during the sessions to write up an informational summary with pictures, quotes and a run-down of what the speaker said.
All blogs for Baseline Shift can be accessed at https://typography.network/baseline-shift/
Though the plan was to hand over roles gradually, it felt quite rapid, and Mia, Ben and I were left with the majority of tasks to complete ourselves and had to then adapt quickly to the changes. From this, we learnt a lot of things that we could take away as well as develop from to lead a team of our own.
2023/2024
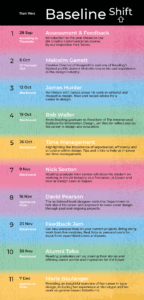
The Real Job was again advertised by our supervisor to recruit two new people to join the team as the three of us had become team leaders. These spots were filled with Tilly Dobson and Amber Jones. Again, because this was during summer, we had to arrange calls accordingly to everyone’s schedules, with some working, travelling or busy to not only introduce Mia, Ben and I but also begin planning for the fast-approaching Autumn term. This often meant we third years felt responsible so resulted in us redesigning the calendar ourselves involving talks from Toshi Omagari, Steve Watson and Jake Paul as well as many others. We initially did want to create branding changes, however, ultimately ran out of time. To compensate, we made minor edits to elevate the existing brand, in terms of colour as well as pattern. We chose a more refined palette as well as discarding the use of texture. We found this made information more legible. Establishing both Tilly and Ambers preferences, we could distribute roles much to everyone’s liking, this led to myself and Tilly hosting, Mia on socials and Ben and Amber on blogs as well as having alternating weeks for everyone.
Taking on board advice and feedback, we found first years were not using Facebook like the second and third years were, therefore would miss out on notifications and reminders about the sessions. We then requested to become moderators on Blackboard where we could send out emails to the whole course. This taught us new ways of communicating, however as a new addition, we did find ourselves forgetting to do this in the first few weeks. Becoming moderators, also reduced the amount of technical difficulties we would having during online sessions as we could fix these juxtaposed to the lack of control we had in our first year, where James had to be present.
From our experience in the first year, we noticed how the team were not well known through the department. This is something we wanted to change. We wanted to feel approachable by everyone, to understand new inputs and insights to not only improve but connect and network on a deeper level. We did this by introducing ourselves and the new team members instantly whilst also remaining good relationships with both students and staff as well as being vocal about sessions. This resulted in many keen first years as well as masters giving their feedback and notifying their interest to join the team for the next year, with staff thanking us for the work we do repetitively.
Kickstarting the term, we showed the new recruits how to complete tasks straight away, including the recording of sessions and upload of blogs and slides as well as contacting, as this is something we felt we did not learn enough about during our time as second years. We took the lead during the first three sessions, where Tilly and Amber could assist, to letting them do their own sessions the following weeks, this enabled them to build confidence and understand how things work from an early stage, preparing them for the future.
However, not everything ran as smoothly as mentioned. Quickly, after term started, we noticed, not all members were attending nor were blog posts being published on time and the social media and posters were delayed in publication. We as well as our supervisor saw that from the rotation of roles between the second and third years were not consistent and the high-quality deliverables produced were lacking.
After becoming aware that team members had other commitments, we organised a spreadsheet where we could write roles to accommodate the days where people are available. This meant for myself and Mia taking on extra roles where necessary, which became more frequent than anticipated. I often had to make socials edits and send reminders to those on duty that week, often feeling like I was being pushy or bossy. However, understanding how team members work, we overcame this by creating schedules for publications of posts, posters and blogs for everyone to understand their responsibilities. Though this was created, it was not stuck to as we continued to see the drop in blog uploads. Another factor affecting this, was failing to remind our supervisor when blogs were complete, therefore leading to a backlog in publishing.
We found that during our first year on the job, people would get confused for in person sessions and where they would be hosted. Especially for first years, the campus is fairly confusing, so many students would get lost or arrive in the wrong place. This was resolved by having the same room for all in person sessions in the Agriculture building, a short walk from our department. When in person, the only files which could be presented were PDF’s in order to be recorded successfully, however where this had not been communicated with the speaker, they came with Keynote, where they would display motion graphics, This unfortunately led to no recordings being produced for the sessions and people missing out. However, this encouraged more people to come and promoted this way where we saw attendance dropping towards the end, due to submissions. These became compulsory for first years, with second and third years only having to attend a proportion maintaining a steady amount of numbers throughout the year.
Other technical issues we had when hosting the sessions include, team members forgetting to remind the speaker of their talk resulting in them to join late, where they couldn’t test if their material works whilst screen sharing, or having internet issues. This resulted in myself having to briefly explain the Blackboard tools to the speaker as well as take over hosting to ensure the rest of the session runs smoothly. Where James was not present to moderate, like he was in previous years, we felt responsible for the mistakes and told the speakers to join 15 minutes prior to the start time to test everything out. This taught us how to overcome issues and have accountability. One instance where a team member forgot to contact the speakers and send reminders resulted in only having one alumnus for our Alumni Talks session instead of between three to four. Though sending out frequent reminders to the team, to contact people as we all had different roles, this fell through. However, through previous networking, we were able to find someone short notice to fill in a space, so the session would not be too short further highlighting the power of connections within the industry.
Another issue we had was the miscommunication between both staff and students regarding strikes. Unaware of the strikes due to take place, the Baseline Shift sessions were still expected to happen, until a few days before, where we had to then explain the cancellations and let down many that were excited to attend. This taught us how to communicate in an empathetic way whilst also remaining professional. Similarly, we had unexpected change of plans where we had to reschedule sessions, due the speakers’ circumstances. Though under pressure, this taught us a lot about time management, trying to book these sessions back into the calendar, in hopes to accommodate everyone.
Conclusion
Being a team leader for Baseline Shift has been both one of the most rewarding yet challenging experiences. From opportunities such as networking, to organising a team, communication was the most essential tool. Understanding how to communicate, tone of voice and delivery of message was crucial to ensure the efficiency of the team as well as building relationships with fellow students and staff. By making ourselves known, we became friendly faces throughout the department, easily approachable by many. By sending out a feedback link at the end of every session, we could gather insight for the speakers as well as how we did as a team, however by sending out another survey, more team based, we could understand how we were as leaders, and how to improve team organisational skills as a tool for the future.
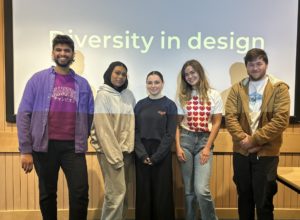
Overall, we received a 4.5 out of 5 for the diversity of speakers and topics, with follow up responses being how it was valuable to hear from people in different design careers compared to previous years. This is something we wanted to do as even we as viewers felt, we were mainly seeing people from the same field, often getting repetitive. We wanted to have more people of colour as well as more females, in which we successfully did. This feeds on to respondent’s comments of how these sessions have impacted them, with students mainly saying about networking opportunities and the power of Linked In. We were glad to see this, as not only do we feel connected to speakers through organising but everyone else also has points of contacts within the industry. The additional comments in the survey thanked us with one comment from a Part One sticking out in particular for me,
‘Most of the team have made themselves visible to the rest of the students, which is hugely important as they feel approachable (important for something like Baseline Shift which involves everyone). Everyone on the team came across professional and passionate when introducing speakers, and Habibah went a step further to reach out personally asking for feedback, and just having general extended conversation about Baseline Shift, helping to spread the enthusiasm. Well done to everyone involved!’
It feels very rewarding knowing that we have made an impact in the design course and our organisation is inspiring for others to join the team.
Upon reflection, I find myself to enjoy competing tasks immediately and gain satisfaction when things are according to deadlines. However, working in a group with a range of demographics, I have learned to become mindful of this and how to work around other peoples commitments to ensure fairness and an efficient team. When leading a team in the future, I aim to be more sensitive to create a cooperative group encouraging discussions and to foster collaboration.
Having hosted over 40 sessions, taking the lead on the last 22, we have learned how to organise, plan, promote and lead a small team and understand how to rise from issues and struggles we faced along the way. This job has been extremely beneficial in adopting key skills and values needed for the world of design and management such as;
- Time management
- Leadership
- Communication
- Networking
- Public speaking
- Social media management
- Blog writing
- Contacting professionals
- Event planning
- Technical skills
- Flexibility
I now have new skills and contacts in the design industry which wouldn’t have been possible without completing this. It was a pleasure being a leader for this team and wish the next group the best of luck!