Background
For our academic cohort, the last project of second year revolved around The Global Goals, a collection of 17 interlinked targets that tackle a range of environmental and cultural issues. In the project, each student was assigned one of the seventeen goals, with the task to design a cohesive campaign across an A2 poster, DL leaflet and D48 billboard animation. Although the goals might seem daunting to complete by the provisional target of 2030, outcomes needed to remind audiences that there is still hope, especially with meaningful action.
Our job, as the Real Job team, was to bring together both digital and physical outcomes to form an in-house exhibition – celebrating the work involved and shining a light of hope on global issues.
Restated brief
It was important for us to expand beyond the typical restated brief by including measurements (and visuals) of the panels within the exhibition space. Luckily, this was something we could obtain from Geoff, so we didn’t need to measure each panel ourselves, which would’ve proved a challenge over the summer vacation period.
Our greatest struggle was finalising deadlines, especially since we were collaborating virtually over the summer. Luckily our production dates were solidified from the get-go, but other dates including caption collection and file gathering depended on the cooperation from students and staff. We overcame this through frequent communication via email and text message, and this was often actioned months in advance.
Throughout the project, the brief didn’t change drastically, and our deliverables remained the same:
- Introductory panel ( 280 x 118 mm )
- Summary panel ( 224 x 118 mm )
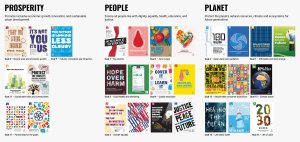
- Prosperity, People and Planet categorisation panels ( 50 x 118 mm )
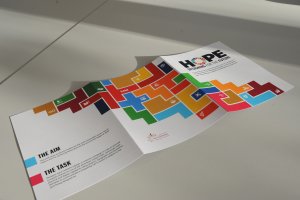
- Leaflet (14.8 x 19.9 cm )
- Digital exhibition with animation showreel
- Social media post
Research
Initially, we looked at what the previous year did with their Global Goals exhibition. This was a necessary precaution since it prevented us from copying their concept and helped us identify their successful, and perhaps less successful components. Additionally, we looked at similar student showcases, identifying presentation methods of both artwork and corresponding copy within captions.
Design process
We began the design process by thinking of concepts and ideas for creating a brand image using the global goals branding. Our aim was to incorporate elements of their brand but it not to be a complete replica or a copy of last year’s exhibition. We had meetings with our clients, Rob and Greg, over the summer to which we presented our initial ideas across deliverables.
![]()
![]()
![]()
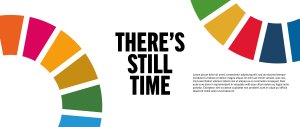

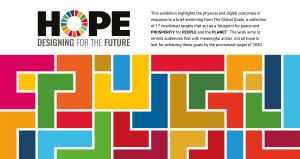
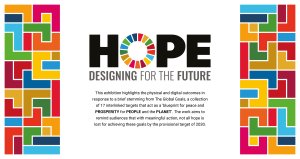
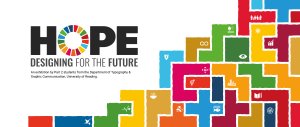
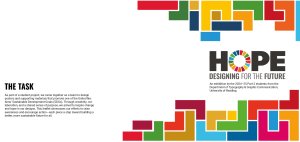
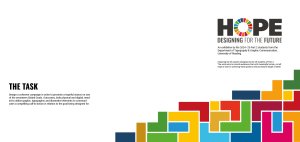
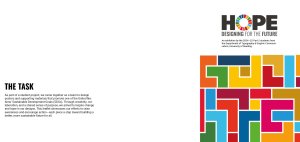
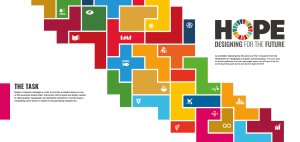
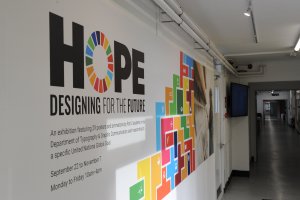
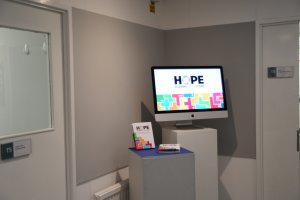
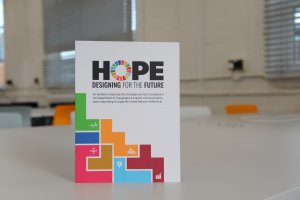
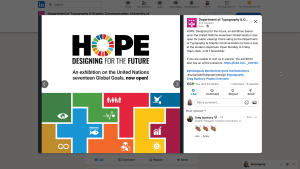
The strongest concept was one that used the global goals colours within a tetris-based design of different blocks. Greg suggested we create a narrative for our concept that fits with the work that is showcased in the exhibition. This is when we came up with HOPE: Designing for the future. The tetris blocks shows everyone’s individual efforts, the students’ responses to the global goals, and when put together we can tackle all issues as part of a bigger community.
![]()
![]()
![]()
![]()
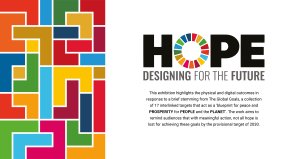
This design was then improved in Illustrator to get a clearer, more unified visual result. We continued to receive feedback from our client, suggesting improvements along the way. One big change we made was the designing of the tetris blocks, originally they were all very similar and rotated in different ways so it was hard to distinguish between different goals. Instead, we created a unique shape for each of the 17 Global Goals so it could be distinguished on its own – linking back to our narrative of individuals coming together. We also experimented with hand-drawn textures as it could be said that the shapes felt a bit too neat and could do with a bit of humanity and warmth. After exploring this idea, we found that the concept was strongest with its perfect shapes and lines.
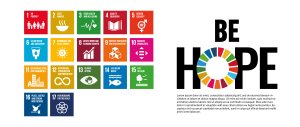
Once we had established our concept of the tetris blocks, we then explored this through the different deliverables. We experimented with the different ways that the tetris could be positioned and created. The introduction panel shows it building upwards, suggesting growth towards the 17 Global Goals and bettering the planet through design. Further connotation is seen through 29 present shapes – each representing a student and response to the brief. The summary panel shows the lock up of all 17 Global Goals together to show the unity among them, together they represent everything that the Global Goals strive for.
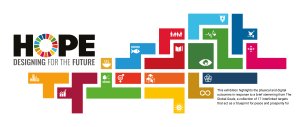
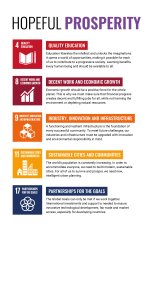
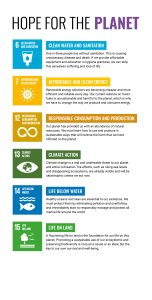
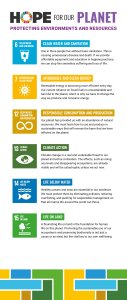
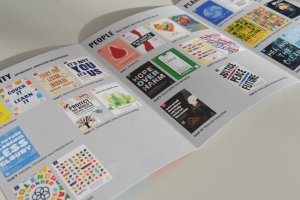
We decided to group our responses into three categories – Prosperity, People and Planet. The first category, Prosperity, highlights the goals that strive for innovation and new global opportunities. The second category, People, looks at the human population and how their lives are impacted by worldwide issues. The third and final category, Planet, shines a light on the goals that express a concern for maintaining natural resources and Earth’s environments. To introduce these sub-categories, large panels were created to highlight the further aims of each goal. We experimented with no tetris, tetris on the bottom, and finally came to a unanimous decision of presenting a tetris pattern on the top that utilises the colours of the goals involved.

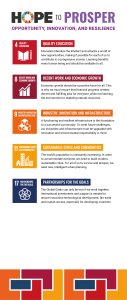
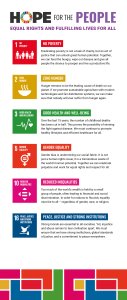
The tetris design was then explored and continued on through the leaflet. The three different categories allowed for a 3-panel leaflet, each panel showcasing a category of students work. We looked at a few different ways to present the tetris concept on the front side of the leaflet but finalised on one that links back to the idea from the introduction panel, it bleeds across the back of the leaflet suggesting that we continue on having hope for the future through design.
Installation
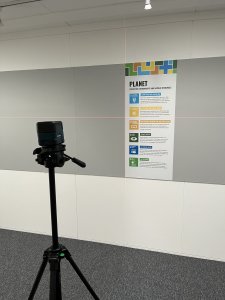
Final installation took place on Friday 19 September. A useful tool that we used was an InDesign document with the exact measurements of each panel. This helped us in planning the flow of the exhibition as well as keeping equal distances between the posters (and captions) on each wall.
We applied the large introductory and summary panels first since these needed a group effort. Then we applied the smaller categorisation panels alongside the posters and captions. We heavily relied on using the laser level to ensure all wall assets were stuck on straight. All deliverables were printed on UTACK, a sticky-backed vinyl which meant all we needed to do was remove the backing and stick them to the walls. The adhesive backing was strong and durable, so if anything was applied at the wrong angle, we could easily readjust and restick.
Throughout the summer, we had expressed a disinterest in displaying the DL leaflets since they differed across the academic cohort, with some students producing exciting tri-folds with die cuts and other special finishes. However, once the posters and animations were up in T-Spur, we felt that the centre of the corridor was too empty. It was then at this point, we decided to bring in three glass vitrines to display the student submissions. Having the leaflets further establishes the cohesiveness of the campaigns on display, and adds more interactivity for the visitor.
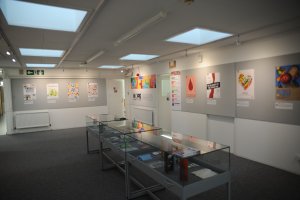
Final products
Physical exhibition space

Leaflet
Promotion and awareness
In its initial weeks of opening, we gave in-house tours of the exhibition to Part 1 and Part 2 students. In these tours, we talked about the visuals on display and the benefits of completing an exhibition-orientated Real Job. These tours were a great way for us to distribute our leaflets and allow students to digest the campaigns, deliverable by deliverable.
In addition to the in-house talks, we were also given the opportunity to speak to design students from Cox Green sixth form. This allowed us to expand on our in-house talks, giving us the platform to talk about the course and Real Job experiences to an audience who are unfamiliar with the scheme.
We also created social media posts to promote the exhibition on the department’s LinkedIn and Instagram accounts. This also linked users to the digital exhibition, to which we followed the frame of last years for. This showcased all the posters along with the animation showreel. Our digital exhibition can be viewed at: https://typography.network/globalgoals/
Self-reflection
Upon reflection, our exhibition could’ve strayed away from the typographic branding of The Global Goals, especially since the colours do most of the heavy lifting. This change would’ve differentiated our exhibition from the previous year, and perhaps would’ve elevated a sense of uniqueness with our work.
Additionally, we think that the project could’ve benefitted more from in-department contact hours. It was difficult to organise this due to the summer holidays, but with us all living close to Reading, it was perhaps something we could’ve done more often. This would’ve helped to finalise print decisions more efficiently.
Emma
As someone who was well-engaged with the project at the end of second year, it was a great honour to be a part of the team to put it all together in the department. Planning, designing and installing this exhibition greatly improved my problem-solving and communication skills – especially when we had the opportunity to talk to students about the work involved. This exhibition is not only a memorable outcome for the Real Job team and I, but also something the whole year can reflect upon and feel proud of.
Hannah
My favourite module of the year was unquestionably the Global Goals module, which motivated me to join the real job team. I developed in a lot of ways while working on the exhibition, from being more comfortable sharing my ideas to communicating and working with others. The whole experience was genuinely enjoyable when watching everything come together and seeing people’s excitement when they saw their work.
Josephine
This was such a great project to be a part of, not only learning how to design and set up an exhibition but also having the opportunity for this to showcase our own work. It pushed my boundaries, overcoming challenges and building my communication skills. This project has definitely sparked a personal interest in exhibition design and I am so happy with the final outcome, along with its impact.