Category: Cutting out images

Exploring image cutting in photoshop

Design ideas and design process

For the simple silhouette I chose a plane, I selected and masked the plane zooming in further editing the tricky portions changing the opacity of the red filter to contrast better. I then made it a layer mask and created a new layer, filling the mask with black.


For my second design I made a complex silhouette of a dog. I used a Gaussian blur adjusting it to a point the fur and background were distinguishable. After, I make a curves adjustment layer to make the light greys absolutely white and make the darker greys black. Leaving me with a slightly blurry silhouette but was successful in making the outline of the fur clearer. I then made a contrast adjustment layer changing it to 100 so only darkest colours were visible.


For the complex image cut out i cutout a person as it was more complicated than still objects. I used the quick selection tool to outline the body, as the clothes and hair blended into the background in areas, I had to find a create way to overcome it. I therefore zoomed in holding option to quick selection and take away areas of the image background, i found a particularly useful tool throughout this process was the viewing mode, i chose an overlay with a 50% opacity, creating a red mask around the cut-out. I selected sections Changing the size of the tool for accurate edits.

Once I had the selection I select and masked. I then worked through the list of properties changing attributes about the cut-out, like the radius and smoothness. However, there was some particularly difficult areas to edit therefore I opted for a blend between the quick selection tool and brush tool. both sizes with the lowest possible and zoomed in as far as i could selecting the individual pixels to remove them. I outputted the outline to a new layer and chose a black background to bring out the brighter hues in the face and dress, by ridding the picture of the original textured background i found it became much bolder and professional.


Software tutorials

when preparing to make my works i watched a variety of tutorials beforehand. firstly, i thought it was most appropriate to learn how to use the necessary tools. to begin i watched ‘how to use the pen tool’, this was especially relevant when trying to make outlines by hand, although I didn’t use it much in my final designs as the process was a lot more intricate and less geometric. I found it would’ve perhaps worked with objects like the plane and in some of the body but especially not with the hair, eyelashes, and fur. next I learnt the difference between clipping paths and layer masks, ultimately i decided layer masks were better, more accurate and easier to use so opted to utilise it in my design process. using a lasso during this process also proved especially useful https://www.youtube.com/watch?v=ymEcuYfMQWo , previously I had experimented with the tool but never knew how to use it, for example I didn’t know the lines I drew had to connect in either an oval or circular shape in order for the tool to take effect. another key tutorial was making selections, as throughout this process of selecting areas of an image I found I did not always select it all, through this tutorial I leaned how to use the rectangular marquee tool and that I could add and take away from the selection through the top left above the tool bar this in turn made the design process a lot easier.


Design resources and articles

One resource that particularly informed my design was https://photoshopcafe.com/cut-anything-photoshop-3-best-ways-remove-backgrounds-photos/ taught me the three most effective methods for removing backgrounds in Photoshop are using the Magic Wand Tool, the Quick Selection Tool, and the Pen Tool. That I should use the magic tool with simple backgrounds and uniform colours, while the Quick Selection Tool is more effective on images with more complex backgrounds. The Pen Tool is the most precise and versatile method, but it requires more time and skill to use effectively and to achieve the best results, it’s important to refine the selection using tools such as the Refine Edge Tool or Layer Masks. Overall, it informed my design and ensured I was using the right tool for different images, additionally the article also talks about improving the accuracy of your selections, such as adjusting the tolerance level of the Magic Wand Tool or using the Select and Mask feature.


Learning throughout the module

Throughout this module I have learnt a variety of useful design skills and familiarised myself with different applications, tools and features. Through working on illustrator tasks, I learnt how to create vector graphics using the shapes and pen tools to illustrations, logos, icons and typography. InDesign helped me understand creating layouts and tables better, working with text frames and graphic frames to arrange content and Using grids and guides to align and organize content which in turn helped me to design and print digital materials that are visually appealing and easy to read. Photoshop allowed me to edit and manipulating photography, working with layers and masks to edit and manipulate images allowed me to enhance and retouch photographs for visual impact and After Effects let me create digital motion graphics, working with keyframes and Using effects and filters to create unique visual effects.


Cutting out images – Photoshop

Introduction


This task required me to learn how to cut out images in Adobe Photoshop. In this post, I will explain the design process that I went through to design the three images.


Image 1: Butterfly

Gossamer butterfly

I first did some research on how to cut out images in Photoshop I found a lot of tutorials but chose the ones that are easier to follow. I then decided to use an image of a butterfly to practice on cutting, after I found the perfect picture I went and opened Photoshop and inserted the image by going to file open then clicking on the image.

placing the image in Photoshop

I found that by using the Quick selection tool you can cut out any images so I went on and did that but making sure to choose the quick selection tool instead of the object selection tool or the magic wand tool.

Quick selection tool

After choosing the Quick selection tool I made sure to click both the Sample All Layers and the Enhance Edge buttons to get a more clean finish. When I am done with choosing those I then get to choose from the quick actions tab if I would like to remove the background or select the object instead . I tried removing the butterfly just for practice but then clicked the select subject button then pressed enter to remove the background and have only the butterfly.

Removing background/ object

Lastly, I added a light pink background and text ( Gossamer butterfly ) which is the name of the butterfly In the image .

Before

After


Image 2: Football

The football cut out

I first  looked for a football image to use. I then, opened the Image in Photoshop by going to file open then clicking on the image. After that I right clicked on the object selection tool , clicked the box for sample all layers and Enhance edge, I found that the Enhance edge bar gives a more precise selection. Clicked select subject, then select the Cut button from the Edit menu.  Finally, I opened the background image in a new tab and pasted my cut out .

Placing the image

Cutting out image

Adding background

Before

After


Image 3: Bicycle

The bicycle cut out

I  looked for an  image of a bicycle to use. I then, opened the Image in Photoshop by going to file open then clicking on the image. After that I right clicked on the object selection tool , clicked the box for sample all layers and Enhance edge, I found that the Enhance edge bar gives a more precise selection, this part was important because cut out a bicycle is way harder than a ball because of its details, I had to also erase some parts. Clicked select subject, then select the Cut button from the Edit menu.  Finally, I opened the background image in a new tab and pasted my cut out making sure to fit it in the right place.

Cutting out  image

Placing image

Before

After


Design Resources


Images:

https://www.pinterest.co.uk/pin/570690584044238031/

https://www.stockunlimited.com/image/a-basketball-player-holding-a-ball-in-between-his-hand-and-his-hip_1676193.html

https://www.pinterest.co.uk/pin/4292562121591948/

https://www.pinterest.co.uk/pin/197102921181929886/

                    https://www.nhm.ac.uk/discover/news/2021/june/colombia-has-the-most-butterflies-in-the-world.html

Tutorials:

https://www.youtube.com/watch?v=F6QzzFTV6ow

https://design.tutsplus.com/tutorials/how-to-cut-out-an-image-in-photoshop–cms-36714


I used these tutorials to learn how to cut out images in Photoshop they were very useful for my design process as a result,  I think I am confident enough in cut out images using Photoshop.


Conclusion

The structure that was built into our Trello boards was very helpful for us to learn how to follow a structure when planning and writing down our processes. During this module, I learned many new skills using Adobe softwares Photoshop, Illustrator, Indesign, and After Effects. I also learned how to record a process and the value of planning. All of this, in my opinion, will be very helpful in the future.


Photoshop Task- Cutting out images. Spring Term

Design Ideas and Design Processes

The brief for this task was to experiment on Photoshop, cutting out images from their original background. There were multiple ways to do this and I wanted to practice with a few of them to grow my skills and gain confidence.

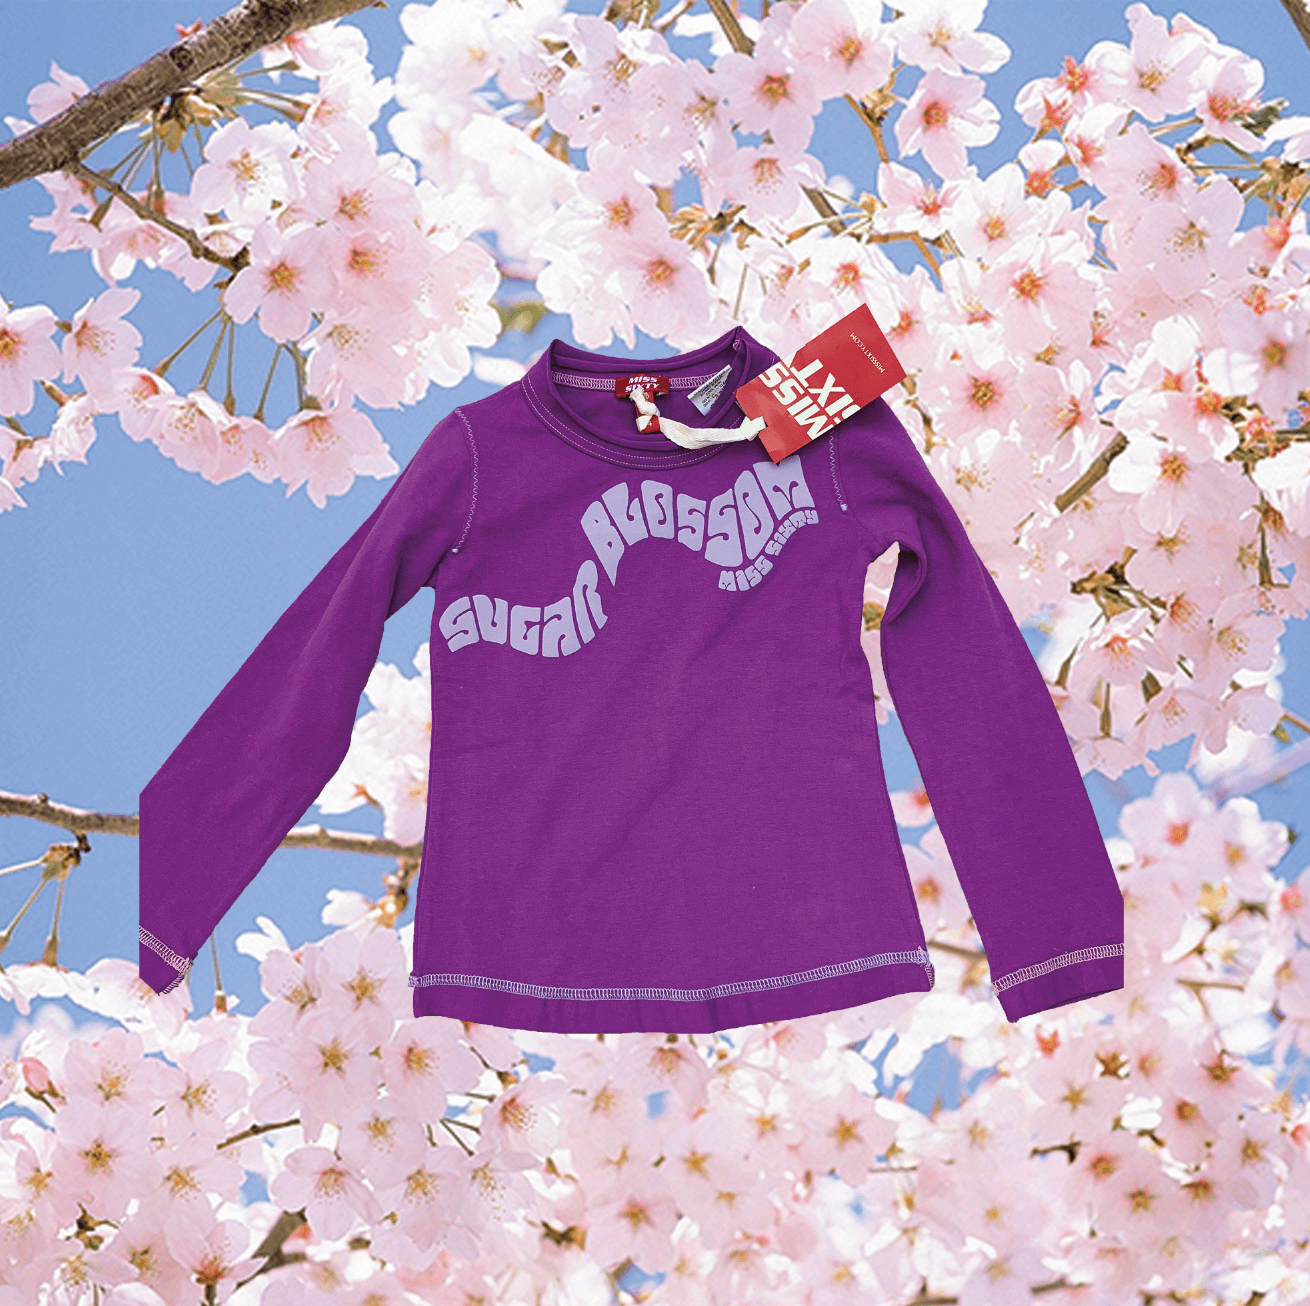
For my first idea, I chose to do a simple cut out in order to get familiar with the software. My job involves selling second-hand clothes, so I decided to edit some of the clothes that I photograph. For this picture, I used the Quick Selection Tool to select the top from the background. As the background was fairly plain, it was easy to select the top from the background. I then used the mask tool on the layers panel to remove the background. This successfully cut out the top. I then decided to add a background of blossom to make the image more creative. I did this by creating a new layer and placing it under the cut-out image.
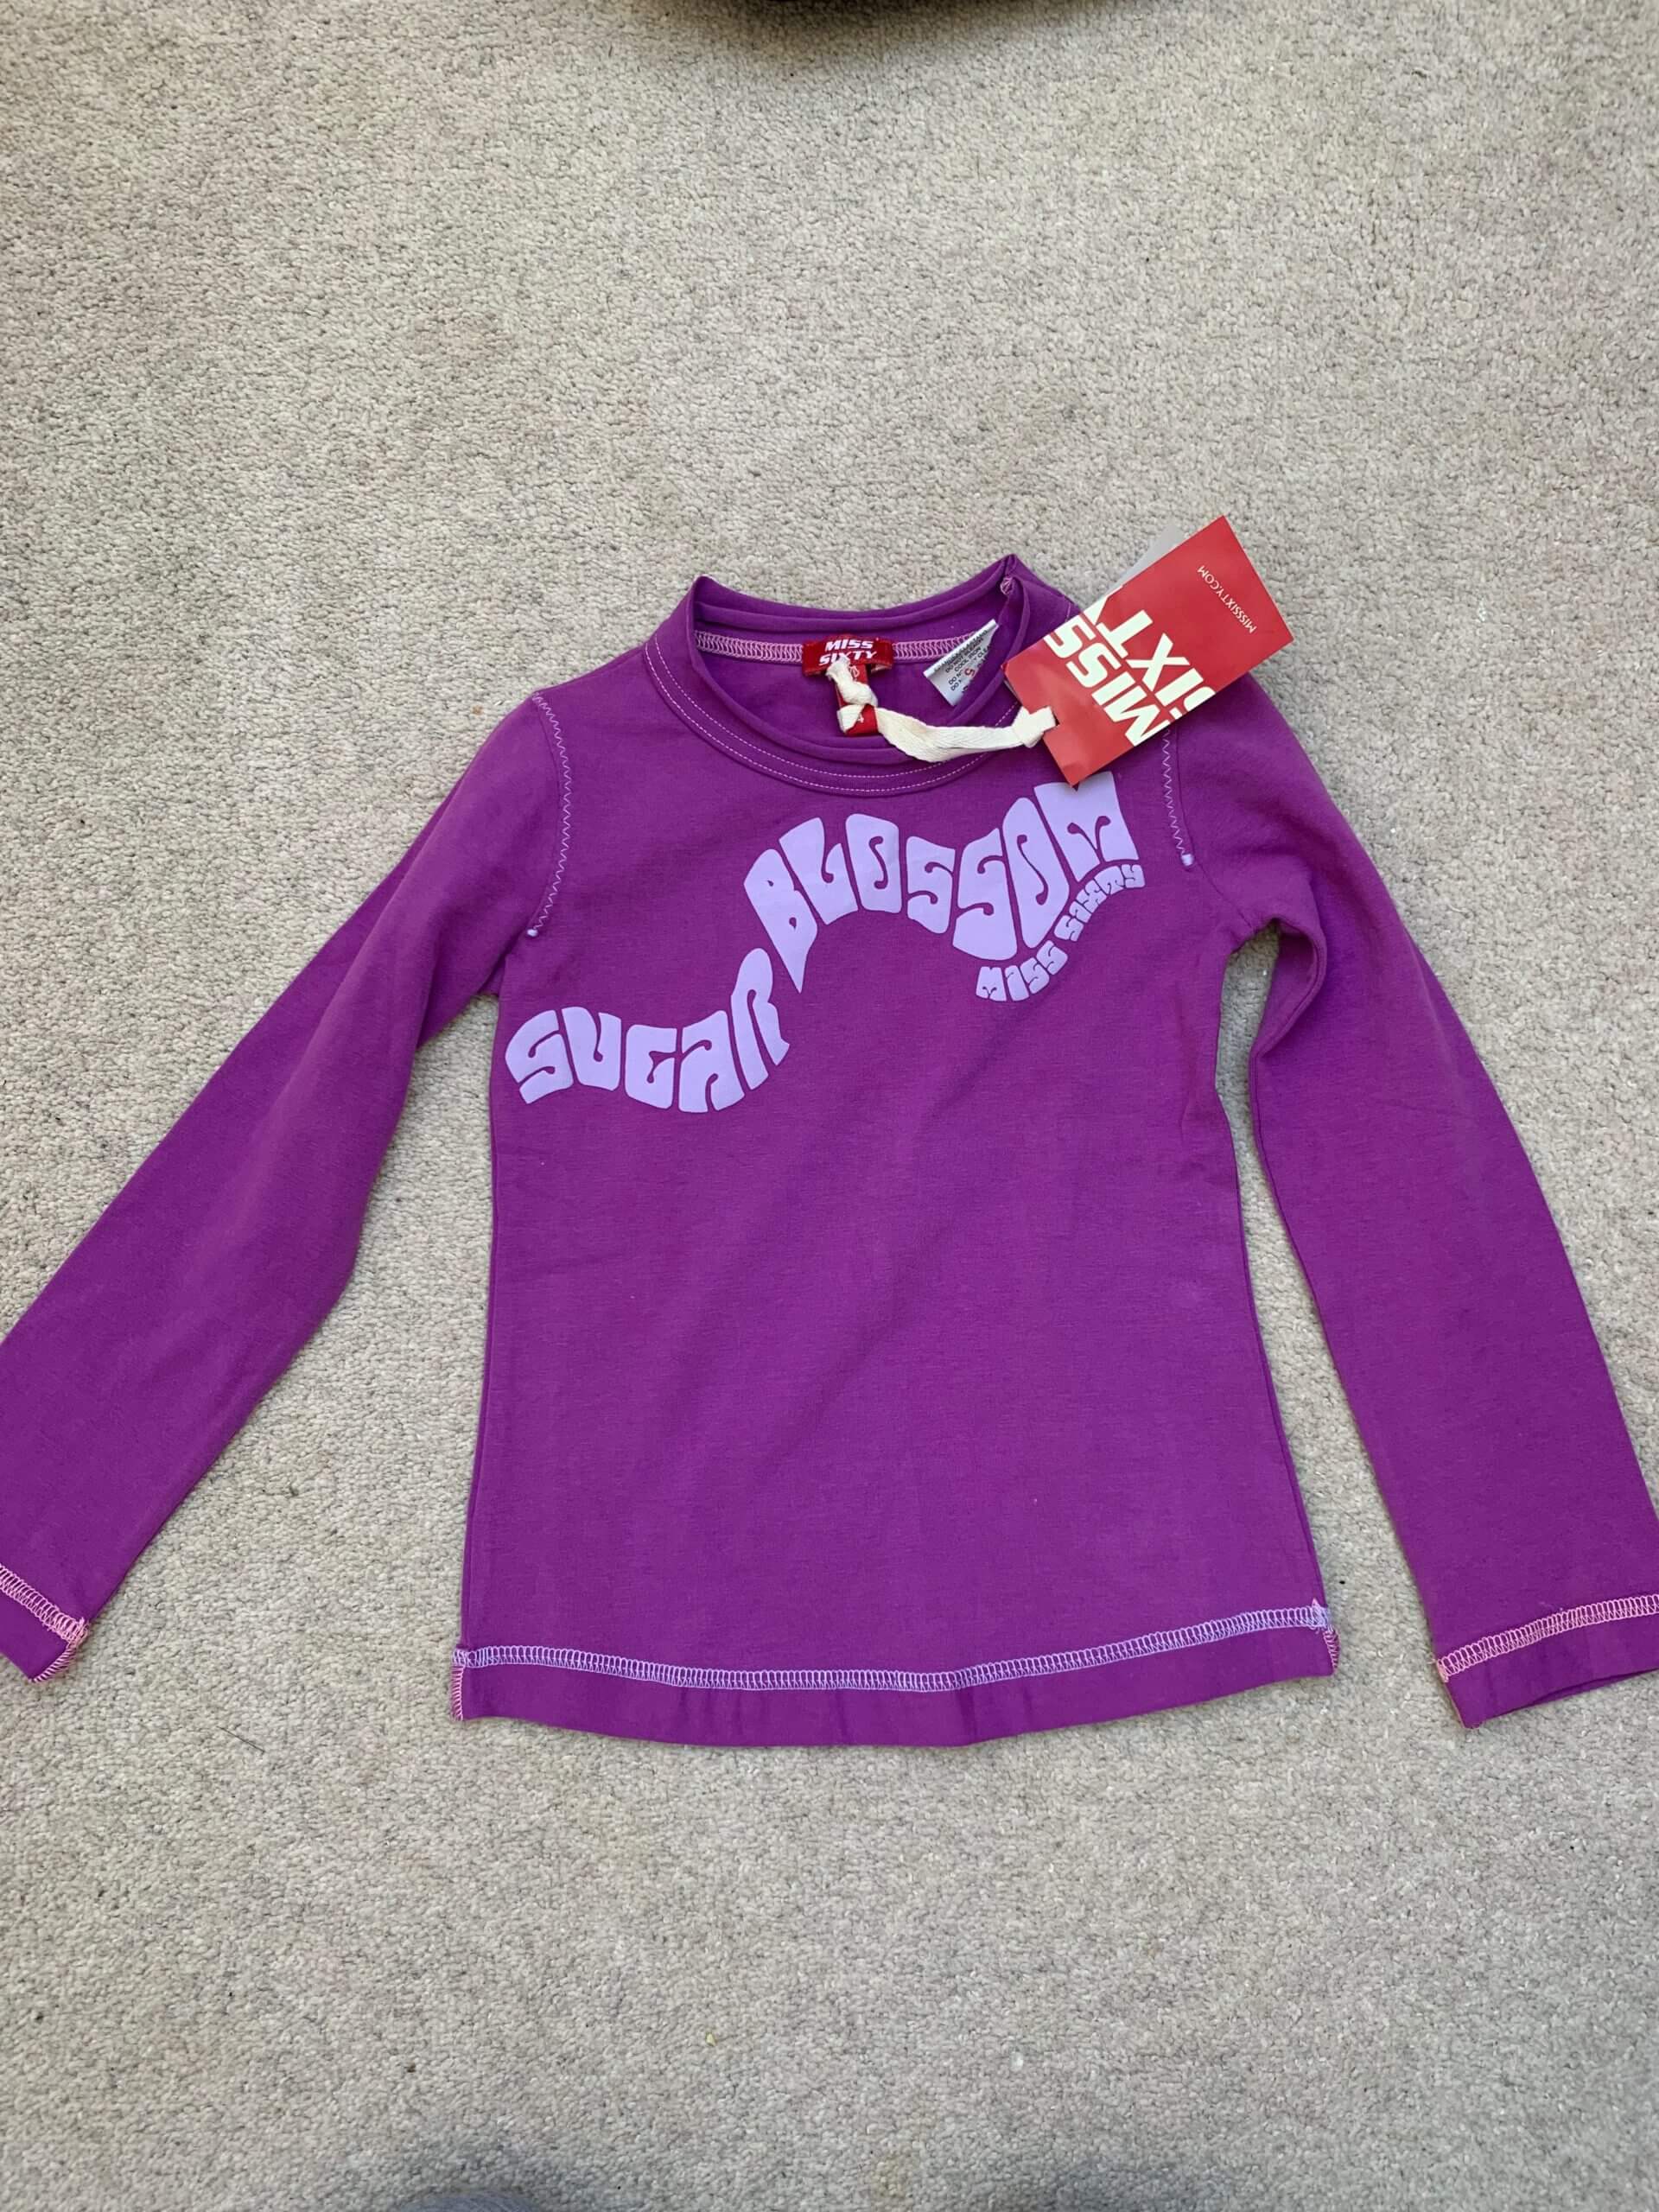
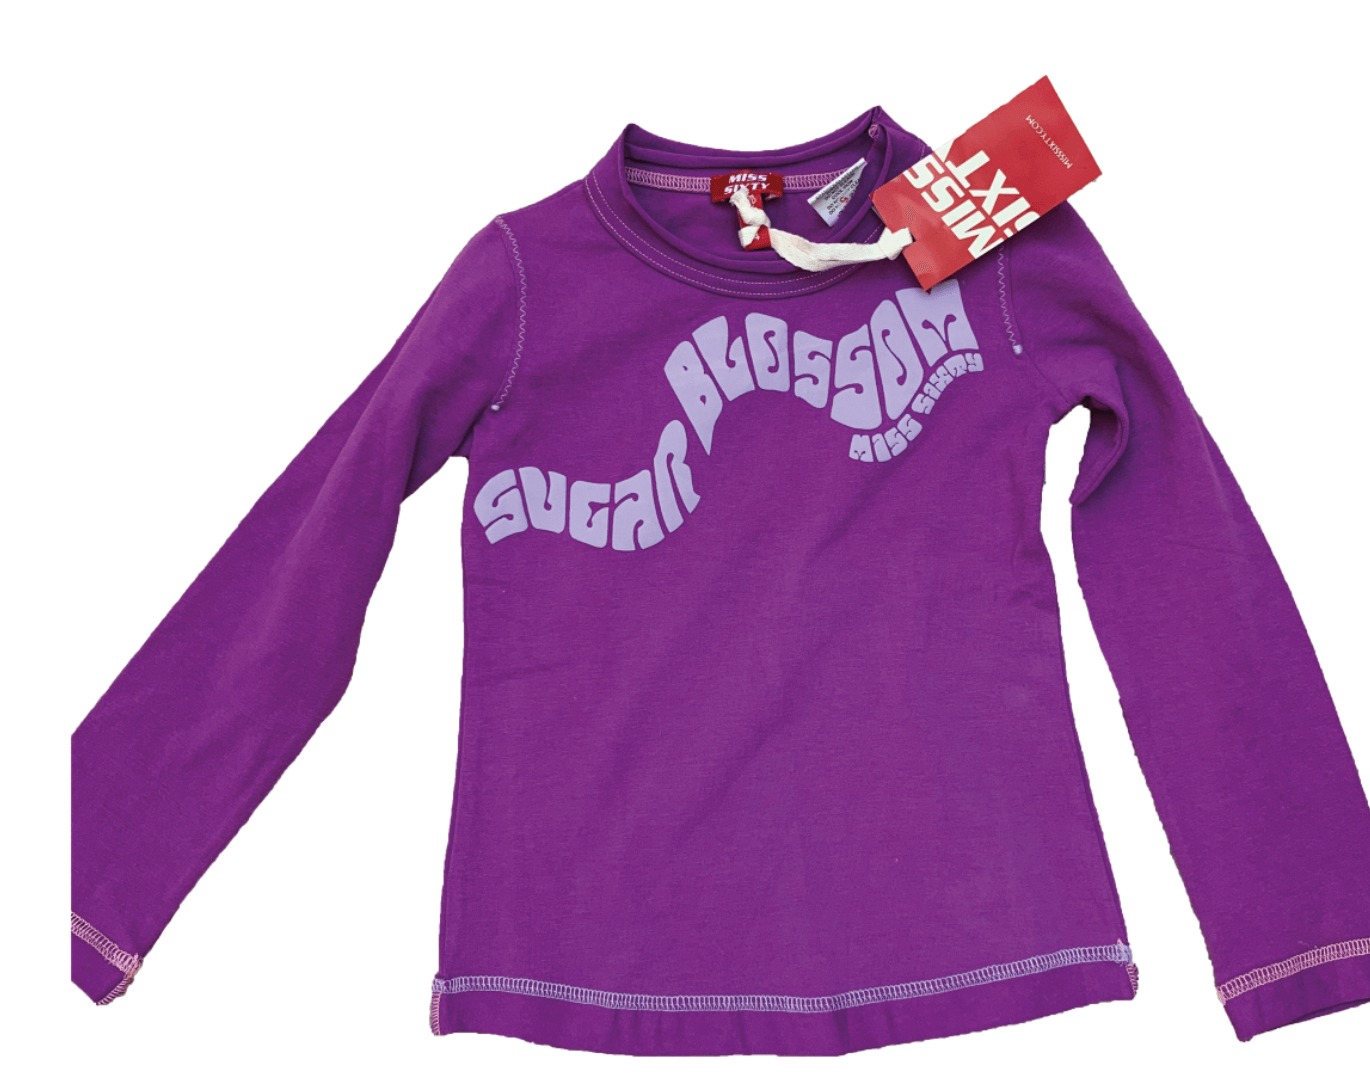
Original T-shirt Photo
Background removed via Quick Selection Tool
Final cut-out image with replaced background


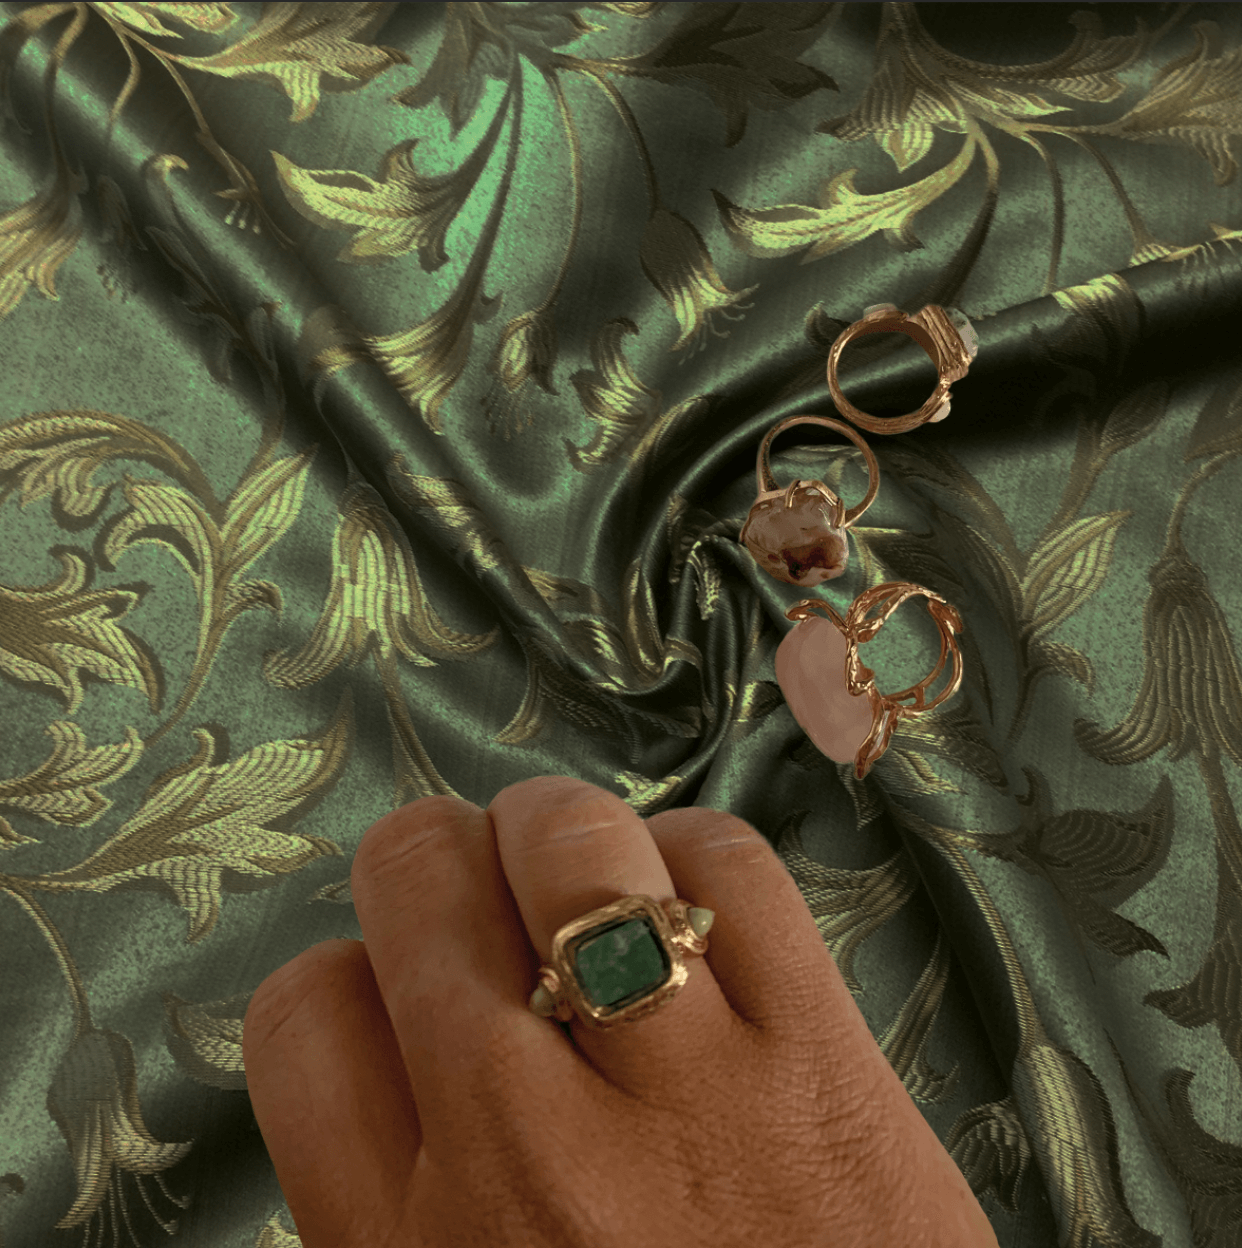
For the second idea, I chose to do a more complex image of a hand and some rings. This was more complex as there was space inside of the rings that I needed to remove. To do this, I instead used the ‘Select and Mask’ option from the ‘Select’ panel. This was fairly accurate in cutting out the image however it did need some refinement, so I used the quick selection tool at a zoomed in point to add or subtract an area to keep or remove. This then created a layer mask, and the background was removed. I used the eraser tool to smooth up any edges that hadn’t already been cut out accurately. I then put it on an exciting background that I felt worked well with the image.
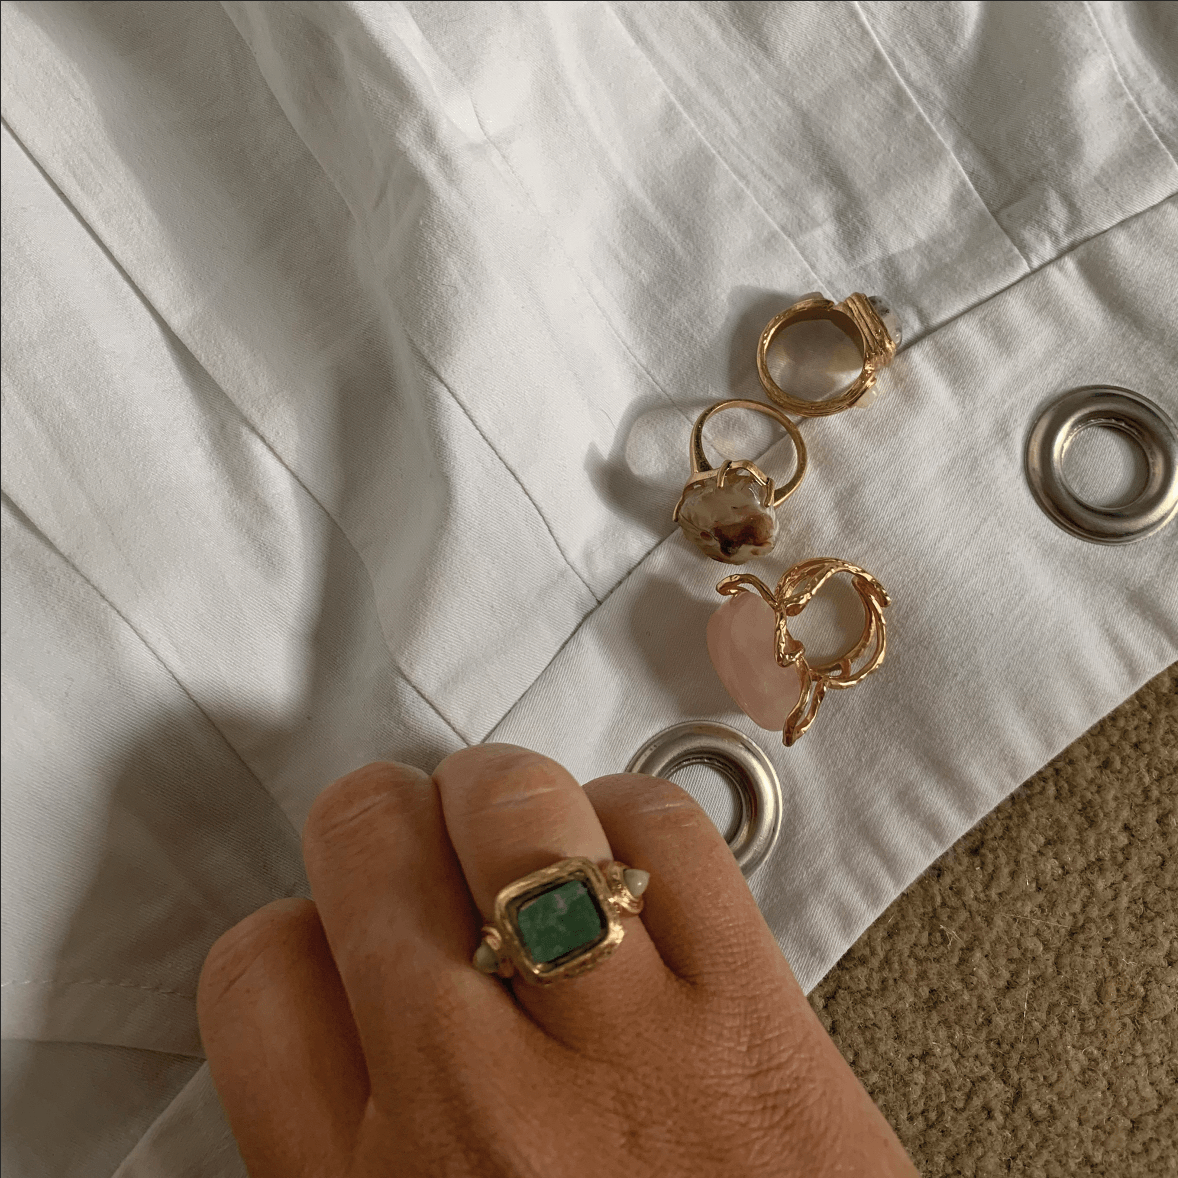
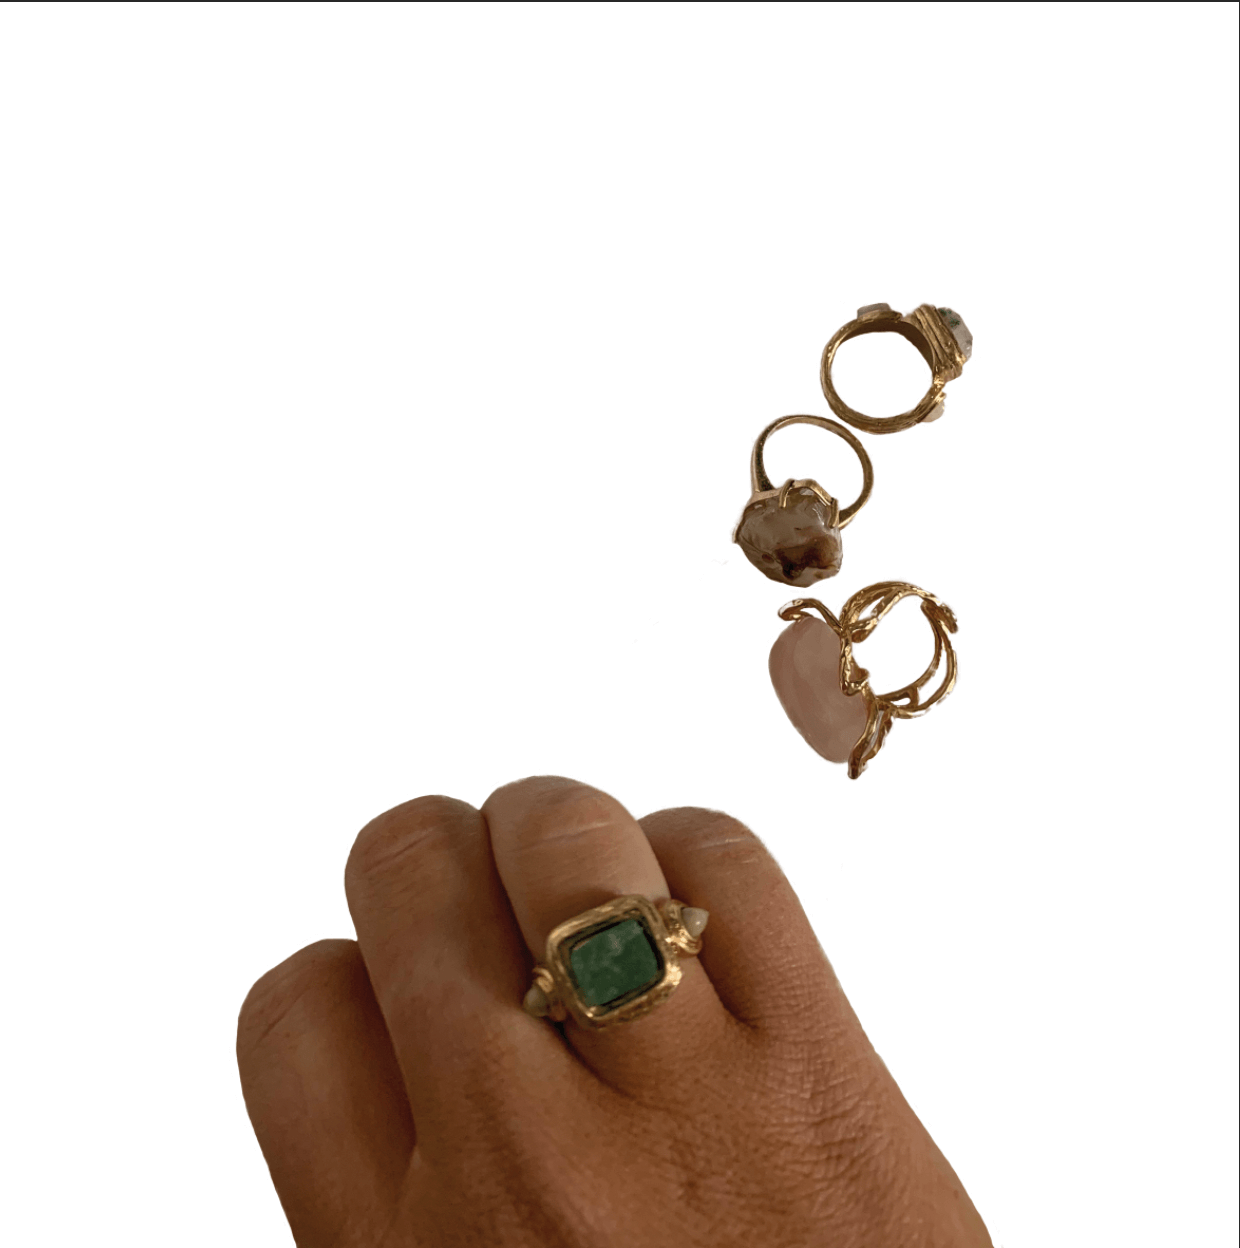
Original Rings Photo
Rings cut-out from background
Final edit of rings on new background


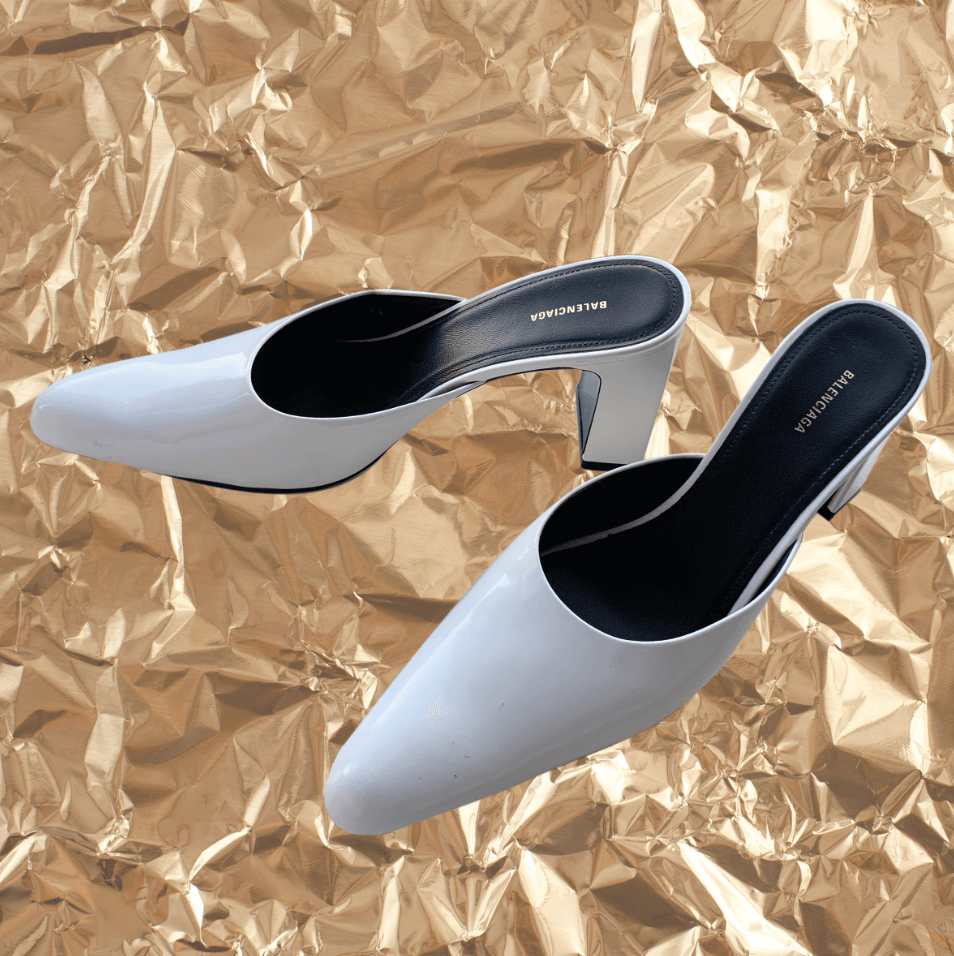
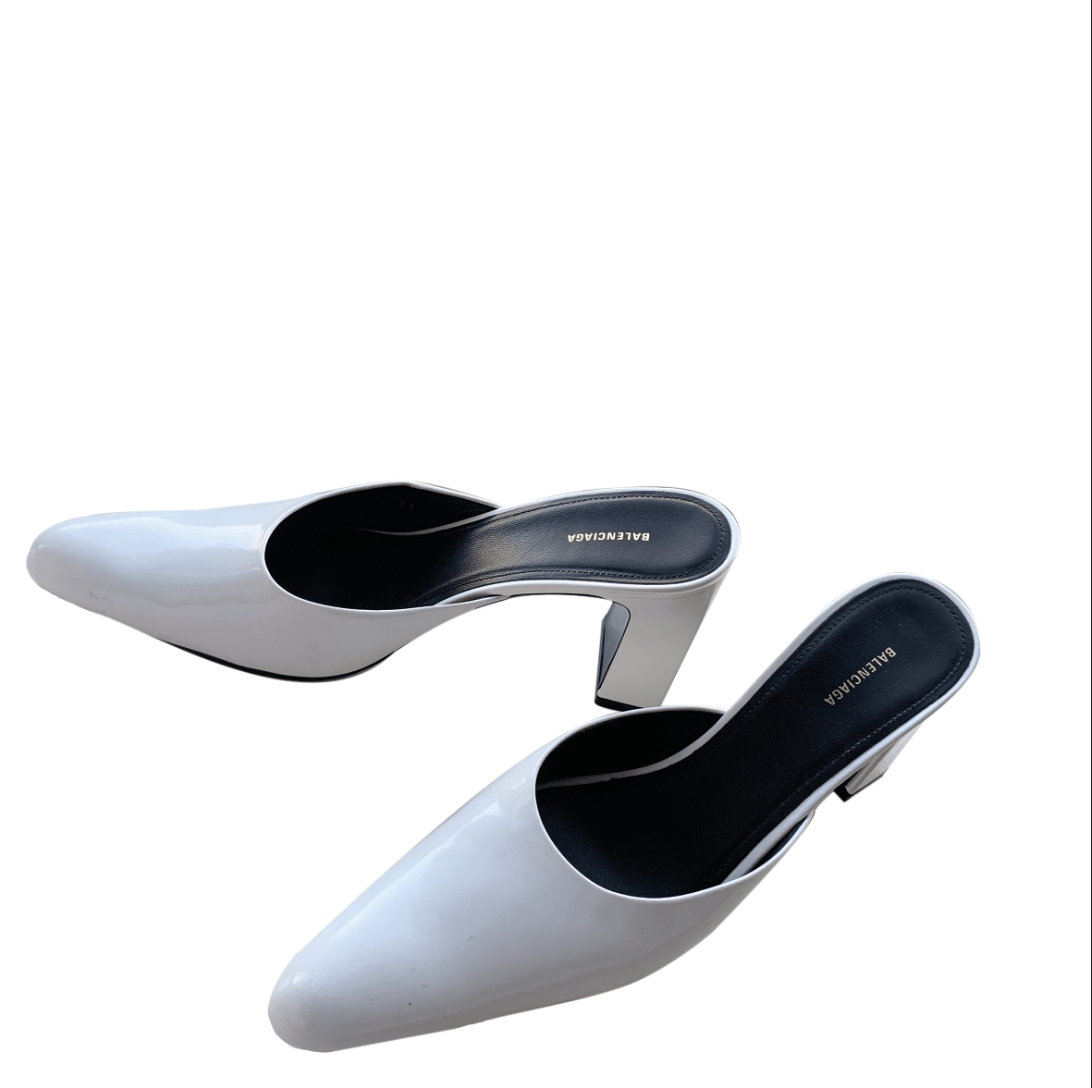
For the third idea, I did another fairly simple image of shoes as I wanted to try a new method of cutting out. This was by the pen tool and I made points along the shoe and then using the convert point tool, curved the points to get an accurate outline of the shoe. After making the path, I right clicked and selected ‘make selection’ and then used a layer mask. This then cut out the shoes from the background which I later replaced with a crinkled gold effect. I also used the eraser to correct any small imperfections.
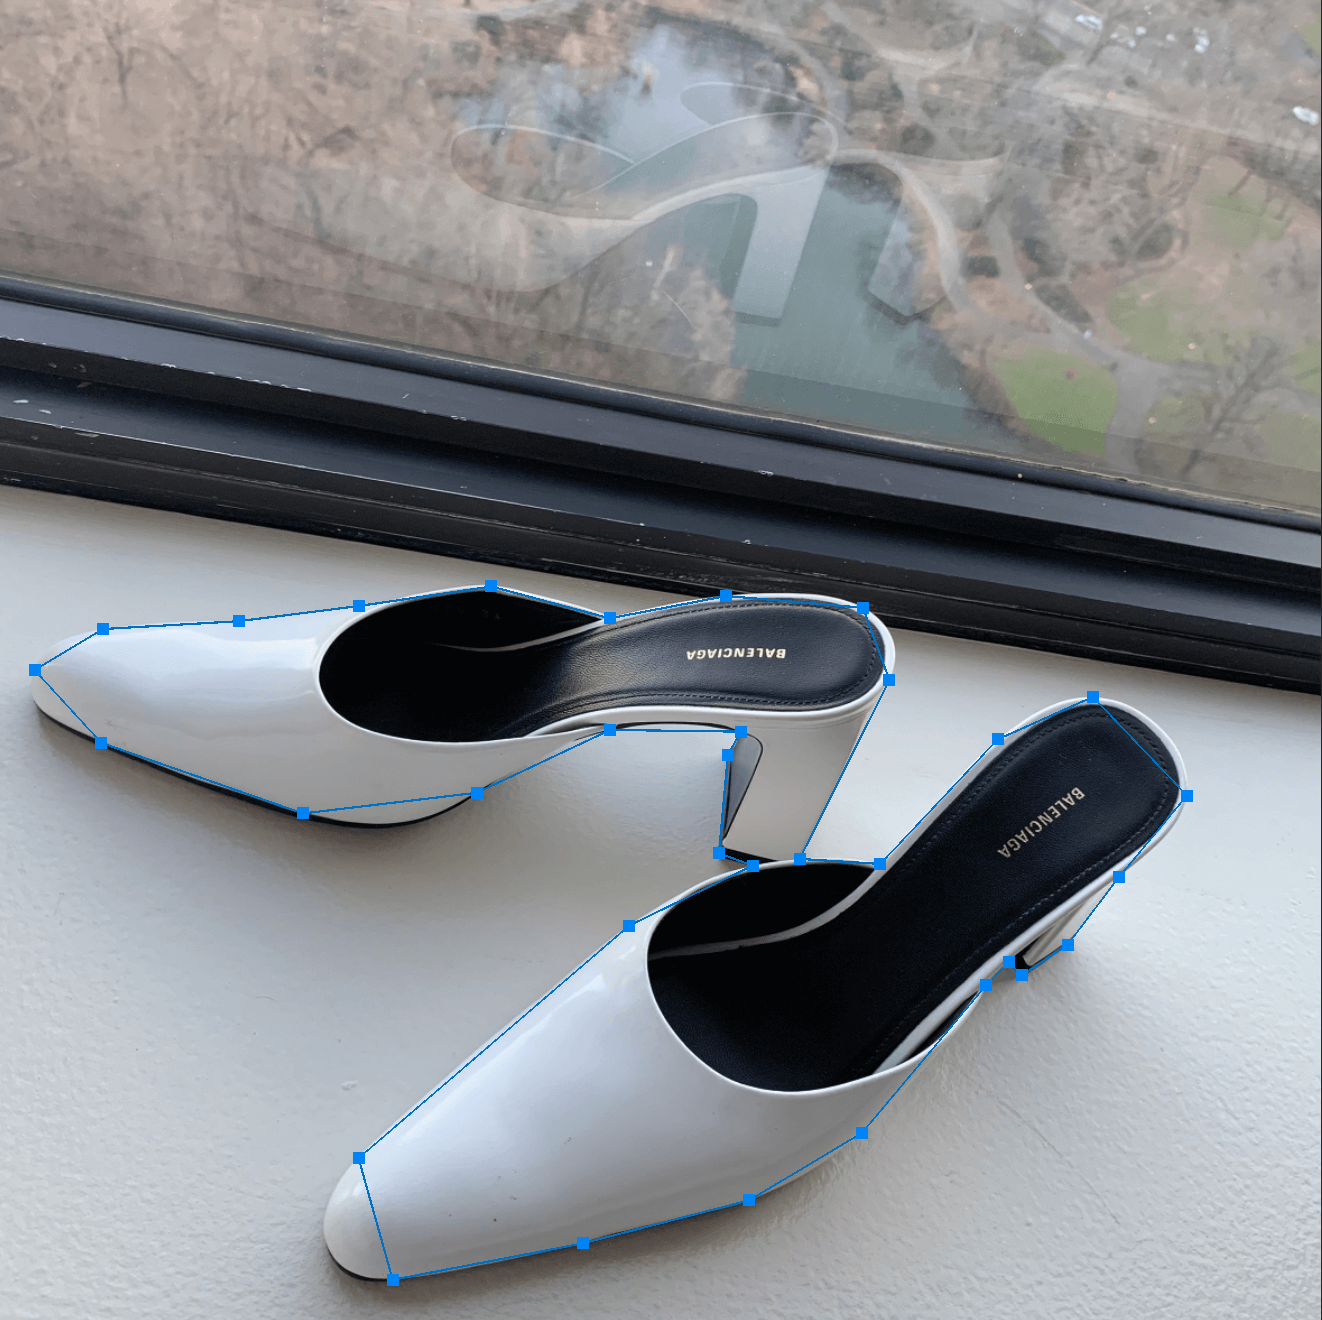
Shoes marked with pen tool on Original Background
Shoes cut-out from original background
Final image of cut-out shoes on new background


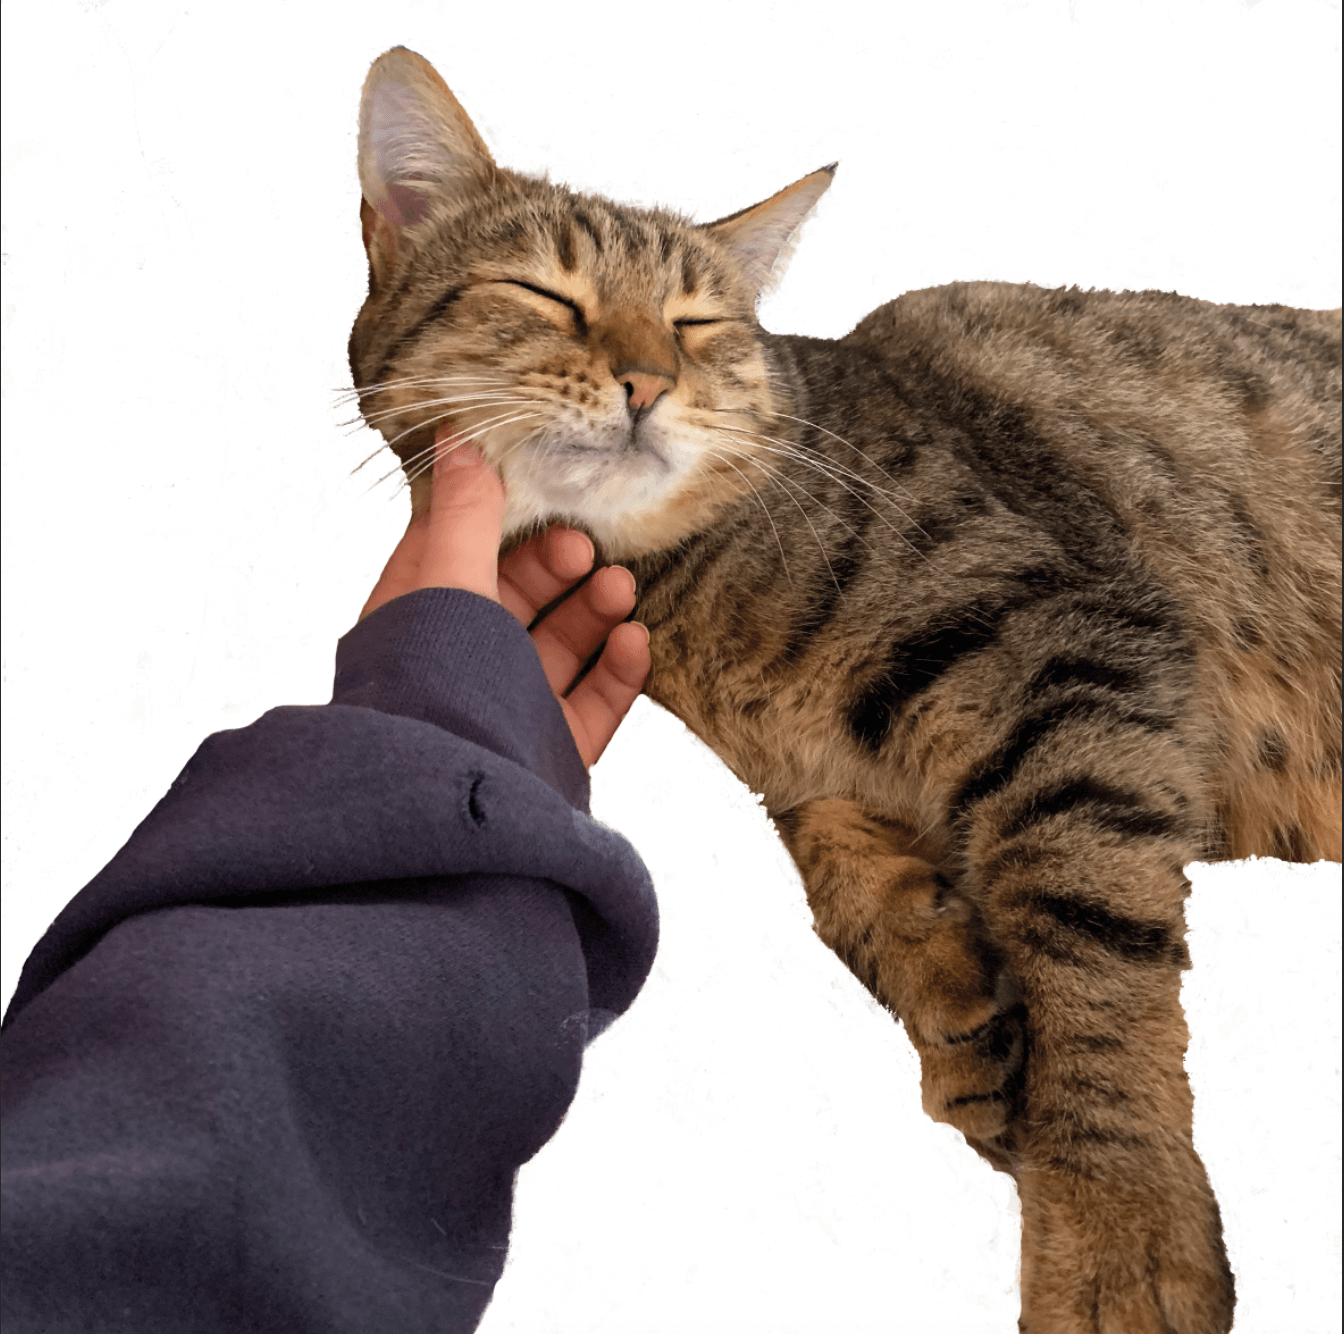
For the 4th idea, I wanted to push myself and use a more complex image with hair. Although it slightly differed from my fashion theme, I felt that the image was still relevant and visually exciting. For this, I used the background eraser tool and the colour picker tool to carefully go around the hair and select the colour that would not be erased. I still think that I need more practice using the method as the picture wasn’t perfect and some hair did get erased as it was similar to the background but felt that I had made a strong starting point.

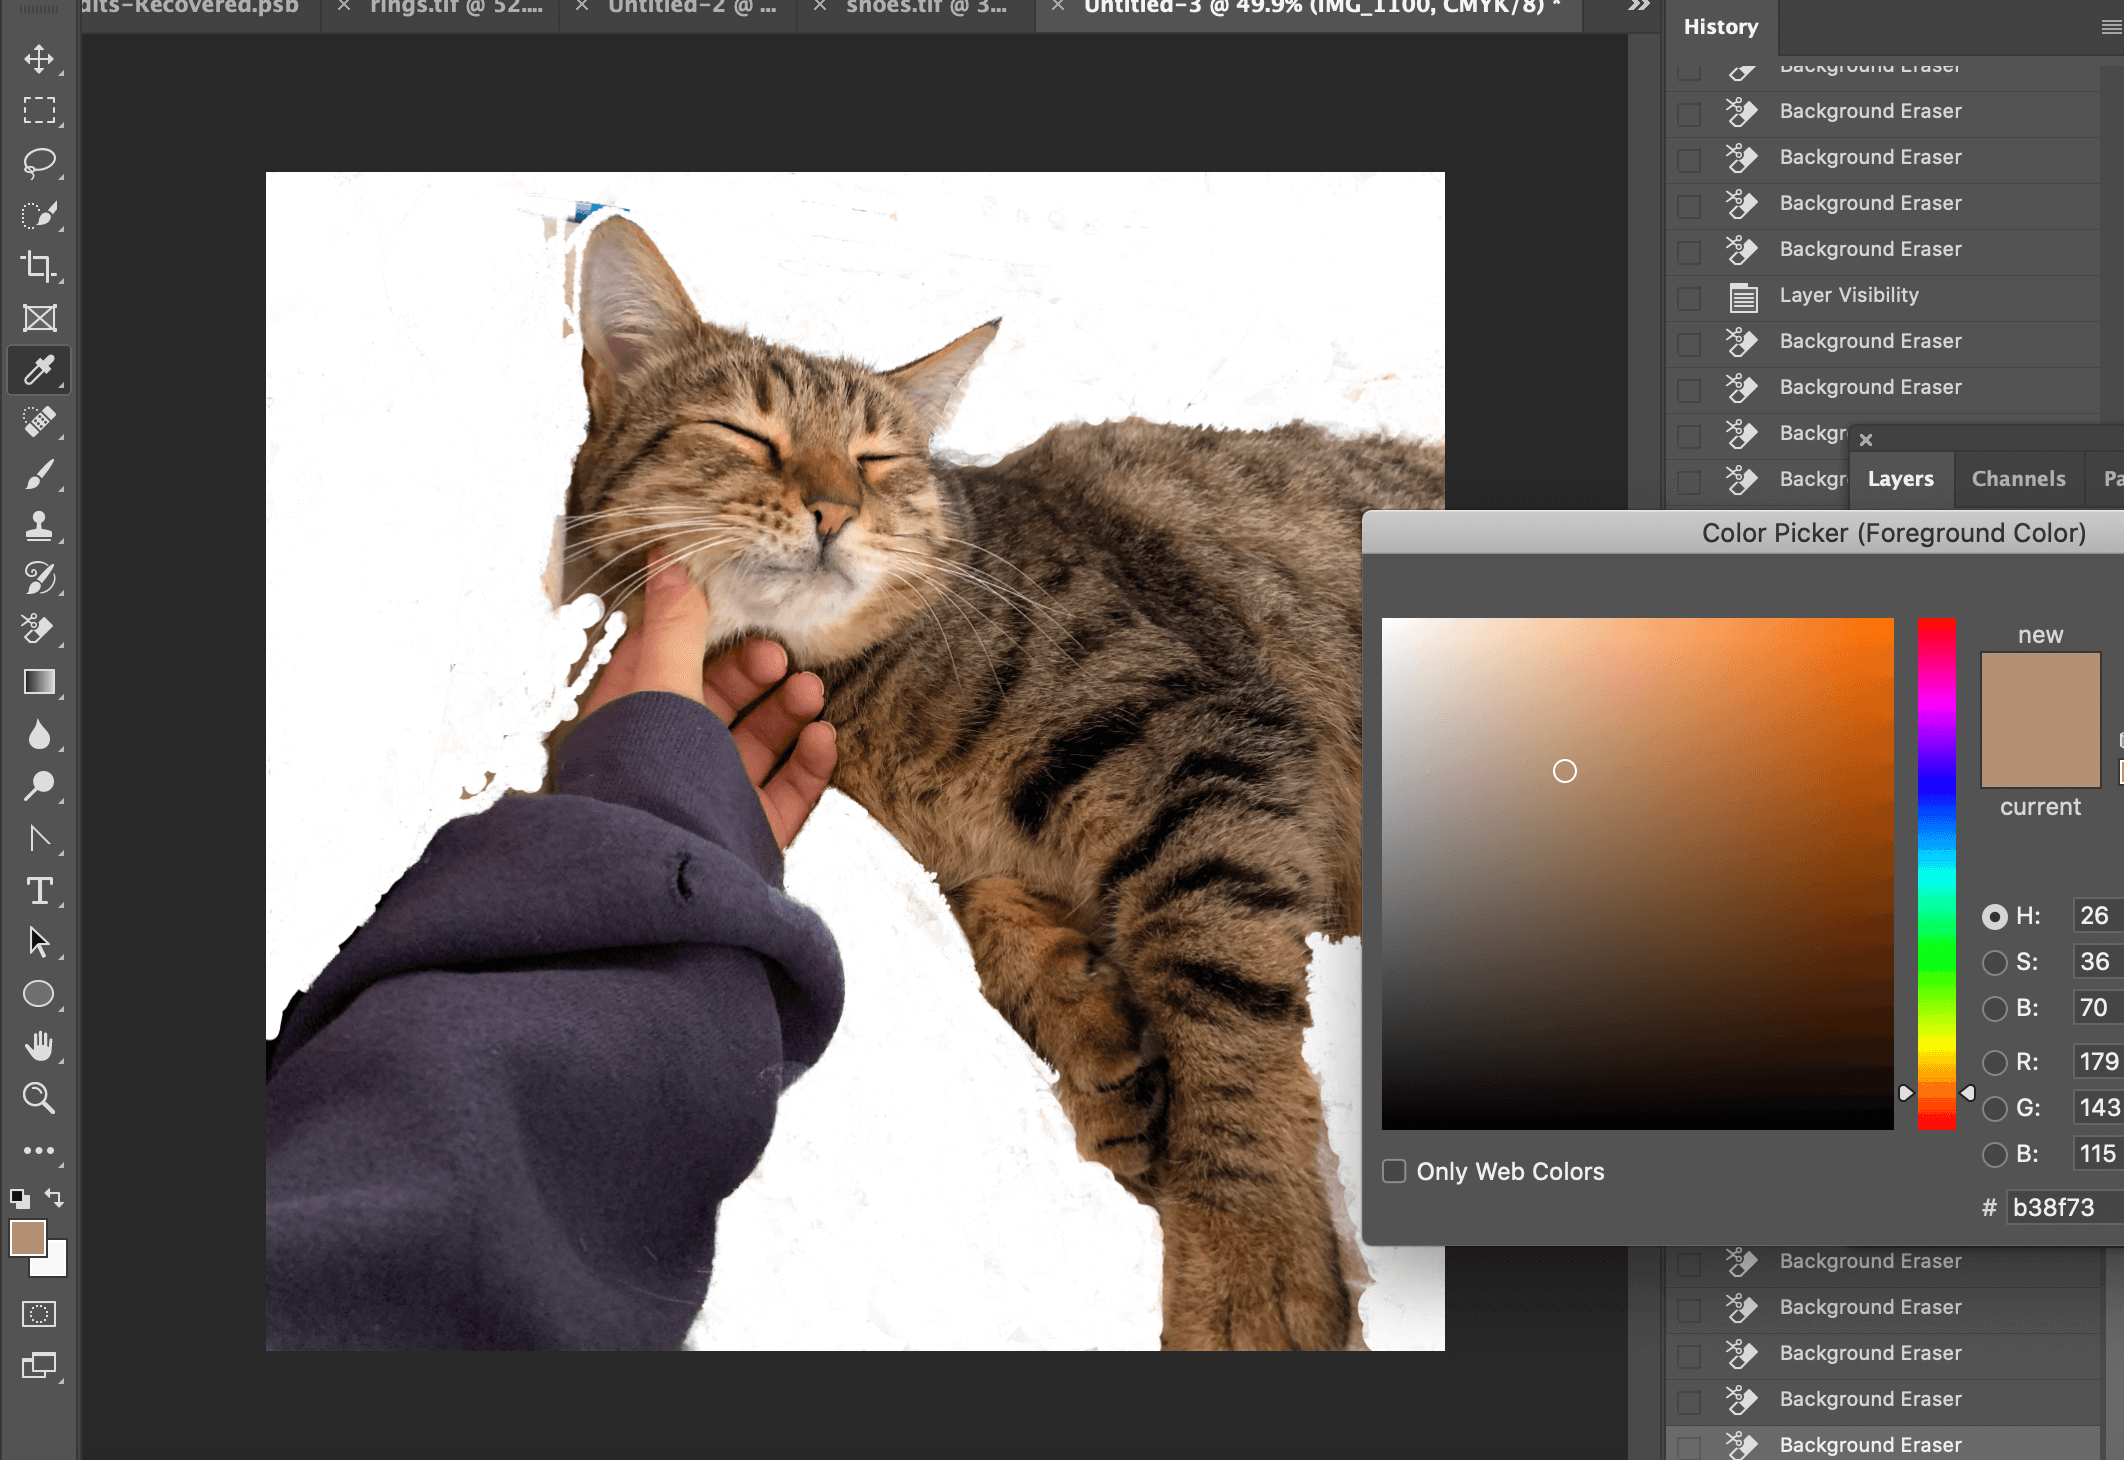
Original Cat Photo
Cut-out using background eraser and colour picker tool
Cat cut-out from background
Finished cat cut-out on new background


Software tutorials

Having only ever used the quick selection tool before, I did not know how to cut out complex images or any other methods of cutting out a background. I firstly watched all of the videos provided to us to get a general oversight of how to use different tools to cut out an image. This gave me a good idea of how to use the basics of all methods, especially the quick selection tool.

For the other methods, I used some YouTube videos to help me. For the third idea of the shoes, I decided to use the pen tool and found a very useful video – https://www.youtube.com/watch?v=awN1QVyk51o to show how to cut out the image using the pen tool.

For my most complex image of the cat, I used a YouTube video-  https://www.youtube.com/watch?v=Ag-bfUOBaCk explaining how to cut out fine hair. I do think that my image was slightly more difficult as the background colour was similar to the hair so in future, I will explore other methods alongside using this.

The tool that I did not use that we were given tutorial videos for was the lasso tool so this is something I would like to use and explore in the future. I would also like to explore other areas in Photoshop to edit the actual image such as how to adjust the quality of the image.


Resources for research and inspiration:


As I was only cutting the images out, it was difficult to get inspiration from anywhere other than the YouTube videos I was watching. There were many different methods to choose from but I decided to use the ones that were most popular as they worked the best. I chose the theme that I did because creative image editing is becoming increasingly popular in the media with people using Photoshop themselves to create cut-out images of fashion and psychedelic colours. The model Mimi Moocher has become an icon for creating these large cut-out collage images depicting her dressed in cool outfits and it is becoming a rapid paced trend on social media. As I have a keen interest in art and fashion, being able to cut out images on Photoshop and create these sorts of images is very beneficial. Photoshop is allowing people to present their pictures in a different way to everyone else and its very interesting to see what individuals create. I would like to also work on editing the actual image on Photoshop in order to produce high quality edits.

Images of Mimi Moocher found on https://www.vogue.co.uk/news/article/mia-regan-balmain-pre-fall-2021

Image may contain: Clothing, Apparel, Human, Person, Furniture, and Peyton List
Mimi Moocher fashion cut-out edits
Image may contain: Clothing, Apparel, Human, and Person
Mimi Moocher fashion cut-out edits