
Design ideas and design process
Final Design 1
The idea behind design 1 as a final design is that it shows one of the new skills I learnt for this task. This was my first attempt at working with layer masks and I can now say that I have a better understanding of them after carrying out this design. I feel that this design shows that I understand how to use layer masks to design a creative photo.
Final Design 2

I have chosen design 2 as a final design as it shows another one of my new skills I have learnt from a tutorial. Whilst also pushing my experiments with layer mask; by using layer masks in a different way to the previous design. I am happy with how this design turned out, and feel that I am getting the hang of layer masks and will start to use them more in the future. As they are a really useful tool. I also feel I now know how to better manipulate images by merging two together. As previously when I have tried to get an outcome similar to this it has looked messy, But then again I did not use layer masks before.
Final Design 3
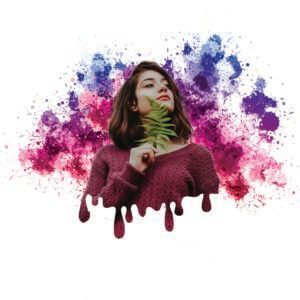
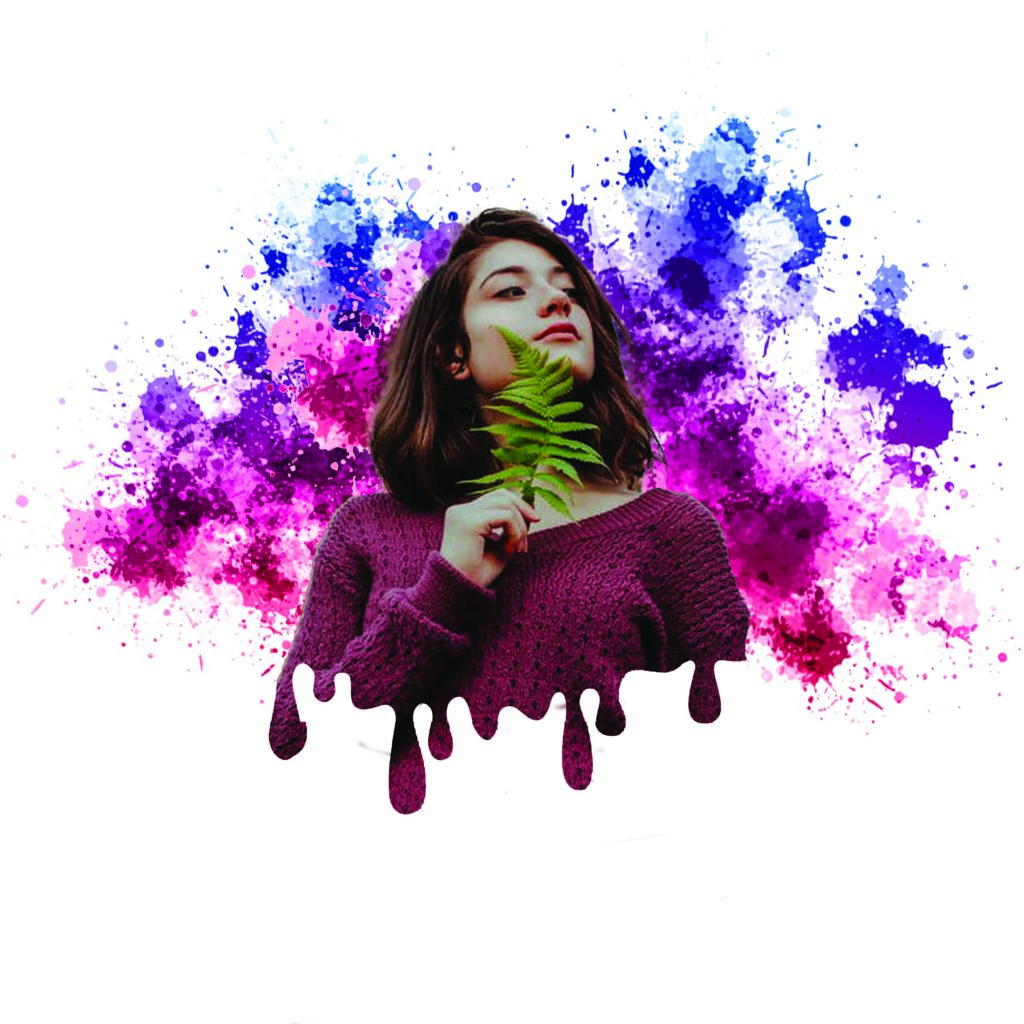
For my last design I wanted to experiment with layer masks to create a dripping / splatter effect. I found this hard to do with one of my own photographs as I have never done this before and I struggled to find a simple picture that was right for this. So I decided to download the file provided for one of the tutorials. I chose this design as one of my final designs as I feel that I am starting to master layer masks and because of this, I was able to create an image with dripping and splatter effects. Also this designs shows a different experiment to my previous ones.

For my final design I was set to try and experiment with dripping and splatter effect created through layer masks. I watched a couple tutorials on this but I felt I hadn’t quite found the right one to follow yet. I used my last tutorial and downloaded their files to follow their tutorial. I was going to use my own images to follow the them but I found this very hard to do, as I wasn’t sure on how to do it still. So I decided to use their images they provided.

I started off by using the quick selection tool to select the girl in the photo, I then added a layer mask to get rid of the background in the image. I duplicated this layer but made one invisibly.
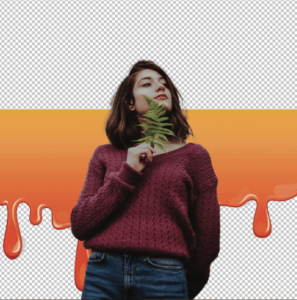
My next step was adding the dripping image provided onto my art board. I used the magic eraser tool to get rid of all the unwanted white on this layer. (I never knew the magic eraser tool existed so this was a new tool for me to learn).
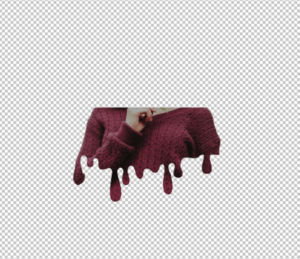
I then placed the dripping image behind the layer of the girl and resized it to where I would want the dripping on the girl. Whilst being on the dripping layer, I selected the mask of the girl and pressed add mask.
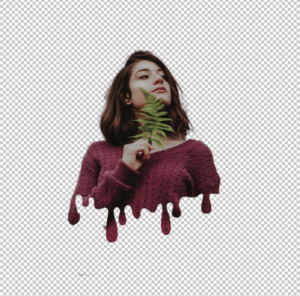
I then made the original layer visible and erased the bottom half of the girl, creating the dripping effect seen as the image above.
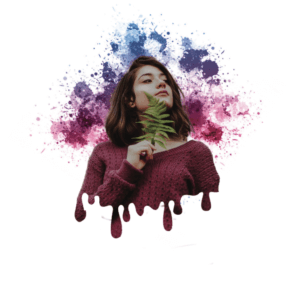
After knowing how to do this, it is quite easy to create the dripping effect using layer masks. Although it is still a long processes. Instead of leaving my design here, I stretched it further by adding splatters into the final design.
Software tutorials
I used a wide range if tutorials for this task; some more useful then others. In this blog I will discuss the more useful of the tutorials I was, focusing on the ones that helped me with my designs.
Combine black and white with colour Is the tutorial I found most helpful with when creating my Design 1. I never knew how to properly do this before as I always found a long winded way round this before, so it was useful watching this and learning about an easy way to achieve this. I wanted to try this for one of my designs and follow it step by step to make sure I understand and knew how to achieve this.
Changing the image in the background I used this tutorial for my Design 2. Whenever I have tried this before it has always come out looking messy or unprofessional. So it was useful watching this tutorial and learning how to do it properly and creating a good outcome without getting frustrated along the way as it isn’t working or coming out how I want. So this was a good tutorial to watch as I learnt how to properly do it. Which will enable me in the future to create work that I have wanted to create before but didn’t know how.
For design 3, I watched many tutorials to try and understand how to create this effect. I found that each tutorial taught it in a different way. The tutorial I followed for this design was Dripping paint splatter. I found it the most easy to follow and one which had all the images available to download to follow each step. What I worked out following these tutorials is that you need images to full-fill the dripping and splatter effect, or your other option is to draw it. There is not one tool (that I know of) out there to create this effect.
I would like to further my skills by putting this into practice and creating more complex designs. I would also practice the dripping and splatter effects different ways on my own photos, as this will enable me to perfect my skills. I plan to do this by watching and following more tutorials.
Resources for research and inspiration
I mainly used tutorials as my resources for research and inspiration. As for this task, it wasn’t just about the outcome, rather it was about learning how to use layer masks to the fullest so in the future I can create unique designs. Therefore, I didn’t spend time looking at outcomes that I could create, rather how I could create these outcomes.
Design 3 was the design that used the most research before creating. I always saw design pieces like this and wondered how to actually get this outcome. Was there a tool? Was it a filter? I still feel there is more to this then what I learnt for this task. Therefore this is something that I want to explore further in the future. But what I can tell you, is what I know now and what I learnt.
Have a go at the ‘Dripping and splatter effect’ that I linked previously, as I believe this tutorial is a good starting point and the most easy to follow and understand. Along with the way they did it using layer masks just is easy to understand compared to some of the other tutorials that I found.
If you want to experiment another way try Dripping effect. I found this tutorial useful and easy to follower, as the designer talked over his steps of what he did and why. I would recommend trying this after the previous tutorial.
Overall, for this task I learnt how to use layer masks and now that I understand them; they are actually a very simple and useful tool to know and use. Not only do I know how to use layer masks one way, I understand how to do multiple different effects using them. This was through the variety of tutorials I watched.