
Design ideas and design process
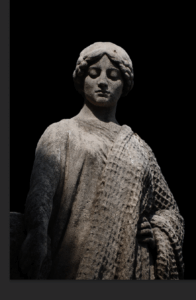
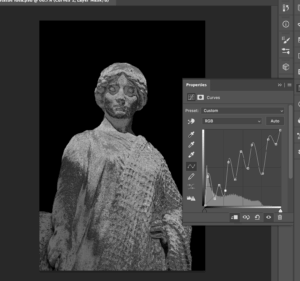
Golden Statue
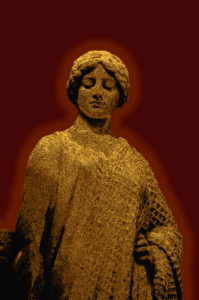
This idea was to help me develop techniques for manipulating light and material on photoshop. Here, I have turned a stone statue into gold. For a graphic designer, I imagine it is an invaluable skill as it breaks free from the restrictiveness of the materials of the photographed object.
I began by isolating the statue and placing it against a black background. I then used curves to make the stone appear to be metallic. Apparently the best way to do this is to manipulate the curve into a zig-zag pattern.
The final step in the process is to use colour look-up, which I have become quite familiar with in the past few weeks. I selected the EdgeAmber option, which was surprisingly simple. I wonder if that is all there is to creating the illusion of material.
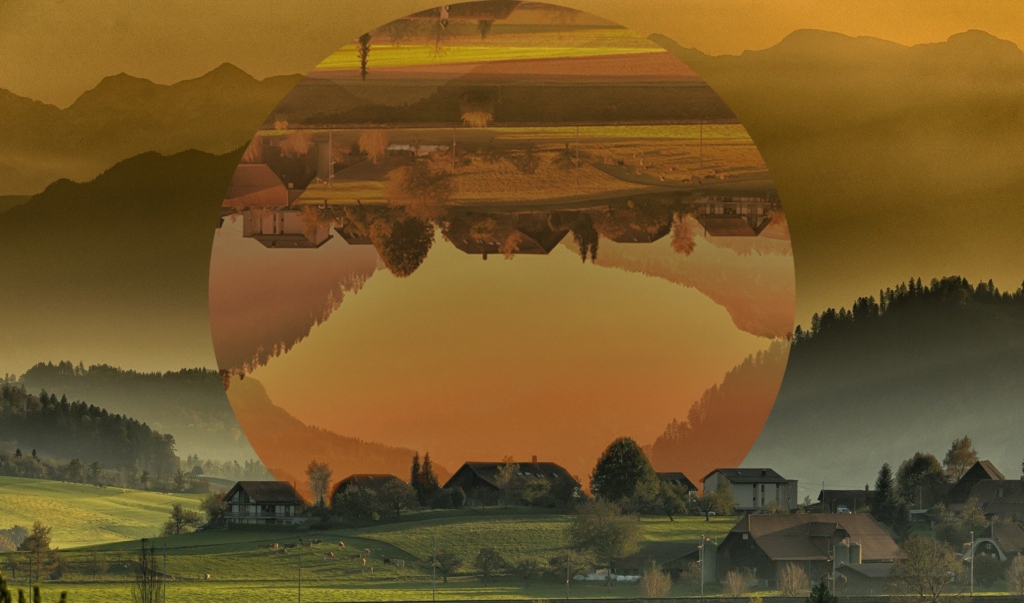
Autumn Mountains
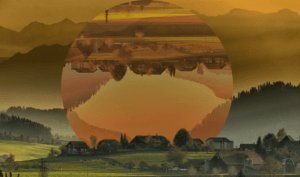
Using colour look-up again, I have created an intriguing image that shows one section in two different states. As such, it would have a lot of potential for a travel-based podcast.
The first step to achieving this was using command+J to duplicate the background layer. I then used the ellipse tool to draw a circle between them and turned the top layer and the circle into a clipping mask. This circular cutout could now be repositioned over the original image.

I used colour look-up and curves to change the colouring of the cut out so that it looked more autumnal, creating some contrast in the image.
Tropical Rainforest
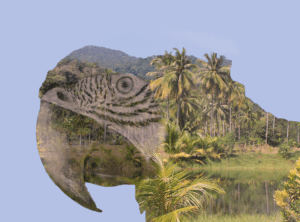
This design crams a lot of detail into a very small space. When considering a podcast image, this is an important consideration, as you’d want the images to make sense on a small display like a phone screen.
Like with my gold statue idea, I began with the selection tool and a solid colour adjustment layer to isolate a section of the image. I decreased the saturation down to -100.
I turned the parrot’s head into a clipping mask after placing an image of a rainforest on top. After that, I used the eyedropper tool to recolour the background so that it matched the sky.

The finishing touch was done by changing the blend mode to multiply, so that the colour was richer.
Software Tutorials
The “Midas Touch” Filter in Photoshop! (Gold Effect)
I used this tutorial to create the golden texture. In a previous week I used a similar tutorial to manipulate light within an image. This tutorial on the other hand, helps me to manipulate material. My next step is, logically, to combine both techniques. This will allow me to progress beyond the constraints of the images I am working with.
Photoshop tutorial – How to make photo effect “Geometric Reflections”
Clipping masks seem an integral function of photoshop, and this tutorial has really helped me build confidence with them. This tutorial in specific involved flipping the clipping mask over, which I did not know was possible. There is clearly a lot more for me to learn about even the most basic aspects of this software. Moving forwards, I should experiment with clipping masks further, so that I can know the true extent of their use.
Double Exposure Effect – Photoshop Tutorial
I had been recommended this tutorial on YouTube for quite some time, so I am glad I finally viewed it for this task. Like the last tutorial, this involved clipping masks, but in a way that was much more complex. I think this technique is more technically impressive, so in future I will have to layer clipping masks up so that I can make even more impressive designs. To obtain true mastery over this software, I should combine everything I know, form the lighting and materiality effects to the more technical clipping mask techniques.
Resources for research and inspiration
For this Photoshop task, I used only images that were available through Pixabay. I used them primarily as a source of inspiration, so that I could then look on YouTube to find techniques. I have found that the high-quality images found on sites like Pixabay and Pexel are a great source of free images for use in artwork. I hadn’t actually used these sites before this module, so I now feel like I am no longer constrained by which images I might have on my camera.
- https://pixabay.com/photos/rain-forest-palm-trees-river-273780/
- https://pixabay.com/photos/macaw-colorful-parrot-animals-5952965/
- https://pixabay.com/photos/statue-monaco-antique-figure-4115144/
- https://pixabay.com/photos/mountains-village-trees-hills-615428/
A great advantage of using images like this is that for most purposes, the number of images available are unlimited. There is also a huge number of images for any one topic, so there is a high chance that you can find one with just the right angle, colours and lighting. This way, if your skills on photoshop are limited like mine are, these websites can do a lot of the work for you.
Another week, I also used Pexels, which is a similar site. I think using these websites has really helped me build confidence with photoshop as I feel a lot less limited by what I know how to do. Compared to software like Illustrator, Photoshop seems a lot more resource based, so it is important to have a supply of images I know I can dip in to.