
I’m Ethan Nunn, a first-year student on the BA Graphic Communication course hear at Reading. As part of our TY1 SK module, we were asked to reflect on one of our self-selected tasks we’ve been working on for the last few weeks; I have chosen to write about what I’ve learnt about Photoshop, especially in developing creative images.
I’m unfamiliar generally with developing creative images; I see myself predominately as someone who uses such images, not create them. Thus, my knowledge of Photoshop’s more creative features is lacking substantially. This week, I’ve chosen to start correcting this, to develop a breadth of knowledge across all of graphic communication.
Design ideas and design process
In this task, I had to develop three different designs – they’re shown below. In this article, though, I’ll be dealing with only one – design idea 3.
- Design Idea 1 was used to develop skills related to curves and image editing generally, with a specific focus on colour in images.
- Design Idea 2 was used to develop skills related to Photoshop’s Patterns feature, and also to develop skills related to Smart Objects and Filters.
- Design Idea 3 was this design idea, and will be spoken about at more length in this article.
I’ve selected Design Idea 3 as the focus of this article as it contains by far the most interesting inspiration and goals besides technical improvement in Photoshop. Read on!
Design idea 3: Inspiration
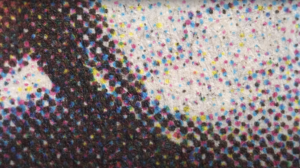
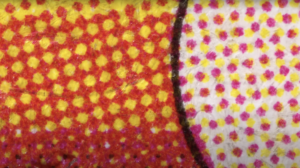
To begin with, let’s talk about inspiration. I was inspired predominately by a YouTube video I’ve recently watched – Dots by Posy, available here here on youtube.com. Below are a few stills that served as particular inspiration, from the same video:
I was also inspired, for this task, by a love of magazines, especially Emigre. The Emigre magazine was published between 1984 and 2005, and was known for its incredibly adventurous design, as well as its more nuanced debate around the interaction between writer and designer. One of our tutors, Eric Kindel, wrote an introduction to a the magazine and the discourse surrounding it in 2017 to promote the Department’s then-running exhibition – it’s well worth a read.
Specifically with Emigre, I was inspired by the enormous blocks of both type and graphic that drew attention to the chaos of the page layout. The rectangular blocks, however, still succeed in bringing some hierarchy to the page: clearly there is a grid involved somewhere, and across pages articles generally remain in the same place and in the same type.

[Publishing information: Berkeley, Emigre Graphics, 1989; image credit: Letterform Archive.]
I set about designing an image that adopted the same principle of Emigre in that the work of the designer is above – not below – the content that it works with, but in a pictorial sense. I also wanted to include some referencing to colour halftones.
Design idea 3: Process and tutorials
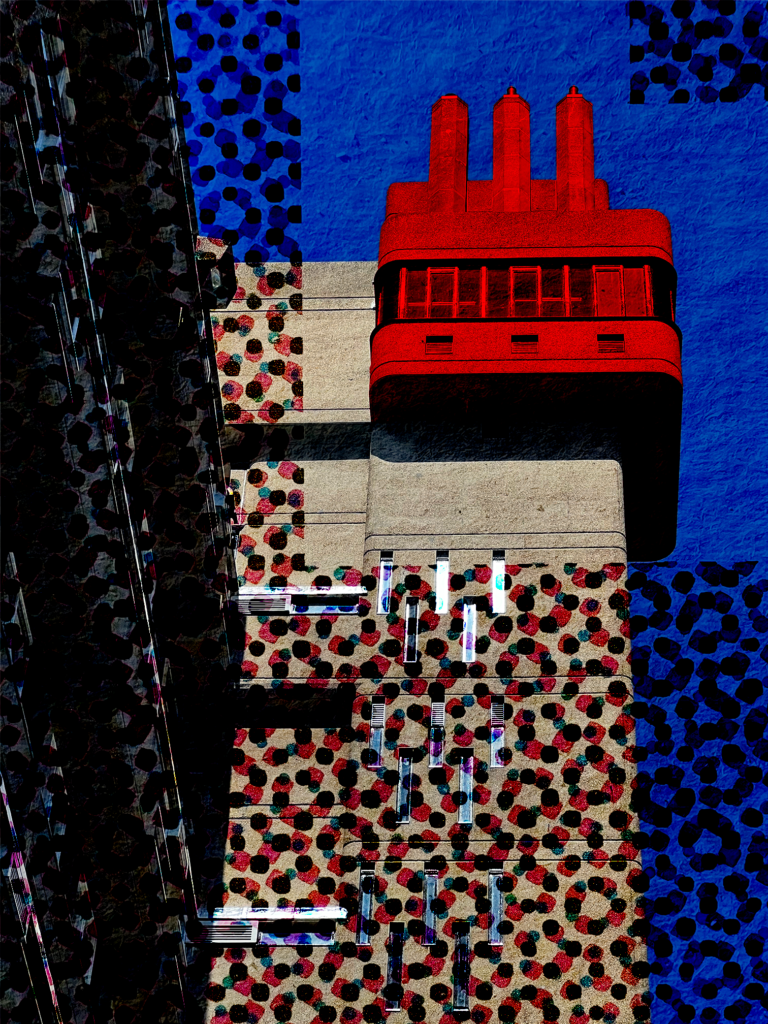
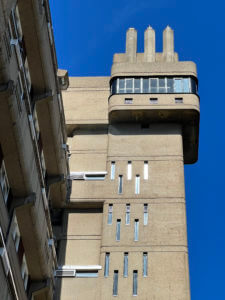
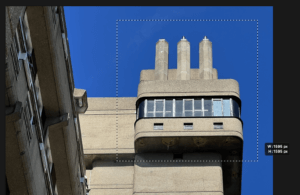
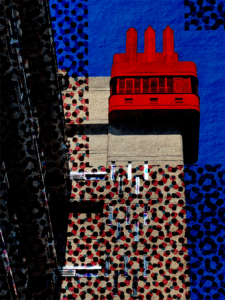
I started out by assessing which photograph I wanted to use. Eventually I settled on this photograph that I had taken over the winter break of Balfron Tower, located in Tower Hamlets, London, showing detail of its lift shaft. I liked particularly its perspective and colour palette, which is typical of a building in the brutalist style.
I then considered how I – as the “designer” – could become more involved in the photograph. I firstly considered cutting out the photograph using Select and Mask. I used this tutorial to remove the background of the photograph.
But although this was the most obvious tool, it did not really inspire me – maybe because the background gave the photograph that rectangular framing that used to such a great (and successful) extent in Emigre. In addition, the magazine did unexpected things; removing the background was expected.
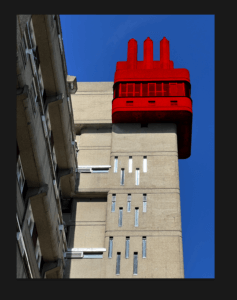
Reconsidering it, I came to an understanding – via its brutalist architecture, Balfron Tower represents equality – each floor is laid out the same, and the exterior finishing is the same across every storey – yellow-grey stonework. I thought, therefore, that it might be interesting – and unexpected – to undo the removal of the background and select the only thing in the photograph that isn’t the same – the lift machinery at the top.
To select this part of the building, I used an entirely new tool – the Quick Selection tool (specifically, Marquee Quick Select), using another tutorial I found online. Dragging a rectangle shape over the lift machinery was a simple-enough operation – more difficult was the operation of refining the selection, which I needed to do with the brush tool.
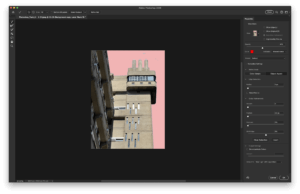
I then created a new colour fill layer and set the layer blend to Darken, after reading article on using blending modes. I was extremely happy with this result. Although I experimented with other colours, in the end I chose a full red: the contrast against the sky worked particularly well to create discomfort in the viewer and achieve the aim of not meeting users’ expectations.
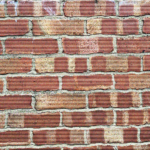
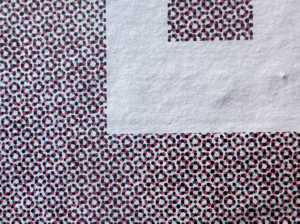
It was time now to insert the colour halftone layer. On the day of designing this poster, I had come across an extremely large billboard; approaching it at a human scale allowed me to take a close-up image of the CMYK dots the printers there had used. I cropped, distorted and enlarged (all three activities being outside the scope for explaining in this blog post) such that I had the following image:
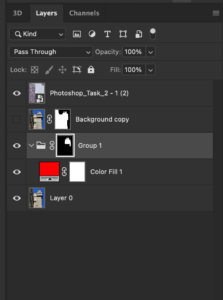
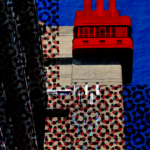
Applying it to the image that I had achieved an incredibly effective result, and resizing and moving the image, as well as setting the blending mode to pass through, yielded the final design idea, which I was extremely happy with.
Reflecting on the design process and my knowledge of Photoshop
My knowledge of Photoshop has definitely increased since I started this task, and I suppose that the idea of going against the norm – through the inspiration provided to me with the Emigre magazine – helped that pheonomenally. I explored masking, selection tools and different types of fills; and perhaps, to me, the most confusing part of Photoshop – blending layer modes – is finally figured out.
Whilst I am happy with the final outcome, and have technically learnt lots, I am unhappy that the dots from the halftone effect perhaps excessively remove understanding from the user. It is a fine balance when positioning oneself as the middle person between the author and user, and here I feel as though I got somewhat carried away in the design I lost sight of the user, who may not even be able to understand that a tower block is being illustrated.
With that all said, my decisions were guided by my inspiration, and it cannot really be argued that Emigre represents the very best of layout and accessibility – indeed, its purpose is to not do this. In this way, my image does work. The likelihood of me using this same graphic style again is limited, but the tools I have learnt will be exceptionally useful as I traverse the world of Graphic Communication.
To develop my skills further, I could take a look at LinkedIn Learning or another online learning platform – but what works for me generally is trawling through the menus of an unfamiliar application and finding out what it can do from that. Now, just to find the time to do just that!