
Design ideas and design process:
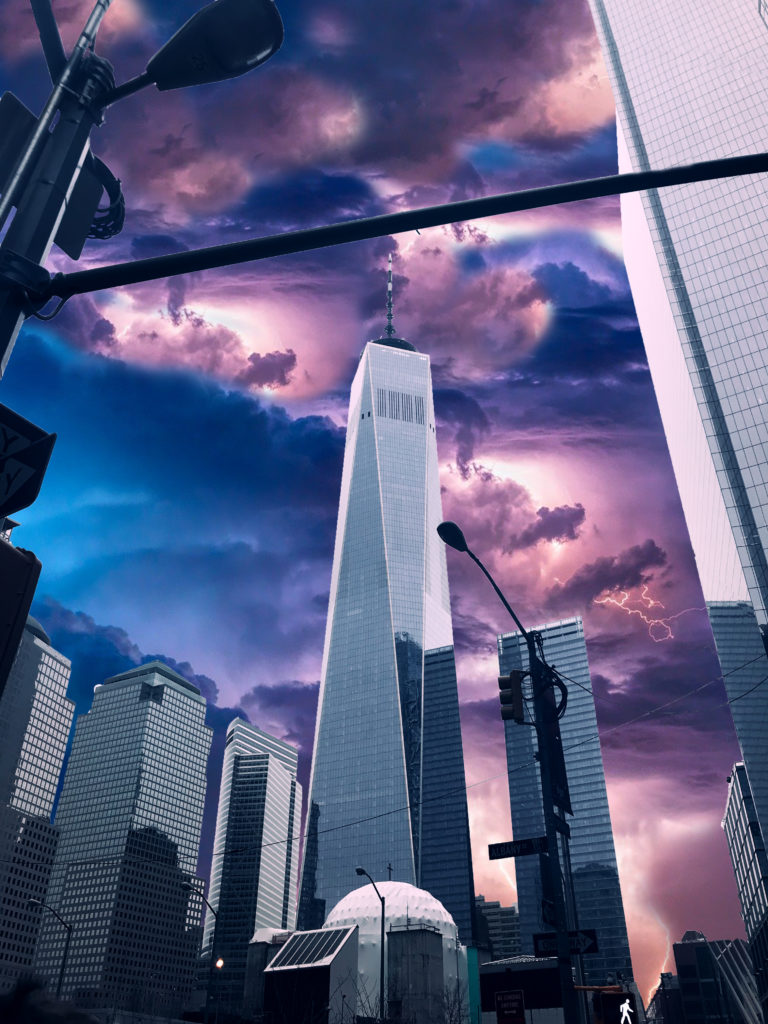
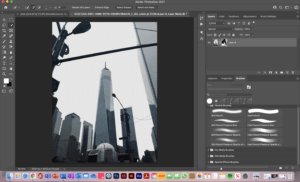
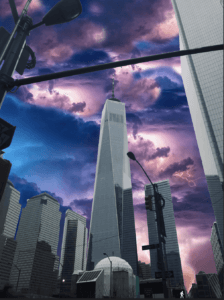
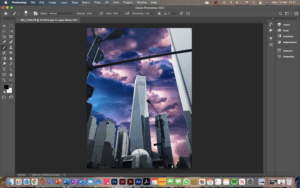
For this design, I used my own photograph that I took whilst in New York. I chose this image as it was of high quality, and the composition was interesting. I also chose this because the background didn’t have too many buildings in it so I knew it wouldn’t be too complicated to isolate as this was my first time using the software. I first used the selection tool to select the sky and parts of the background that I wanted to remove, adjusting the size of the tool in order to get my selection as accurate as possible. I then used inverse selection to select the buildings and everything else that was in the foreground of the image so that I could make that selection a clipping mask therefore removing the background. I then fixed some details further on the clipping mask layer with the paintbrush tool using black to take away and white to add back some of the image, again adjusting the size of the paintbrush as and when I needed to. I then went back in with the clone stamp tool to get rid of some of the thin wires that were running across the buildings, as I had removed them along with the sky in the background. The results of this removal can be seen in figure 2.
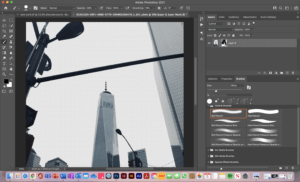
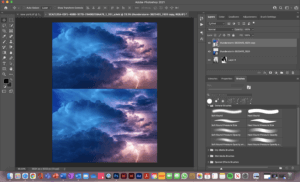
Once I felt I had accurately cut out the background I then went on to place the new background image into the file. I used ‘place embedded’ to do this. I scaled the new background image to half the size and duplicated it so one was on top of the other shown in figure 3. This then allowed me to merge the 2 images into one layer so that I could then use the clone stamp tool to blend them together. Once I had blended the background images, I then moved the layer below the original photograph, leaving that as the new sky for my New York image.
I chose to edit the foreground image as, in real life, if the sky was really that colour you would see pinks and blues in the reflection of the buildings. I first increased the contrast which you can see in figure 5. I then adjusted the colour balance. I left the mid-tones as they were, added more blue and cyan to the shadows and then added more magenta and red to the highlights of the image. This can be seen in the feature image at the top of the post.
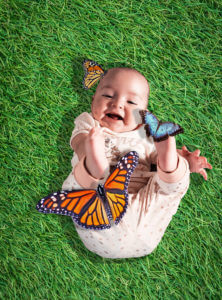
For my second design, I removed the background of the original image using a layer mask and then placed the 3 butterflies I wanted on to the image. They originally had a white background, so I selected the butterfly using the object selection tool and then made it a mask layer. I then scaled and rotated the butterflies to sit on or around the baby. Next, I placed an image of grass in the file in a new layer making sure it was the very bottom layer. I then edited the contrast and blending effect of the grass so that it fits in well with the rest of the image. Finally, I added drop shadows to both the babies and the butterflies. This is because the original image of the baby had light coming in from the right and so I wanted this to be reflected in the rest of the image, making sure it was consistent and didn’t look like multiple images put together.
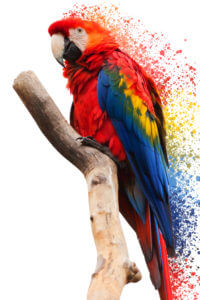
For my third and final design, I kept it quite simple. I duplicated the image layer and on the new layer selected the parrot and branch to make it into a layer mask. I did this so that I could get the paint splatters close and packed together near the parrot without it going over the parrot itself. I then placed paint splatters using the brush tool around the right-hand edge of the parrot taking colour swatches from within the parrot.
Software tutorials:
https://helpx.adobe.com/photoshop/how-to/composite-photo.html This was a given resource. As photoshop was still a fairly new software to me, it was necessary to teach myself exactly what a composite image is and see how I could potentially go about making one myself. I felt it was important to understand this before beginning my ideation for the edits so that I could start this task in the right direction and with a full understanding of what it was that I was creating.
https://www.youtube.com/watch?v=NnjOEcfK52E This again was a given resource that was particularly useful for the New York edit. From the beginning of the creation of this edit, I knew I wanted to remove the background of the image, but I wasn’t sure how to go about it. This taught me, not only how to remove the background, but to remove the background with as much accuracy as I could. It did this as it showed me how I could remove part of a selection by holding down the option key as well as how to use black and white with the brush tool on a mask layer.
https://helpx.adobe.com/photoshop/how-to/clone-stamp-remove-object.html I used this tutorial for a task in a previous week. However, I re-watched it to refresh my memory as I knew the clone stamp tool could help blend the 2 sky images together, as well as fix the reflection issues I had in the New York edit.
I think I have largely improved my photoshops skills from completing this task and using the tutorials to aid me. Although there is always more to learn and so to continue growing my skill set, I will use photoshop when I feel it is appropriate with my projects in other modules. I will carry on with experimentations and if I see an interesting image, I will be sure to be inquisitive in terms of how it was produced and even try to recreate it myself with the help of some adobe and YouTube tutorials.
Resources for research and inspiration:
https://www.thrillist.com/entertainment/nation/the-avengers-battle-of-new-york-joss-whedon
For my edit of New York, I got inspiration from the brief as it suggested to replace the background of an image and straight away I knew I wanted to do this to a city scene so it looked like a scene from a supernatural movie that uses special effects, such as Avengers. This was helpful to look at for the New York edit as it is what made me consider editing the image in the foreground with the buildings as I noticed the reflection of the green and blue light from the sky in the buildings. I think this really helped to tie my image together rather than look like two images layered on top of one another.
Going forward, it would be interesting to explore beauty photo editing in photoshop. I think learning the tools and techniques used for beauty editing will give a new perspective to offer to the conversation about whether it’s ethically right to be editing beauty photos at all, especially when it comes to advertising and beauty products.